Installing VMware vCenter Server Appliance (VCSA) 8.0
In this walkthrough I will be installing vCenter Server Appliance (VCSA) 8.0.
Prerequisites for Deploying the vCenter Server Appliance (VCSA)
- Download vCenter Server Appliance Installer
- Can be found here
- Verify that your system meets the minimum software and hardware requirements. See System Requirements for the vCenter Server Appliance.
- If you want to deploy the appliance on an ESXi host, verify that the ESXi host is not in lockdown or maintenance mode and not part of a fully automated DRS cluster.
- If you want to deploy the appliance on a DRS cluster of the inventory of a vCenter Server instance, verify that the cluster contains at least one ESXi host that is not in lockdown or maintenance mode.
- If you plan to use NTP servers for time synchronization, verify that the NTP servers are running and that the time between the NTP servers and the target server on which you want to deploy the appliance is synchronized.
- If you plan to assign a static IP address and an FQDN as a system name in the network settings of the appliance, verify that you have configured the forward and reverse DNS records for the IP address.
More info about prerequisites can be found here.
Installing vCenter Server Appliance (VCSA) 8
Deploying the vCenter Server Appliance
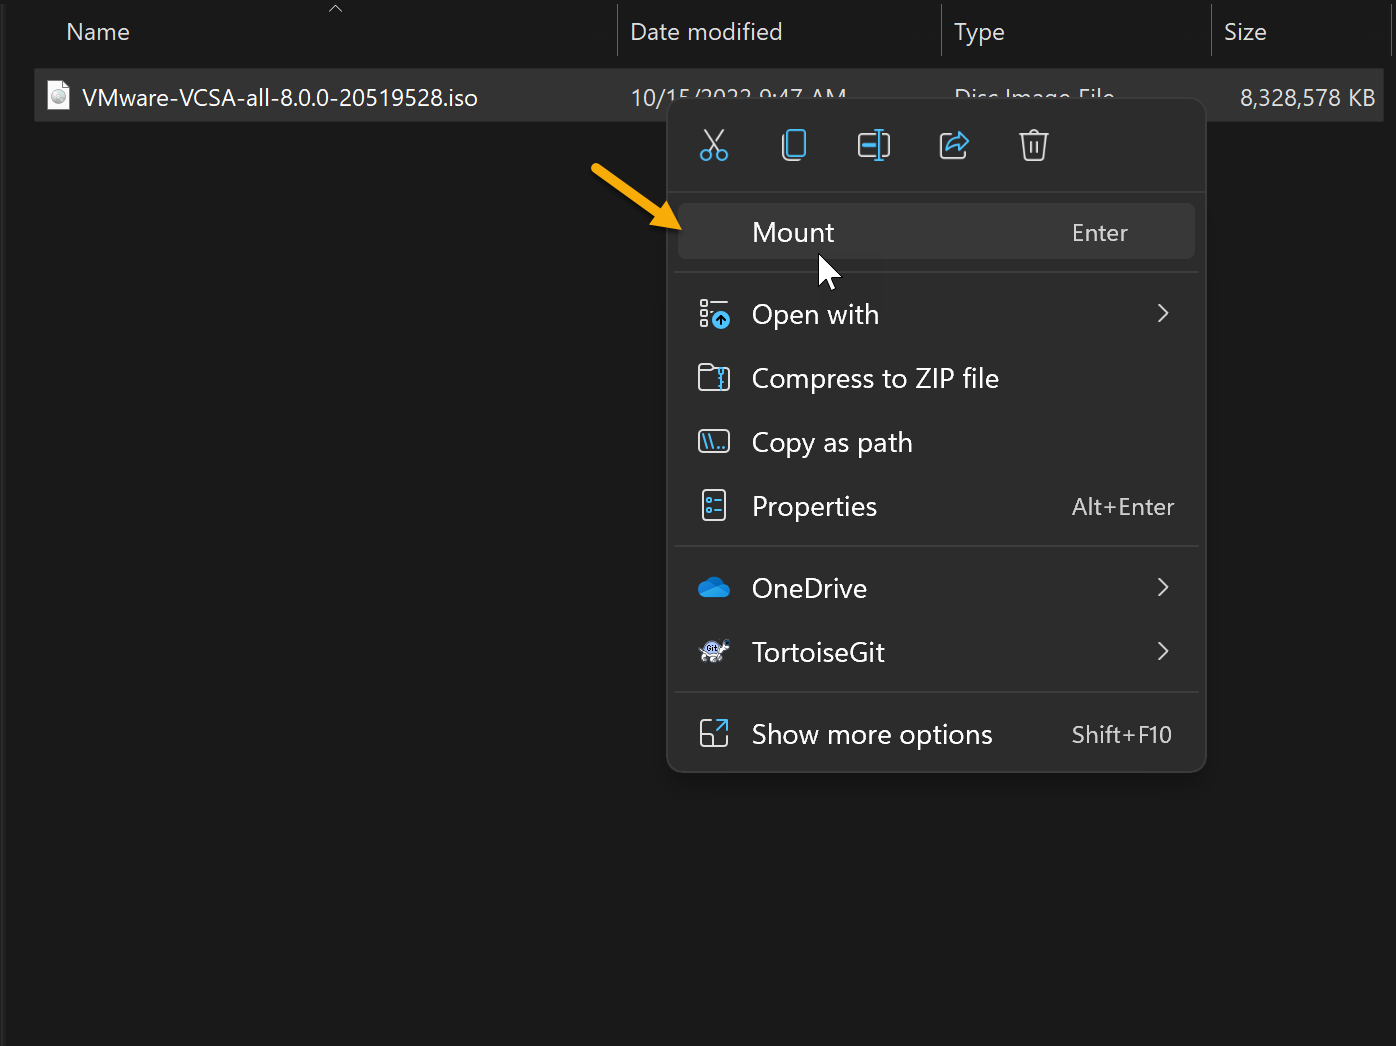
- Mount the VCSA .ISO you downloaded from VMware
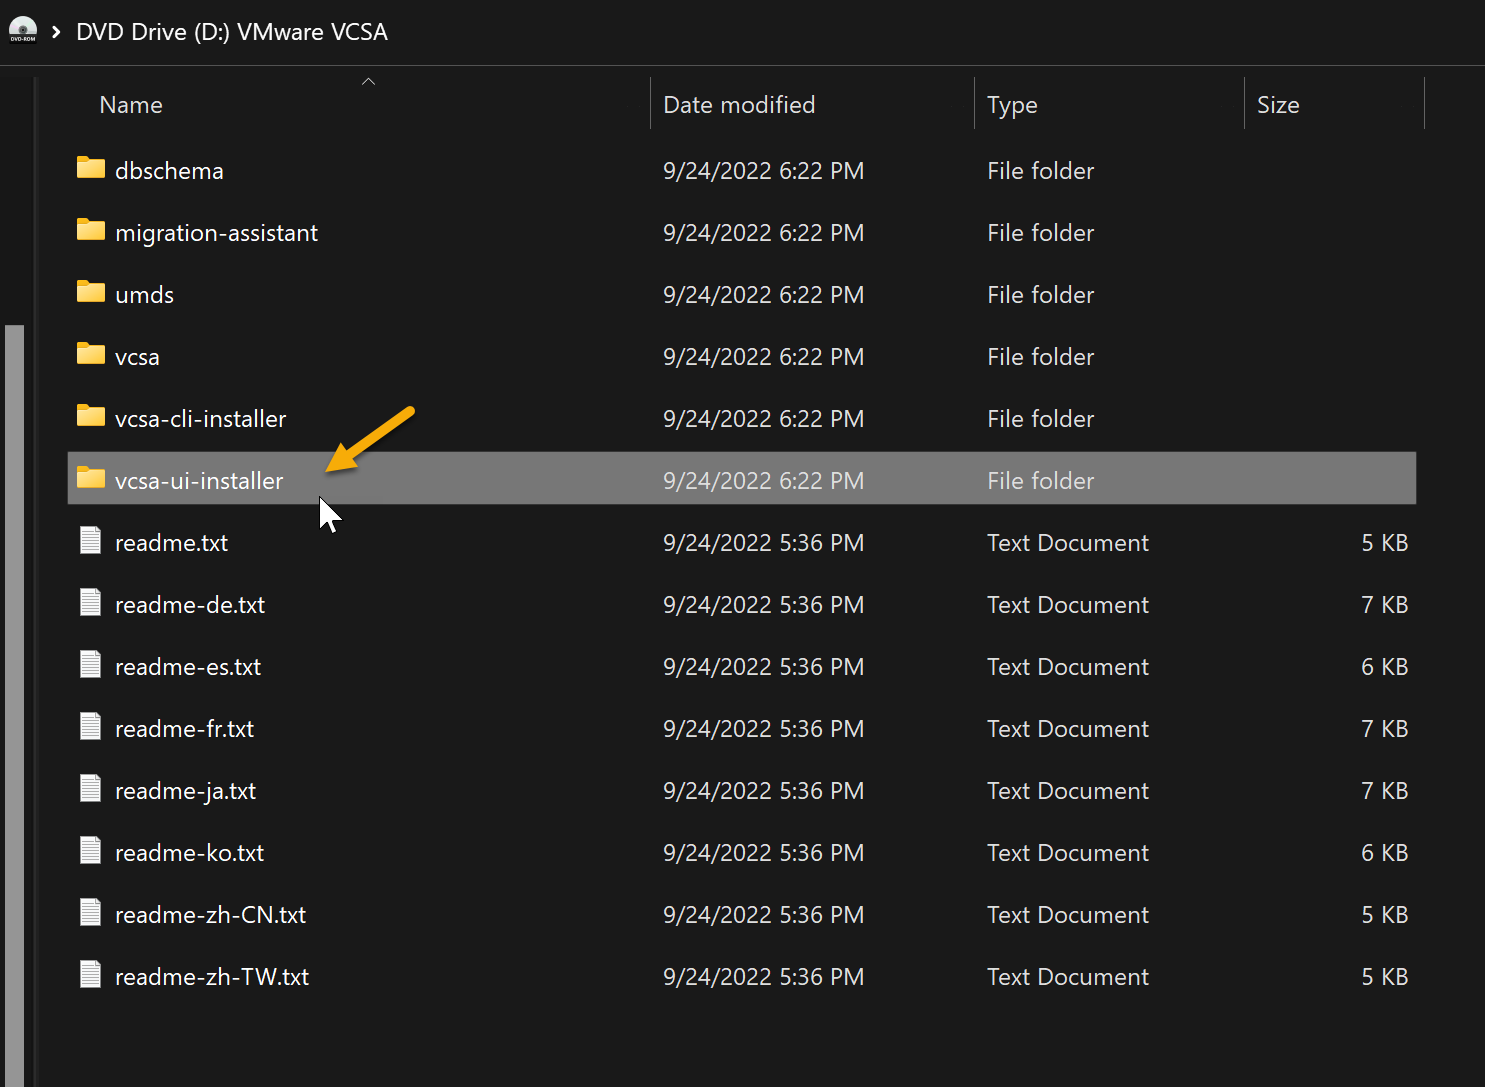
- Open the folder called “vcsa-ui-installer”
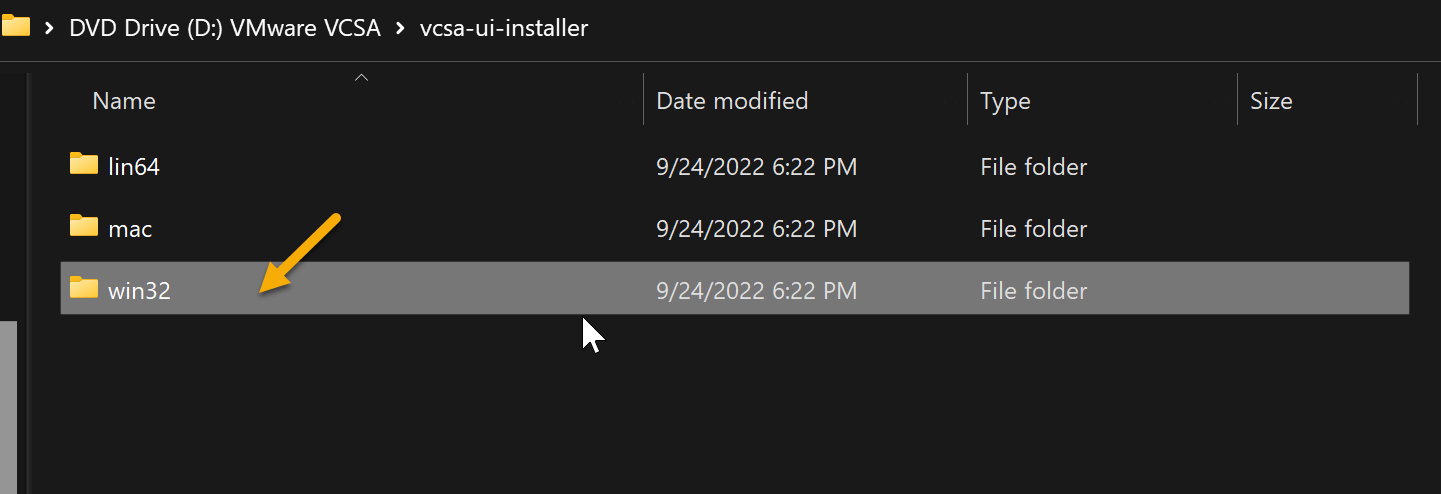
- Choose the correct folder depending on the operating system you’re deploying the VCSA from. Since I am using Windows 10 to deploy VCSA, I will select “Win32” folder.
- For Linux OS, go to the lin64 subdirectory, and run the installer file.
- SUSE 15
- Ubuntu 18.04, 20.04, 21.10
- For Mac OS, go to the mac subdirectory, and run the Installer.app file.
- macOS 10.15, 11, 12
- macOS Catalina, Big Sur, Monterey
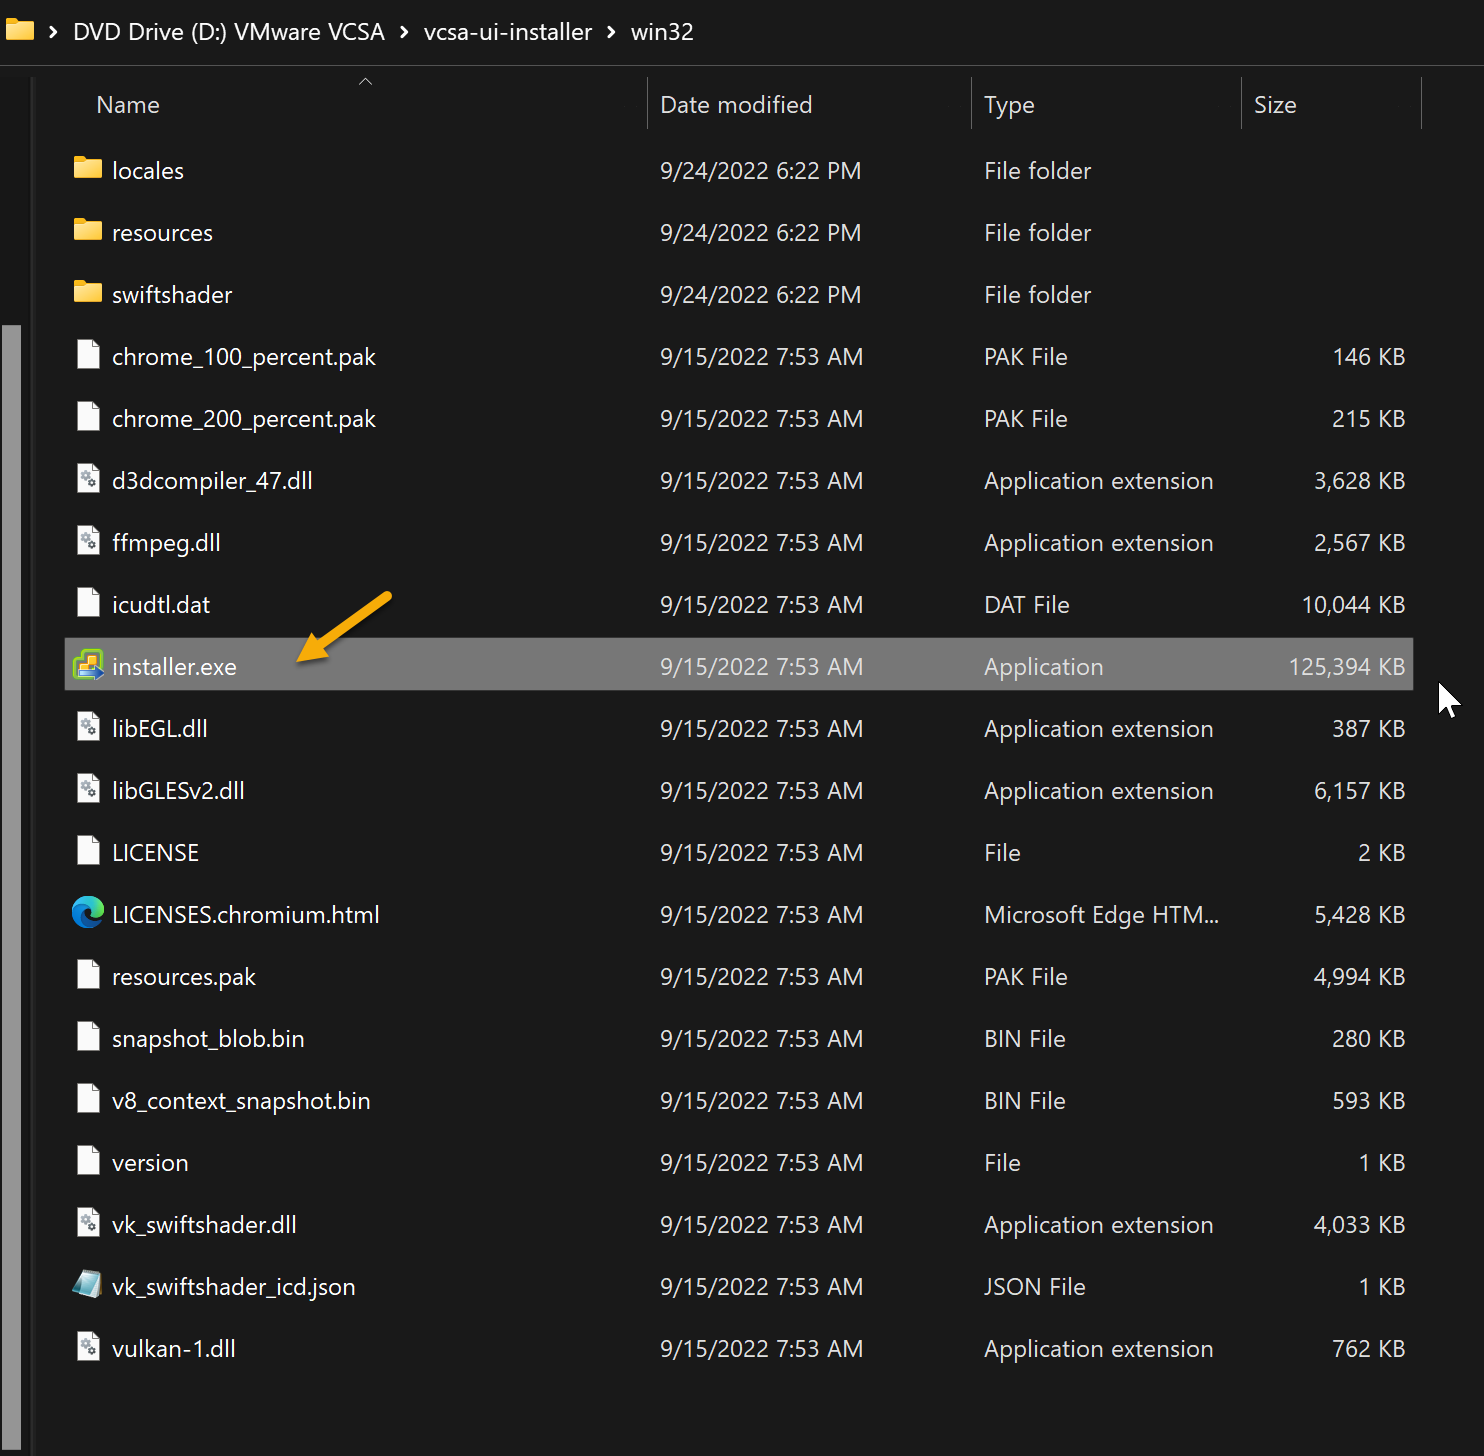
- For Windows OS, go to the win32 subdirectory, and run the installer.exe file.
- Windows 10, 11
- Windows 2016 x64 bit
- Windows 2019 x64 bit
- Windows 2022 x64 bit
- Run “Installer.exe” to open the vCenter Server Installer.
- Choose “Install” and click “next” on the introduction screen.

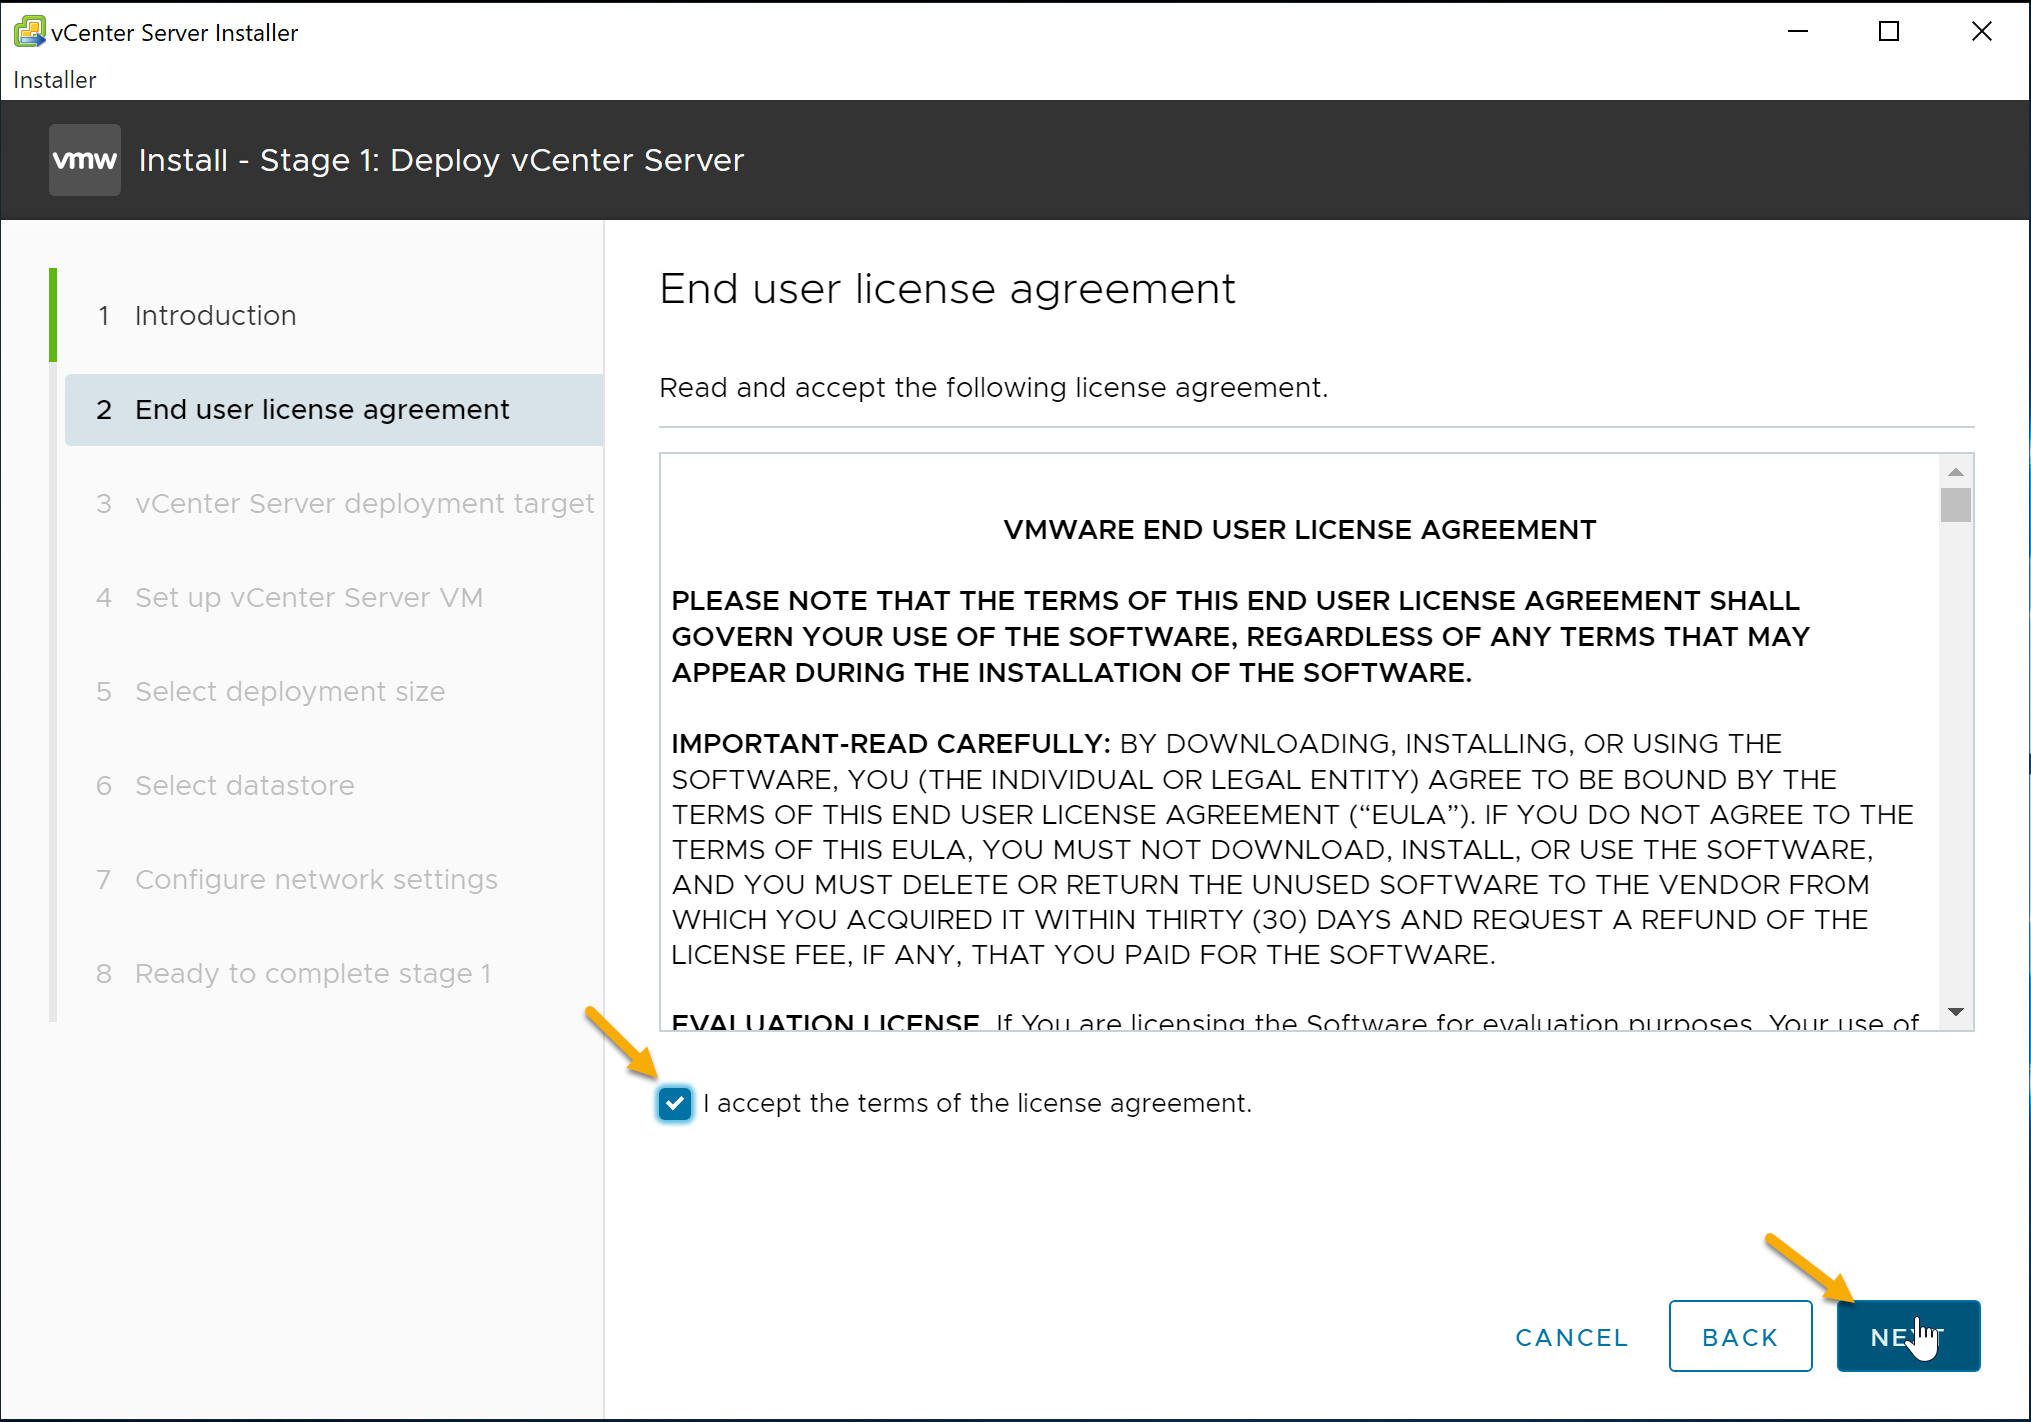
- Accept the End user license agreement and click next
- Specify target where vCenter server appliance will be deployed. The target can be ESXi host or existing vCenter server. In this demo I will be using a standalone ESXi host. Once you have completed form, click “Next” to continue.
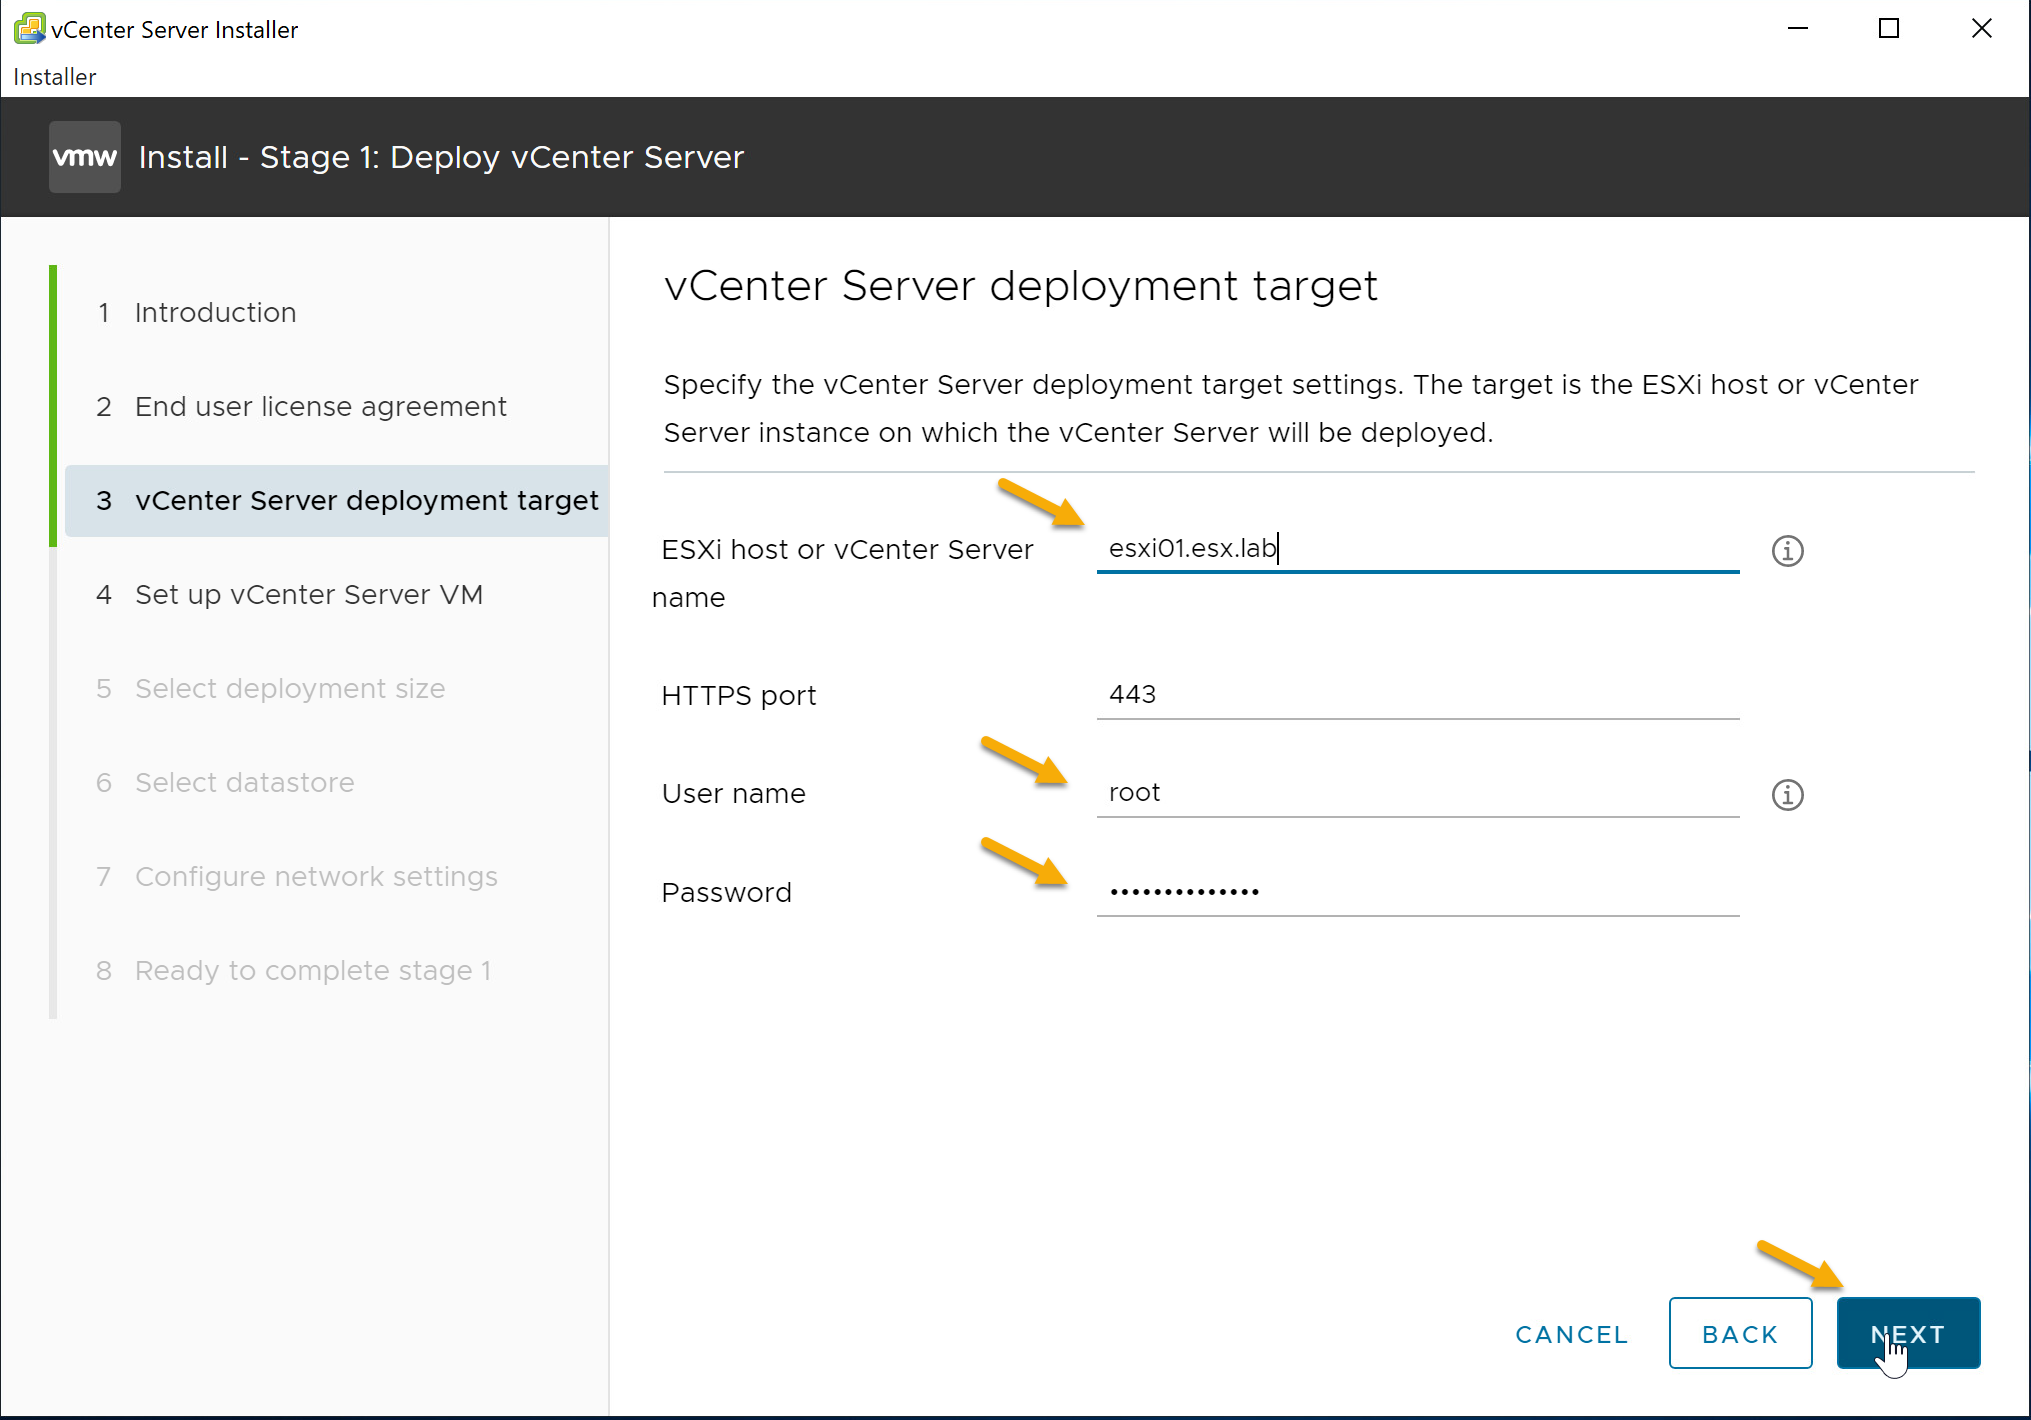
Note: A Certificate Warning might appear. Click “Yes” to continue.
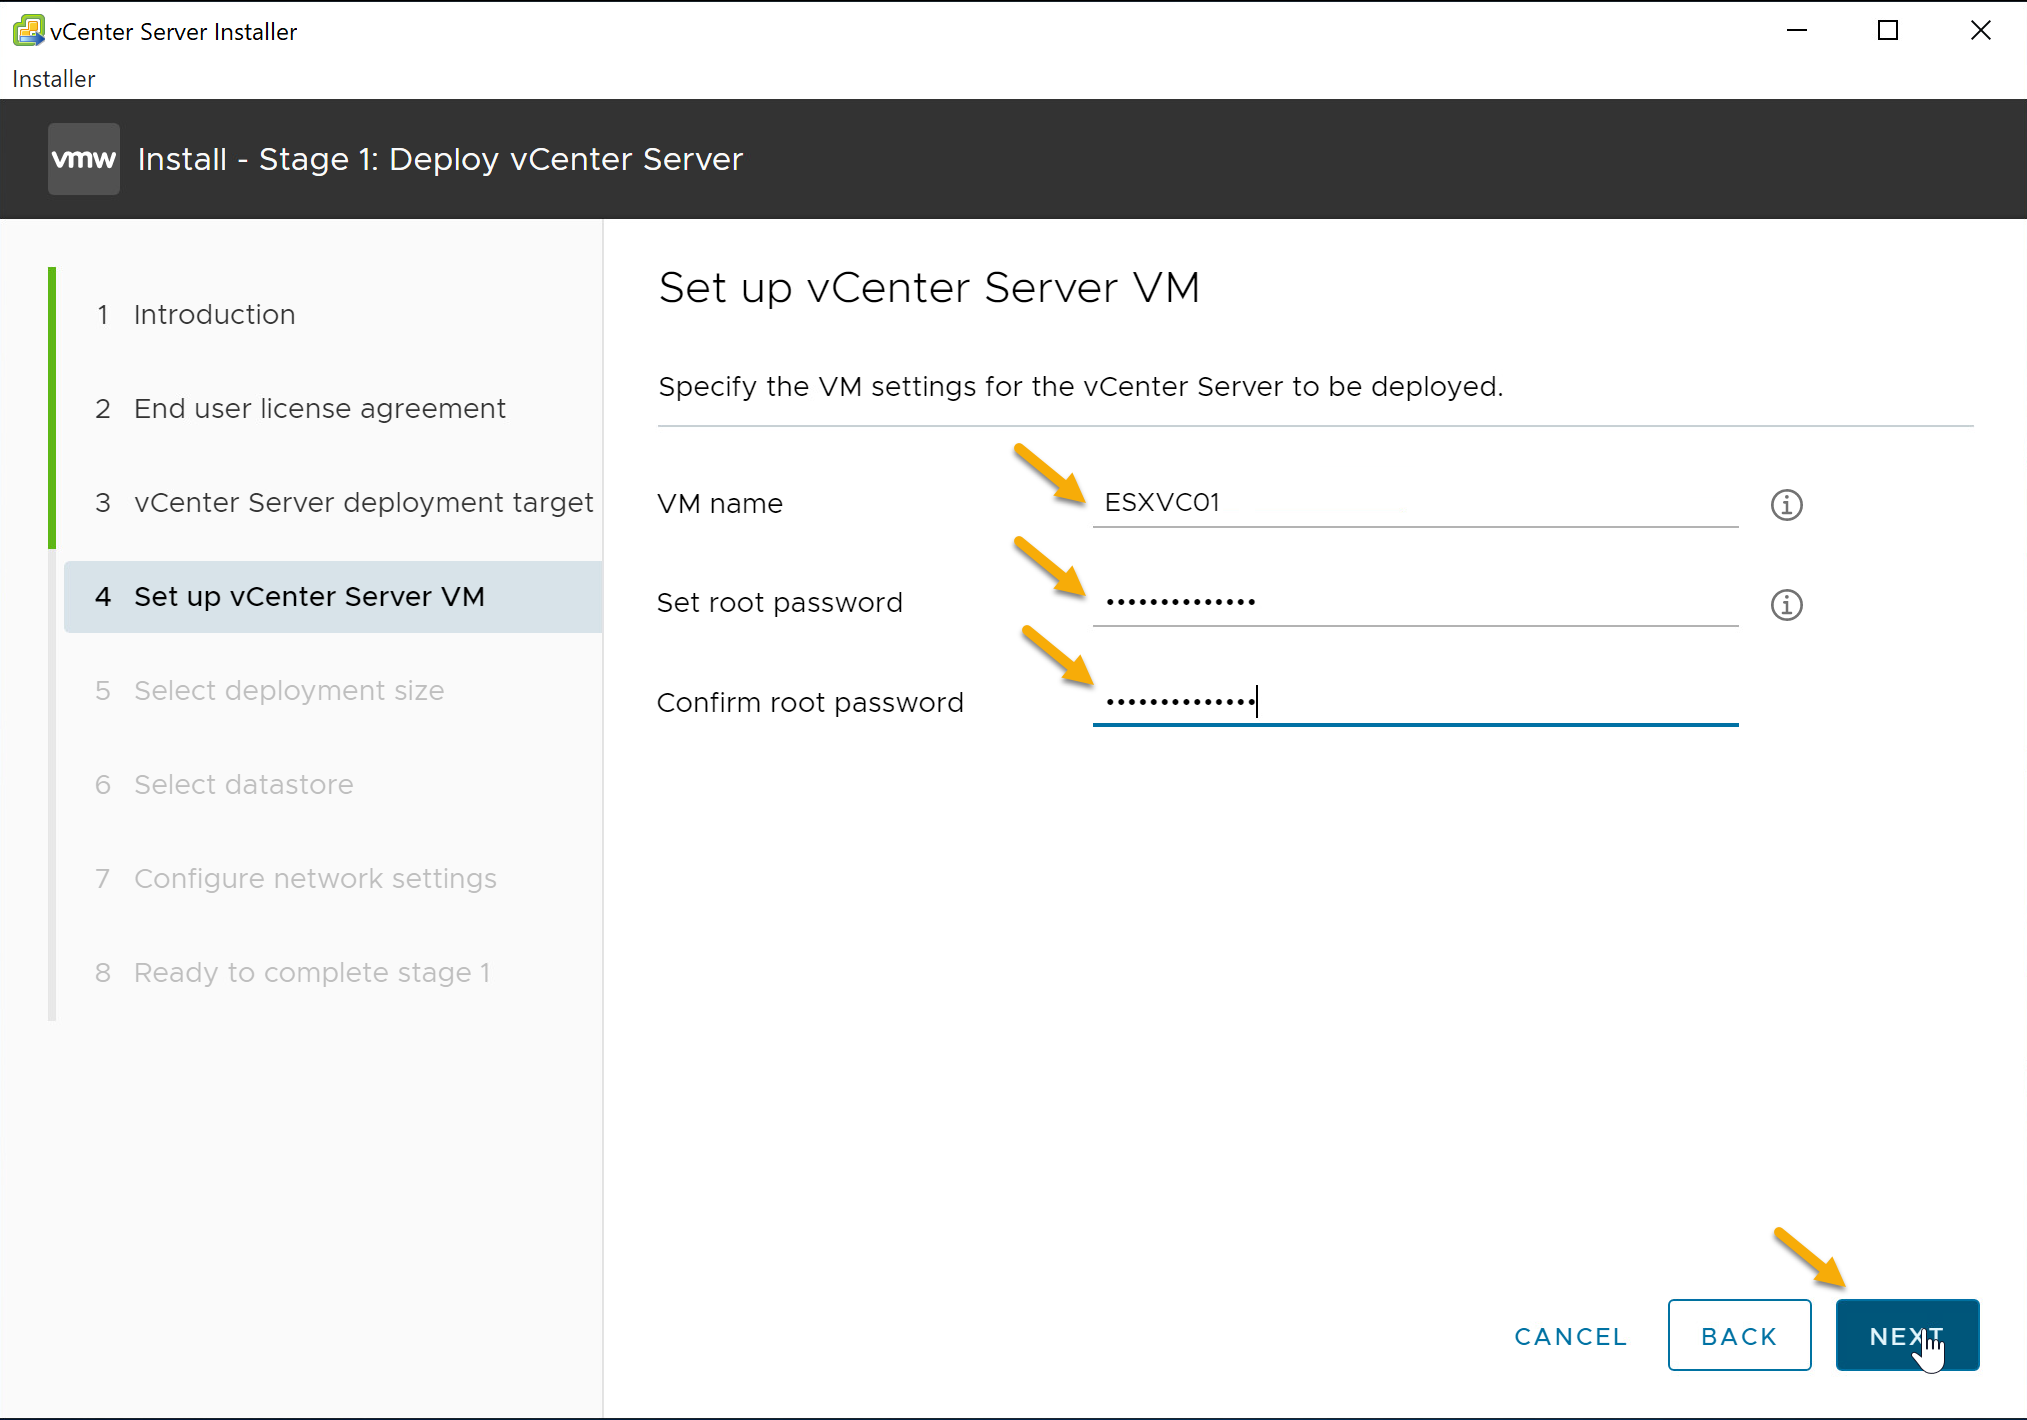
- Specify the VM settings for the vCenter Server. Click “Next” to continue.
- VM Name - Name of the Virtual Machine
- Set root password - Provide a Password
- Confirm root password - Confirm the root password
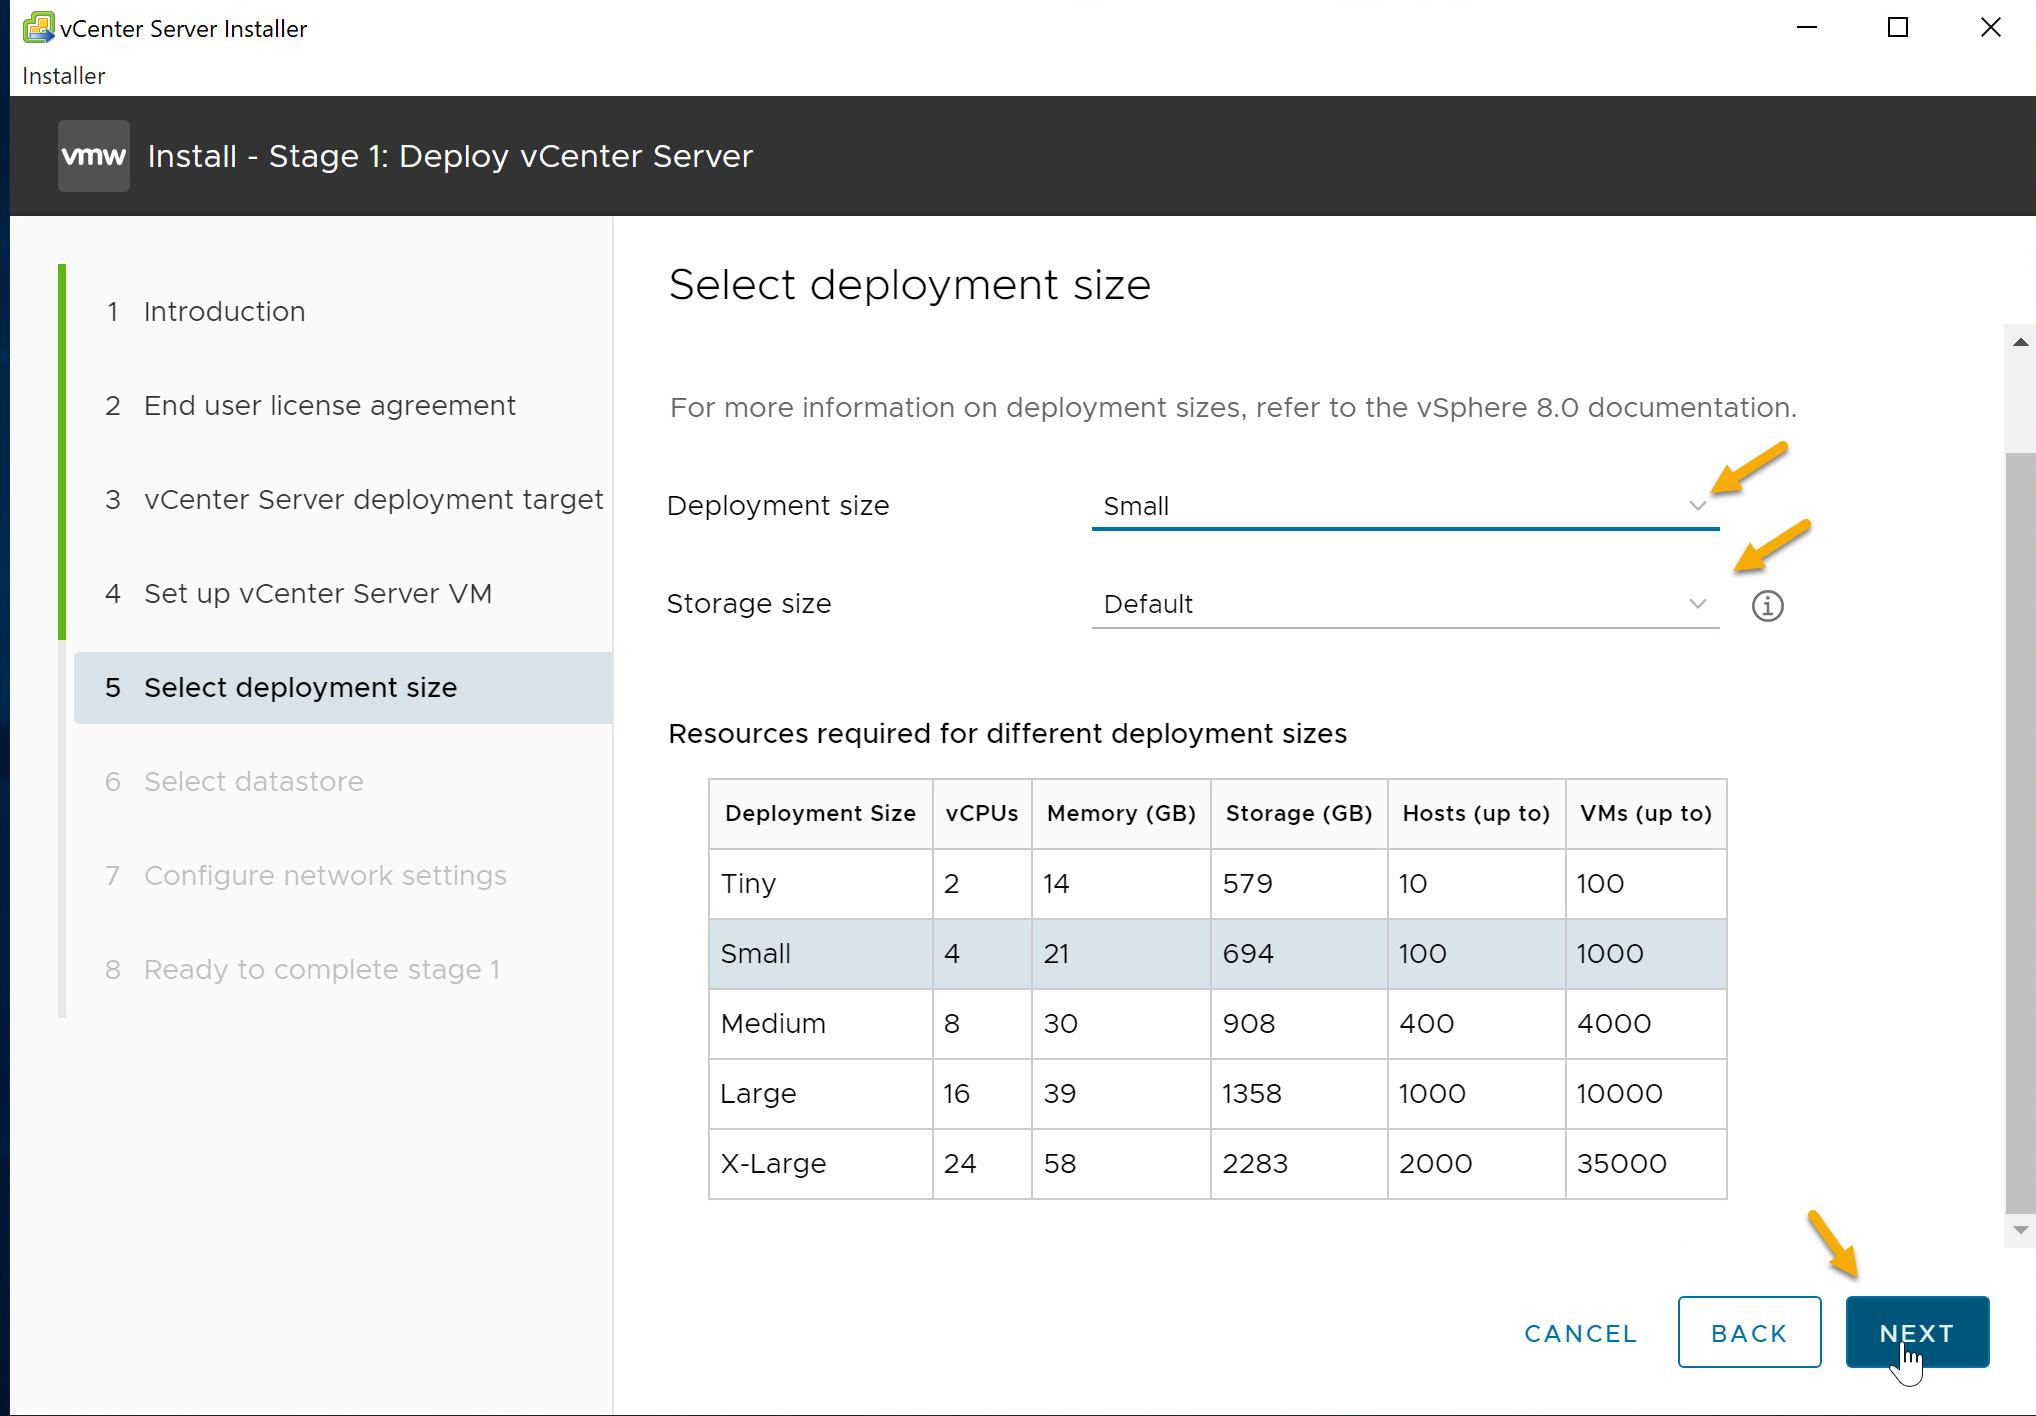
- Select the VCSA deployment size for your enviroment. In this demo I will be using “Small” for deployment size and “Default” for Storage Size. Click “Next” to continue.
Deployment Size
- Tiny
- Deploys an appliance with 2 CPUs and 14 GB of memory. Suitable for environments with up to 10 hosts or 100 virtual machines.
- Small
- Deploys an appliance with 4 CPUs and 21 GB of memory. Suitable for environments with up to 100 hosts or 1,000 virtual machines.
- Medium
- Deploys an appliance with 8 CPUs and 30 GB of memory. Suitable for environments with up to 400 hosts or 4,000 virtual machines.
- Large
- Deploys an appliance with 16 CPUs and 39 GB of memory. Suitable for environments with up to 1,000 hosts or 10,000 virtual machines.
- X-Large
- Deploys an appliance with 24 CPUs and 58 GB of memory. Suitable for environments with up to 2,000 hosts or 35,000 virtual machines.
Storage Size
-
Default
- For tiny deployment size, deploys the appliance with 579 GB of storage.
- For small deployment size, deploys the appliance with 694 GB of storage.
- For medium deployment size, deploys the appliance with 908 GB of storage.
- For large deployment size, deploys the appliance with 1358 GB of storage.
- For x-large deployment size, deploys the appliance with 1283 GB of storage.
-
Large
- For tiny deployment size, deploys the appliance with 1992 GB of storage.
- For small deployment size, deploys the appliance with 2046 GB of storage.
- For medium deployment size, deploys the appliance with 2140 GB of storage.
- For large deployment size, deploys the appliance with 1958 GB of storage.
- For x-large deployment size, deploys the appliance with 2383 GB of storage.
-
X-Large
- For tiny deployment size, deploys the appliance with 4279 GB of storage.
- For small deployment size, deploys the appliance with 4304 GB of storage.
- For medium deployment size, deploys the appliance with 4468 GB of storage.
- For large deployment size, deploys the appliance with 4518 GB of storage.
- For x-large deployment size, deploys the appliance with 4620 GB of storage.
Note: See Hardware Requirements for the vCenter Server Appliance and Required Information for Deploying a vCenter Server Appliance for more info about deployment size.
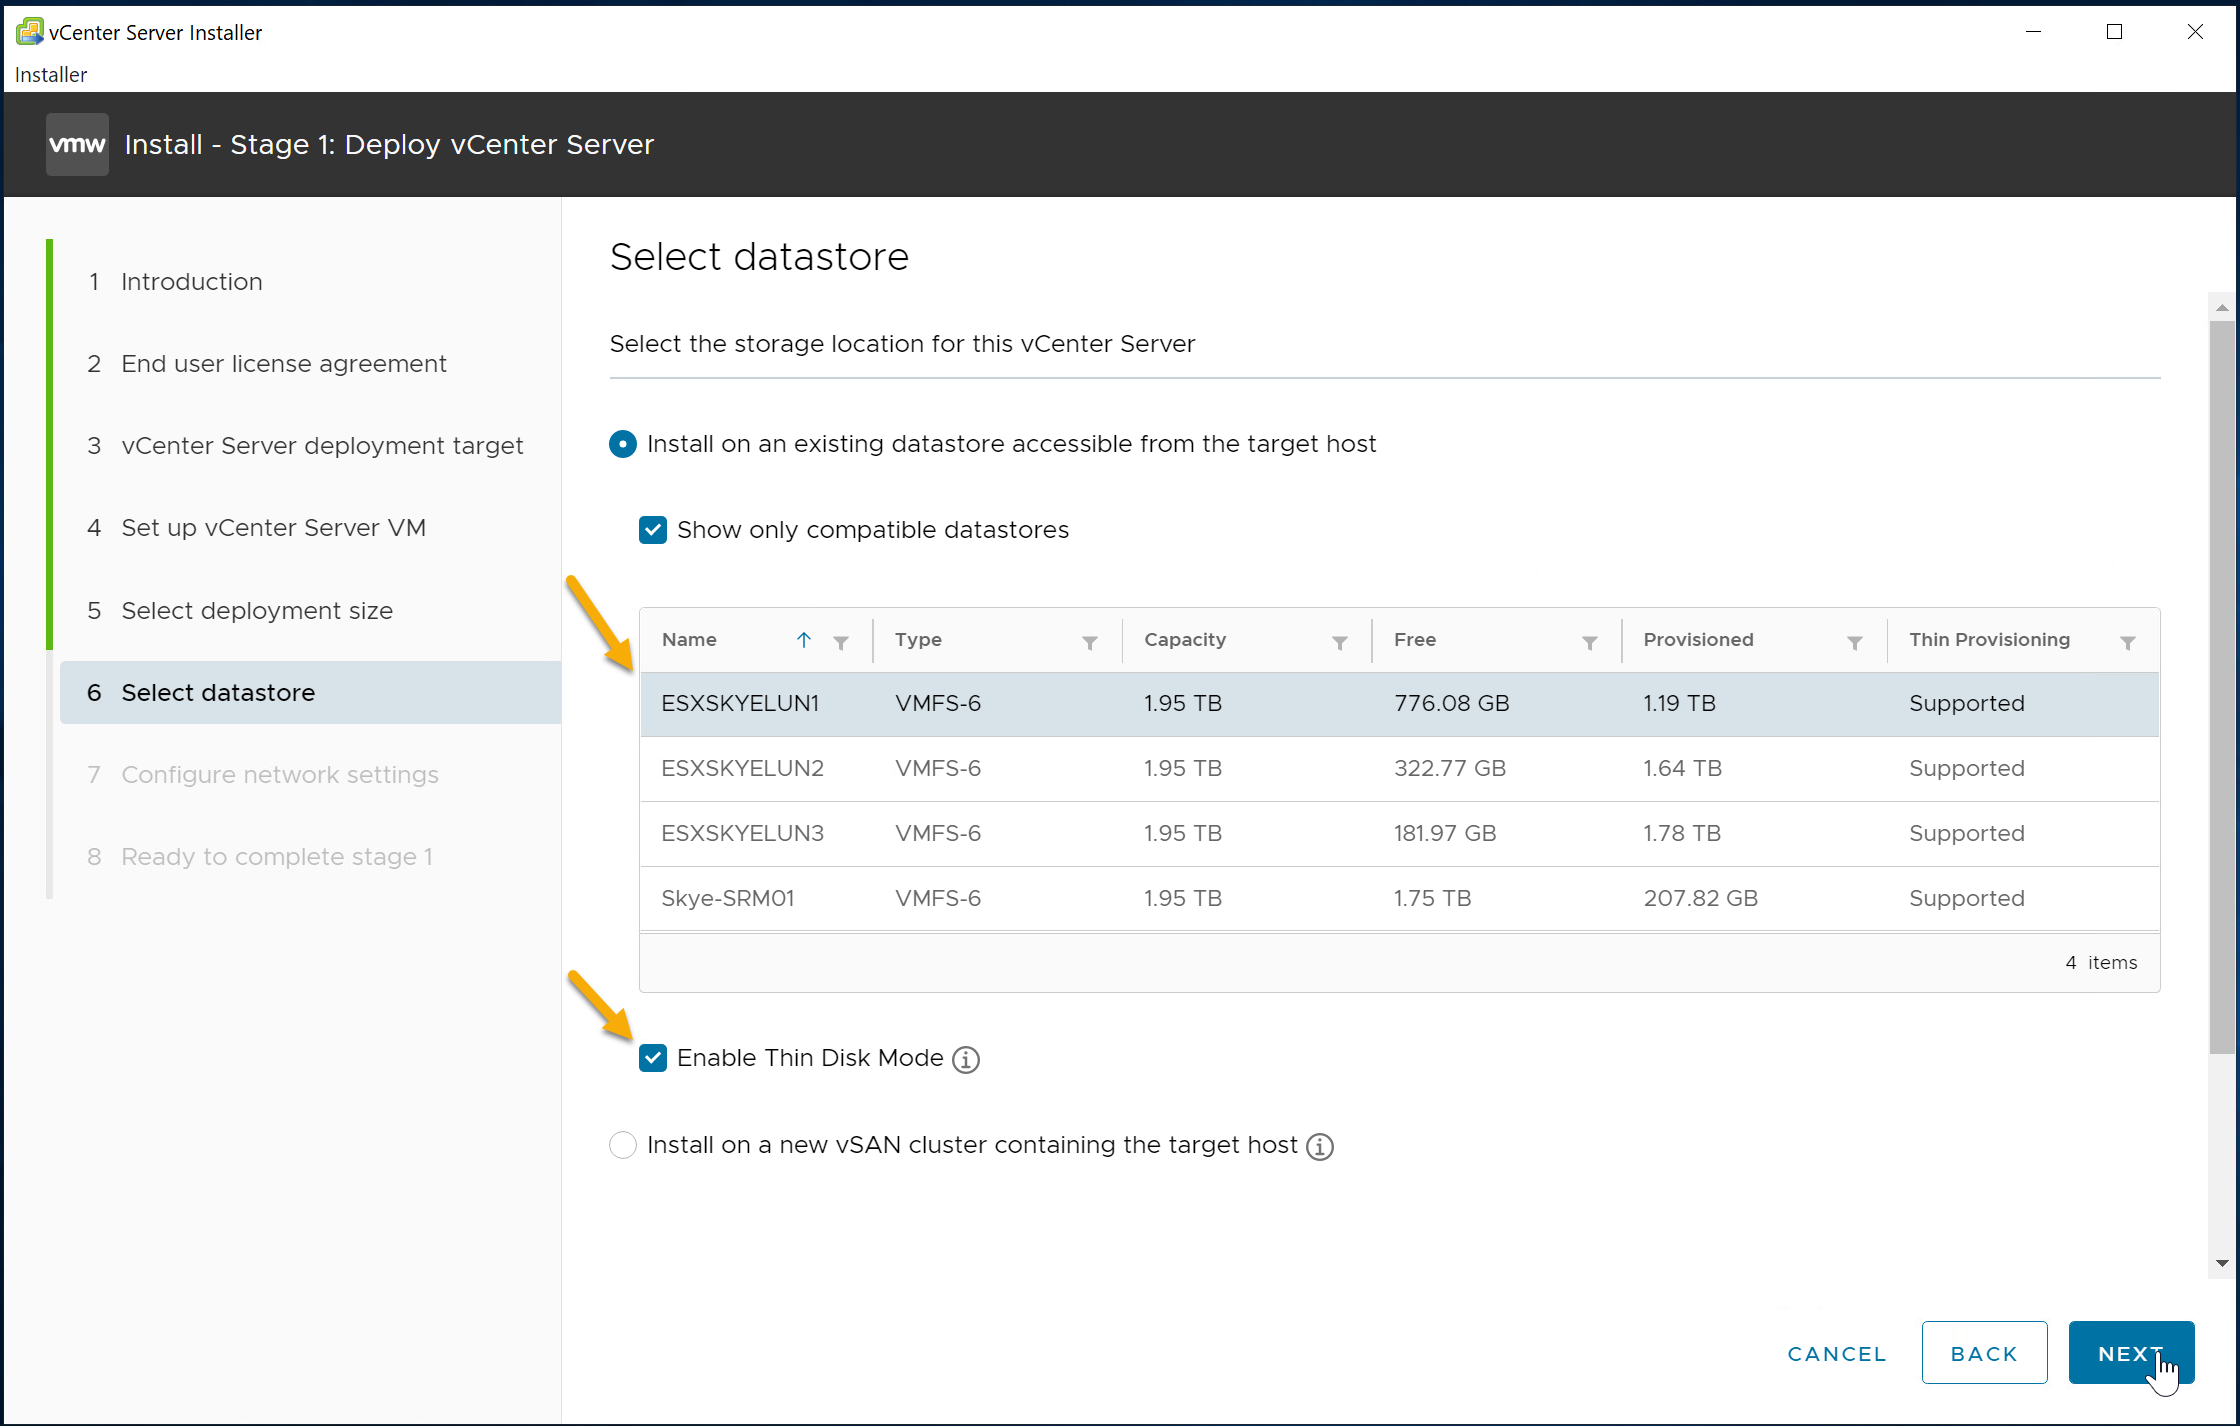
- Select Datastore to idenifty the storage location for the VCSA. Click “Next” to continue.
Note: I selected “Enable Thin Disk Mode” for this demo. If you enable thin disk mode, the datastore size should have a minimum of 25GB space.
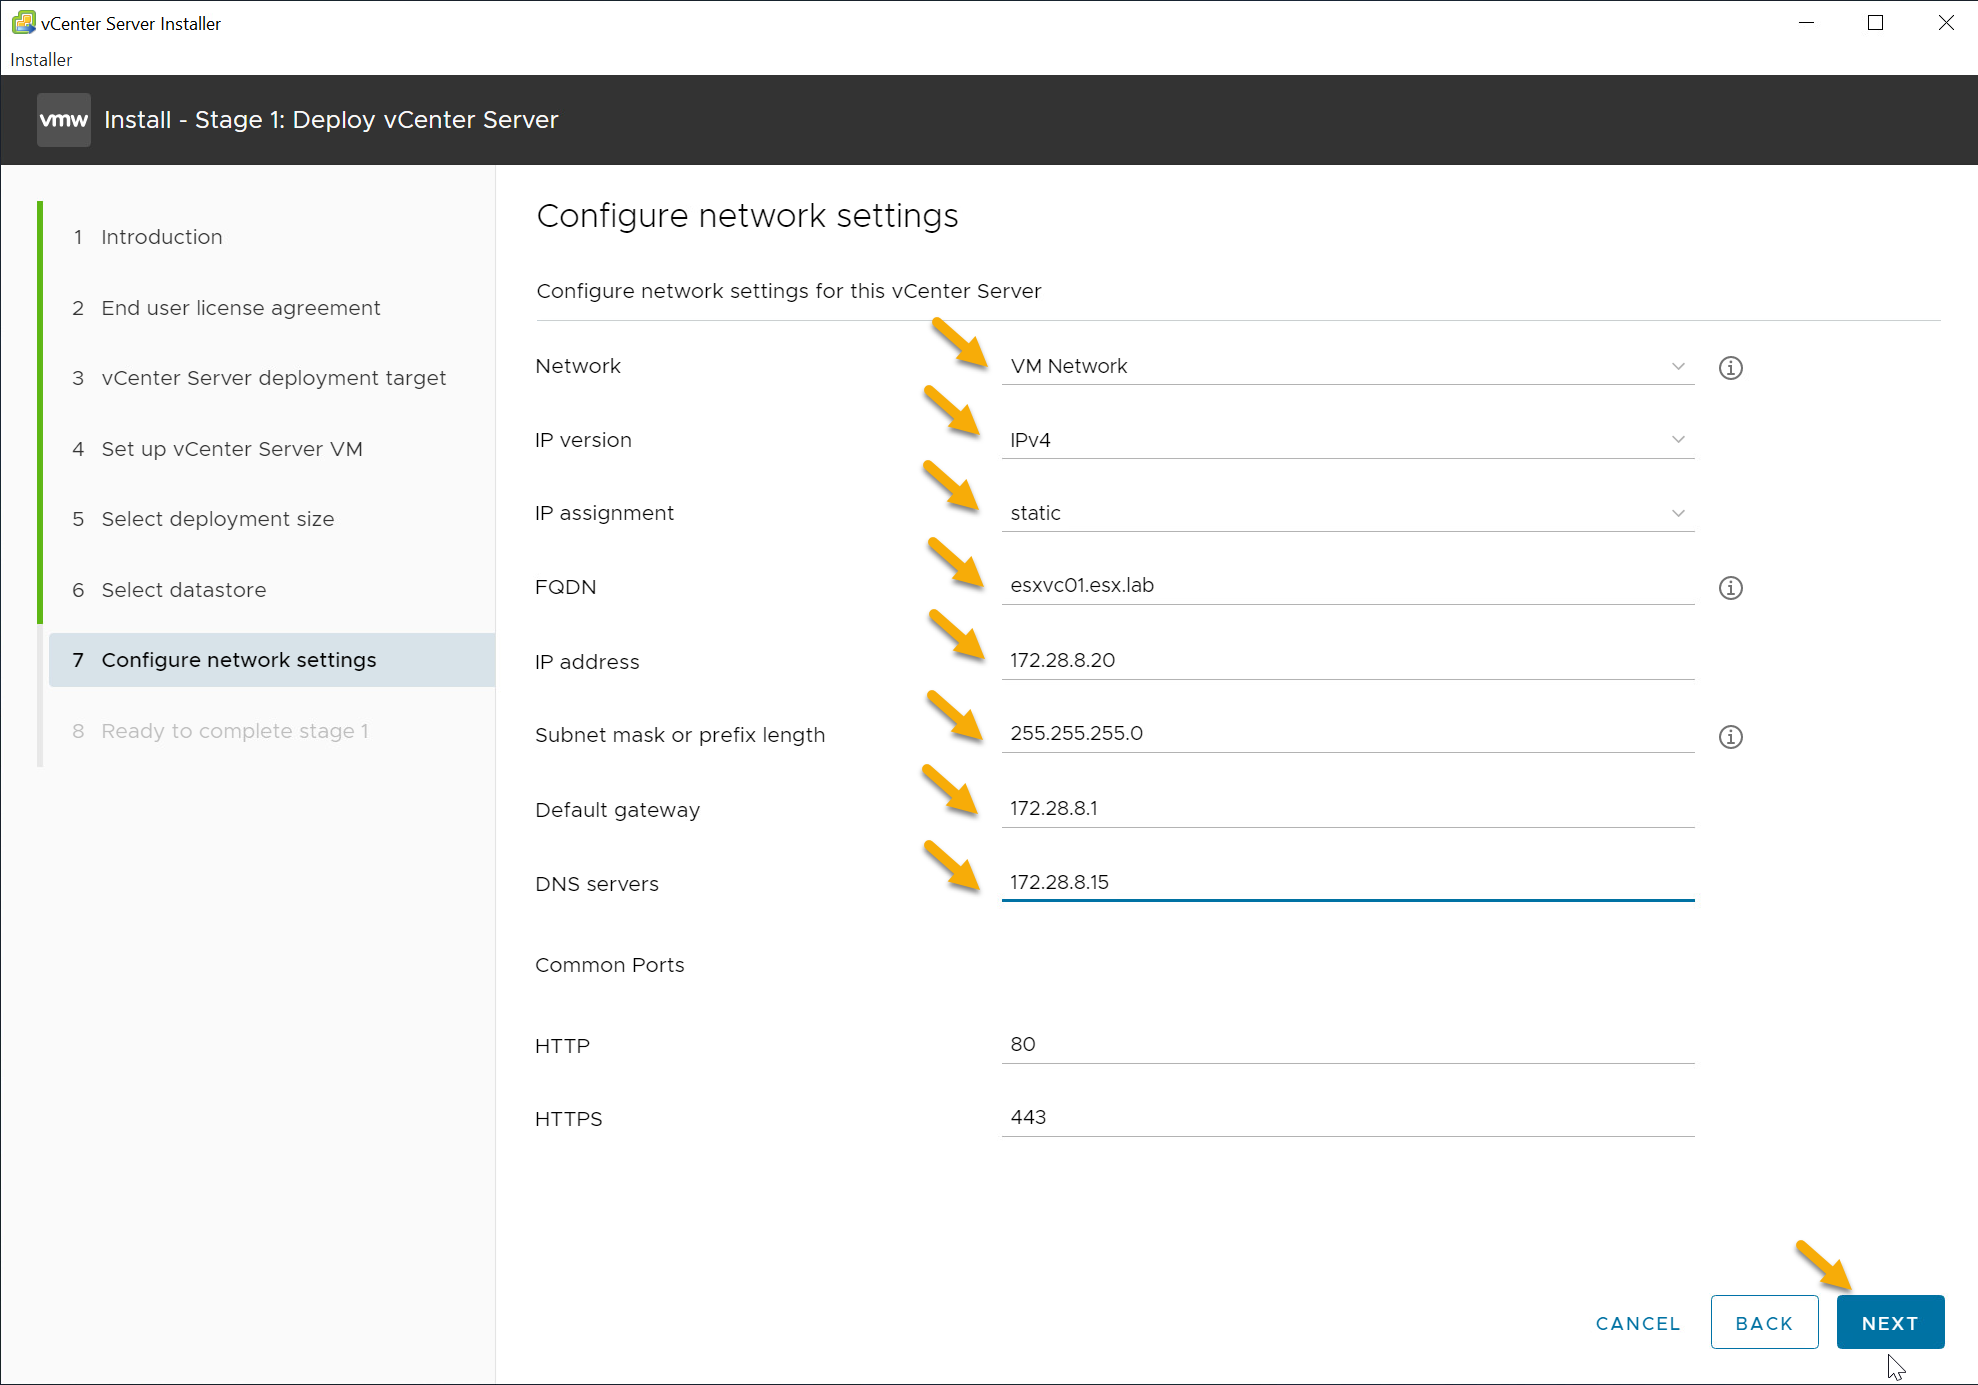
- Configure the network settings of the VCSA. Click “Next” to continue.
- Network - Select the port group to be used for the VCSA
- IP Version - Select either IPv4 or IPv6
- IP assignment - Select either Static or dhcp
- FQDN - Provide the fully qualified domain name (FQDN) or IP address of the VCSA. (vcentername.domain.com or x.x.x.x)
Note: The IP address or the FQDN of the appliance is used as a system name. It is recommended to use an FQDN. However, if you want to use an IP address, use static IP address allocation for the appliance, because IP addresses allocated by DHCP might change.
- IP Address - Provide the IP address of the VCSA (x.x.x.x)
- Subnet Mask or Prefix Length - Provide the Subnet mask or Prefix Length of the VCSA network. (x.x.x.x or xx)
- Default Gateway - Provide the Default Gateway (x.x.x.x)
- DNS Servers - Provide the DNS server IP address for the VCSA. (x.x.x.x,x.x.x.x)
- Common Ports - Leave Defaults unless you need to customize them for your enviroment.
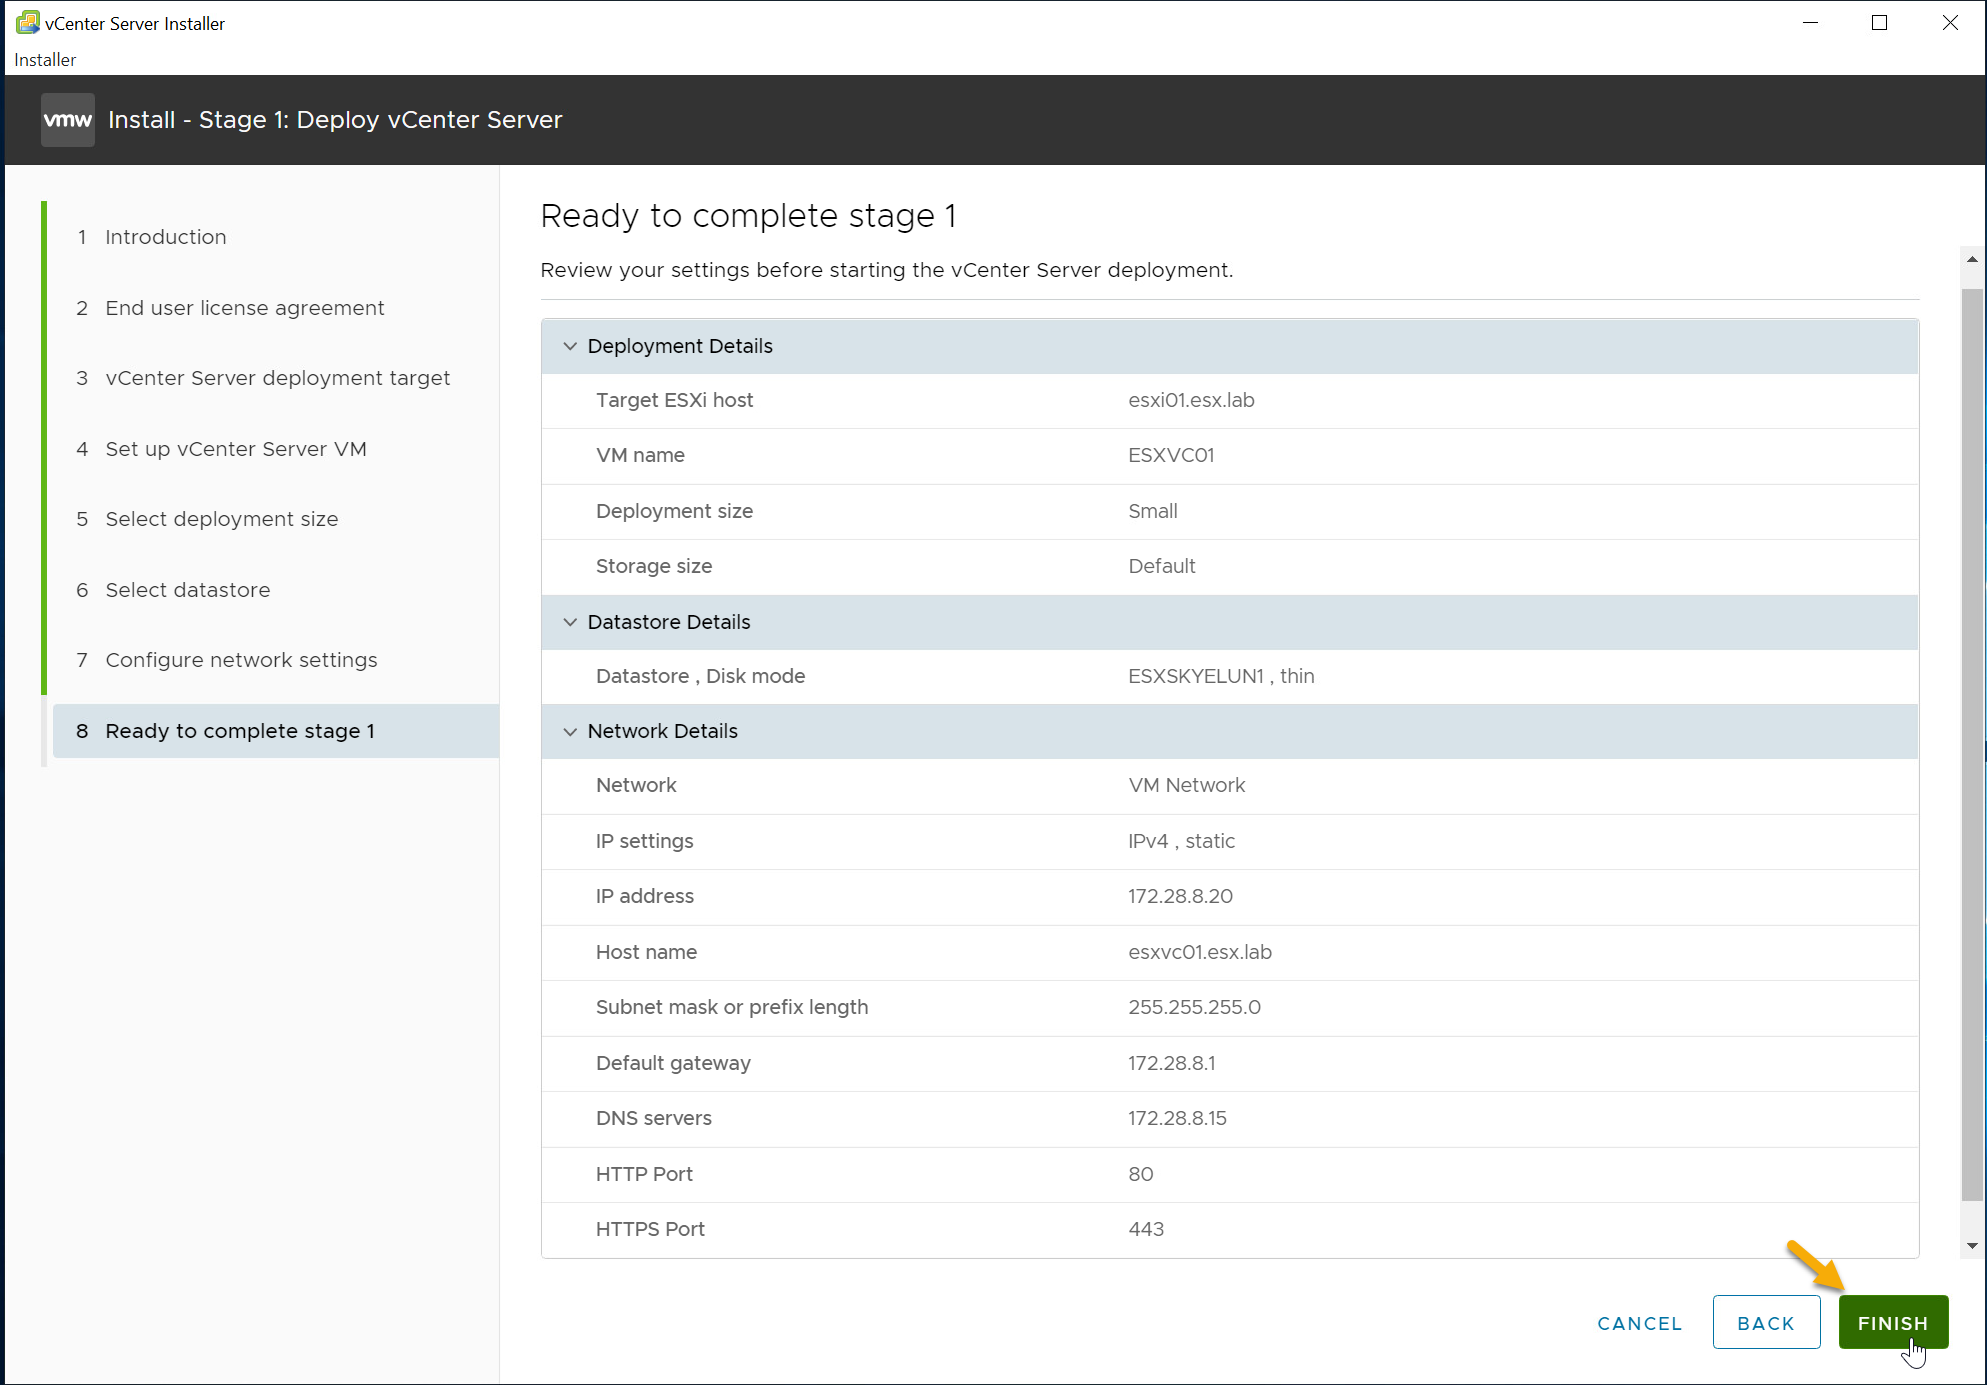
- Review your configuration and Click “Finish” to initiate stage 1 of deploying the VCSA.
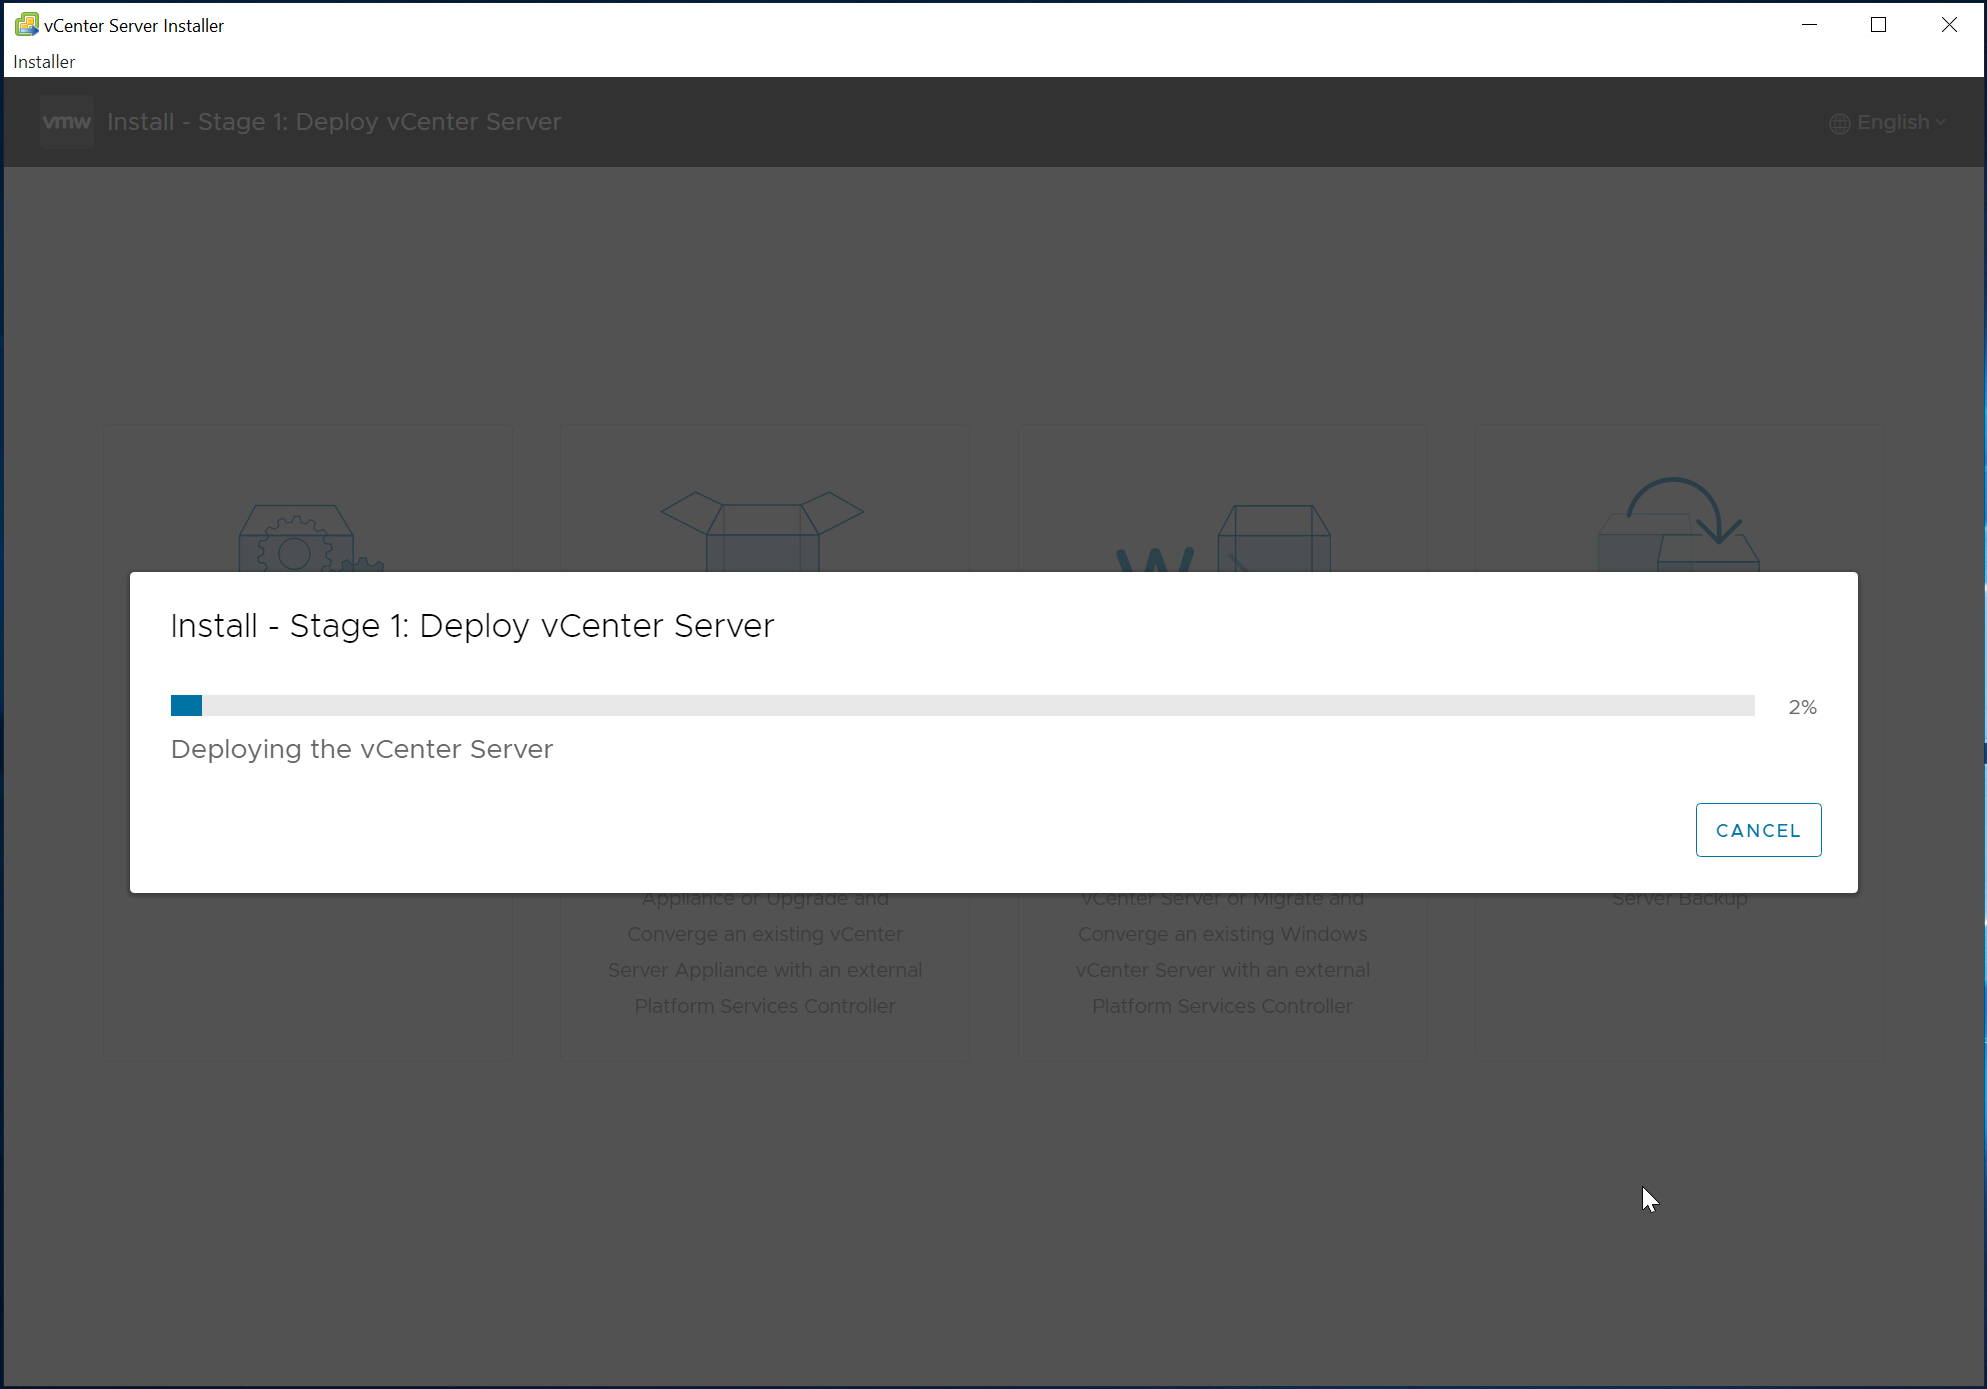
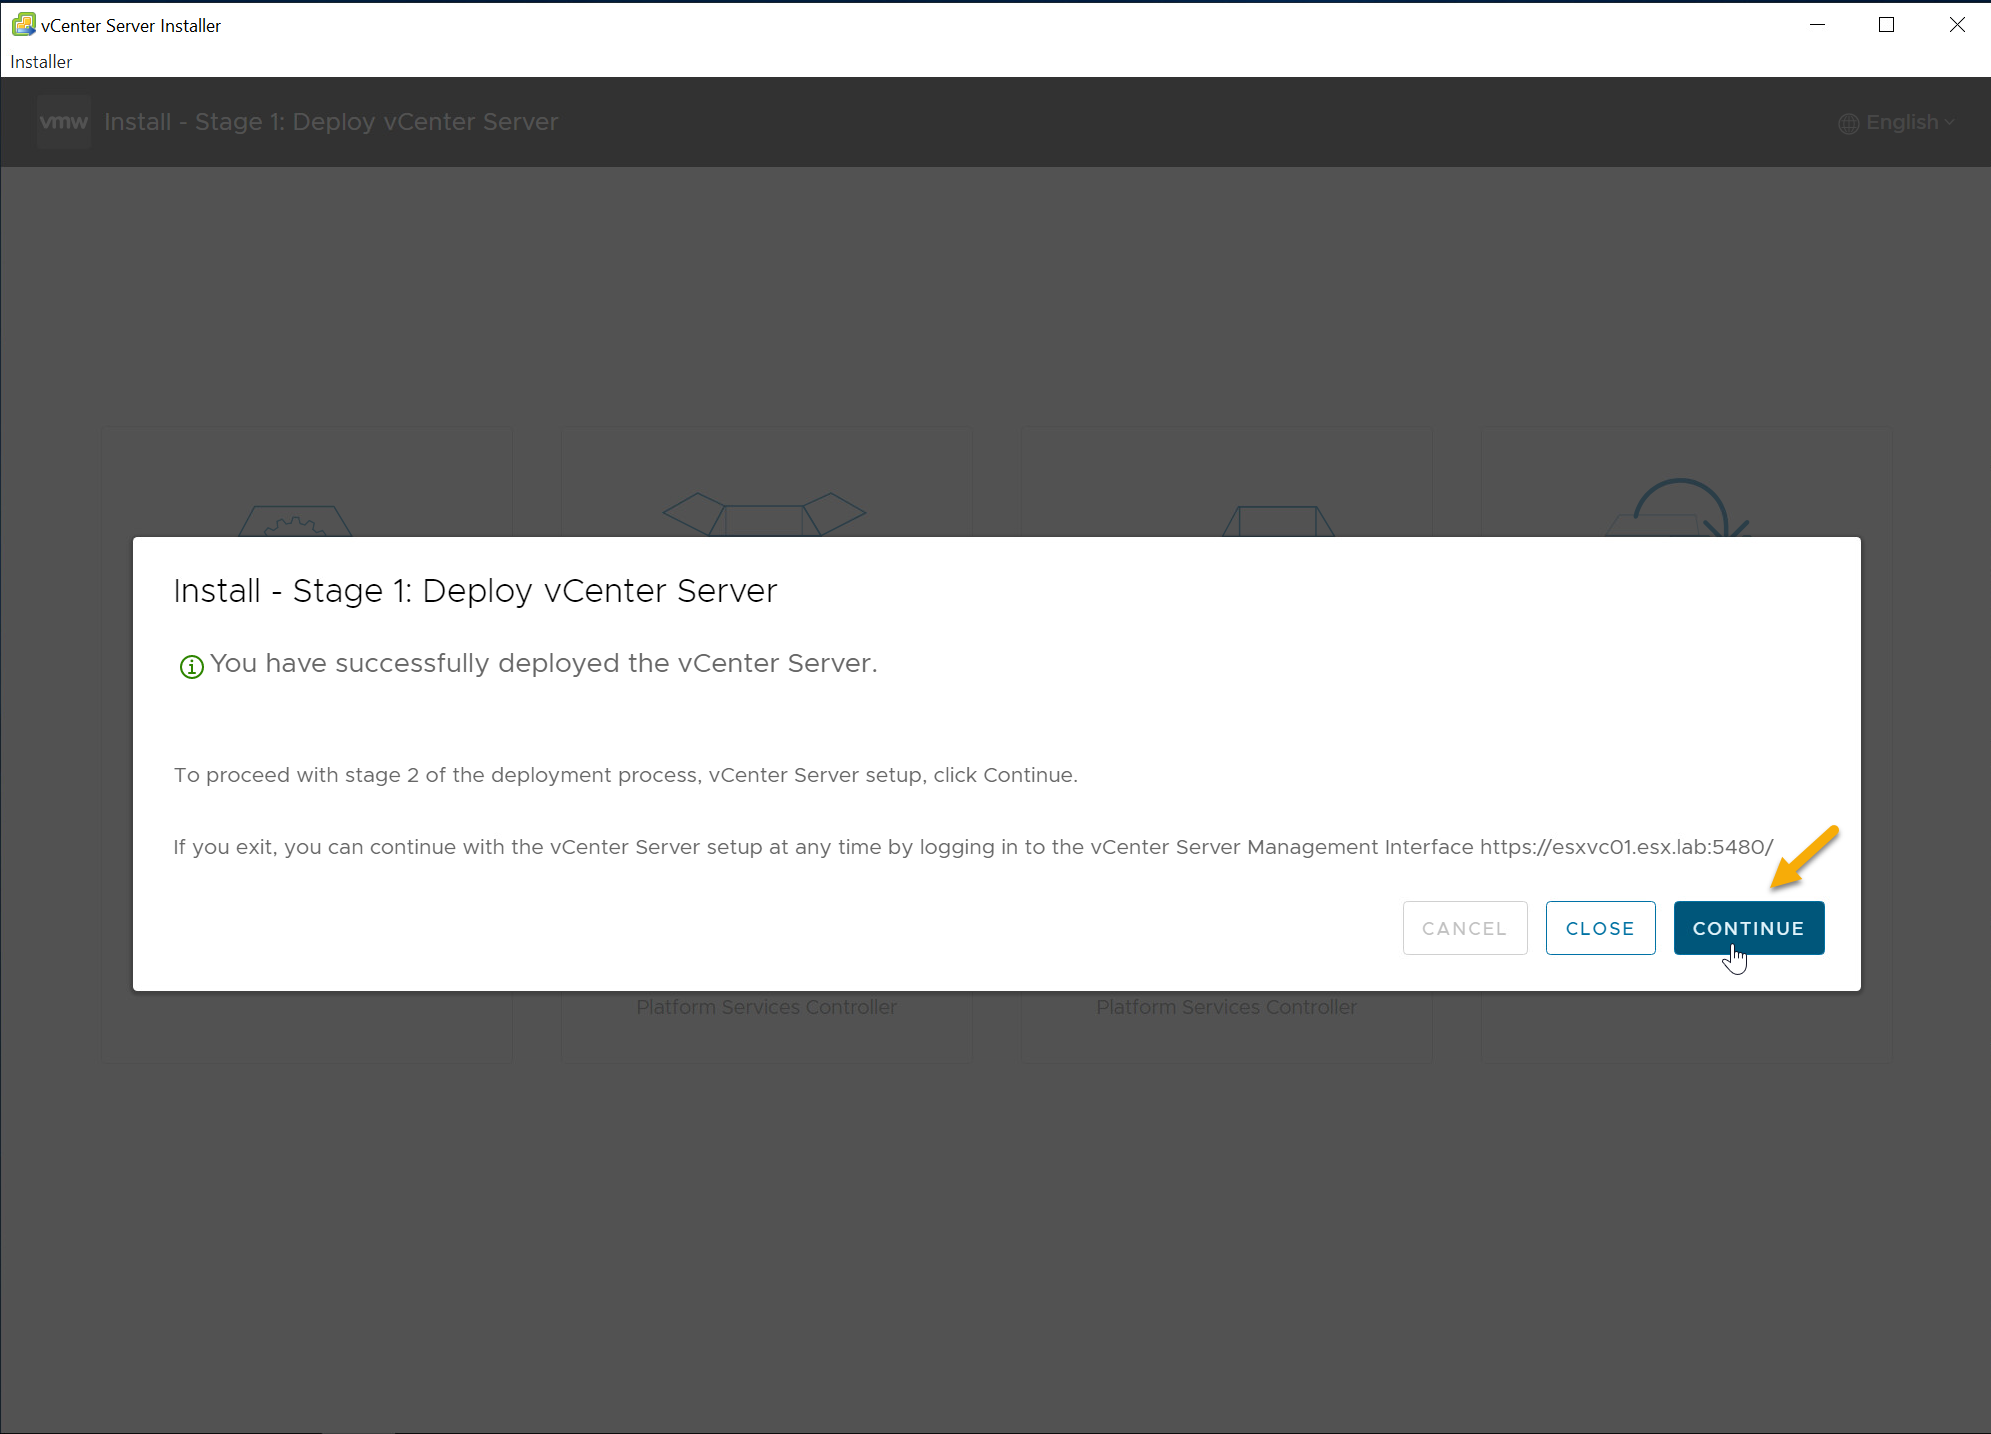
- After sucessfully completing stage 1 of the VCSA. Click “Continue” to proceed to stage 2.
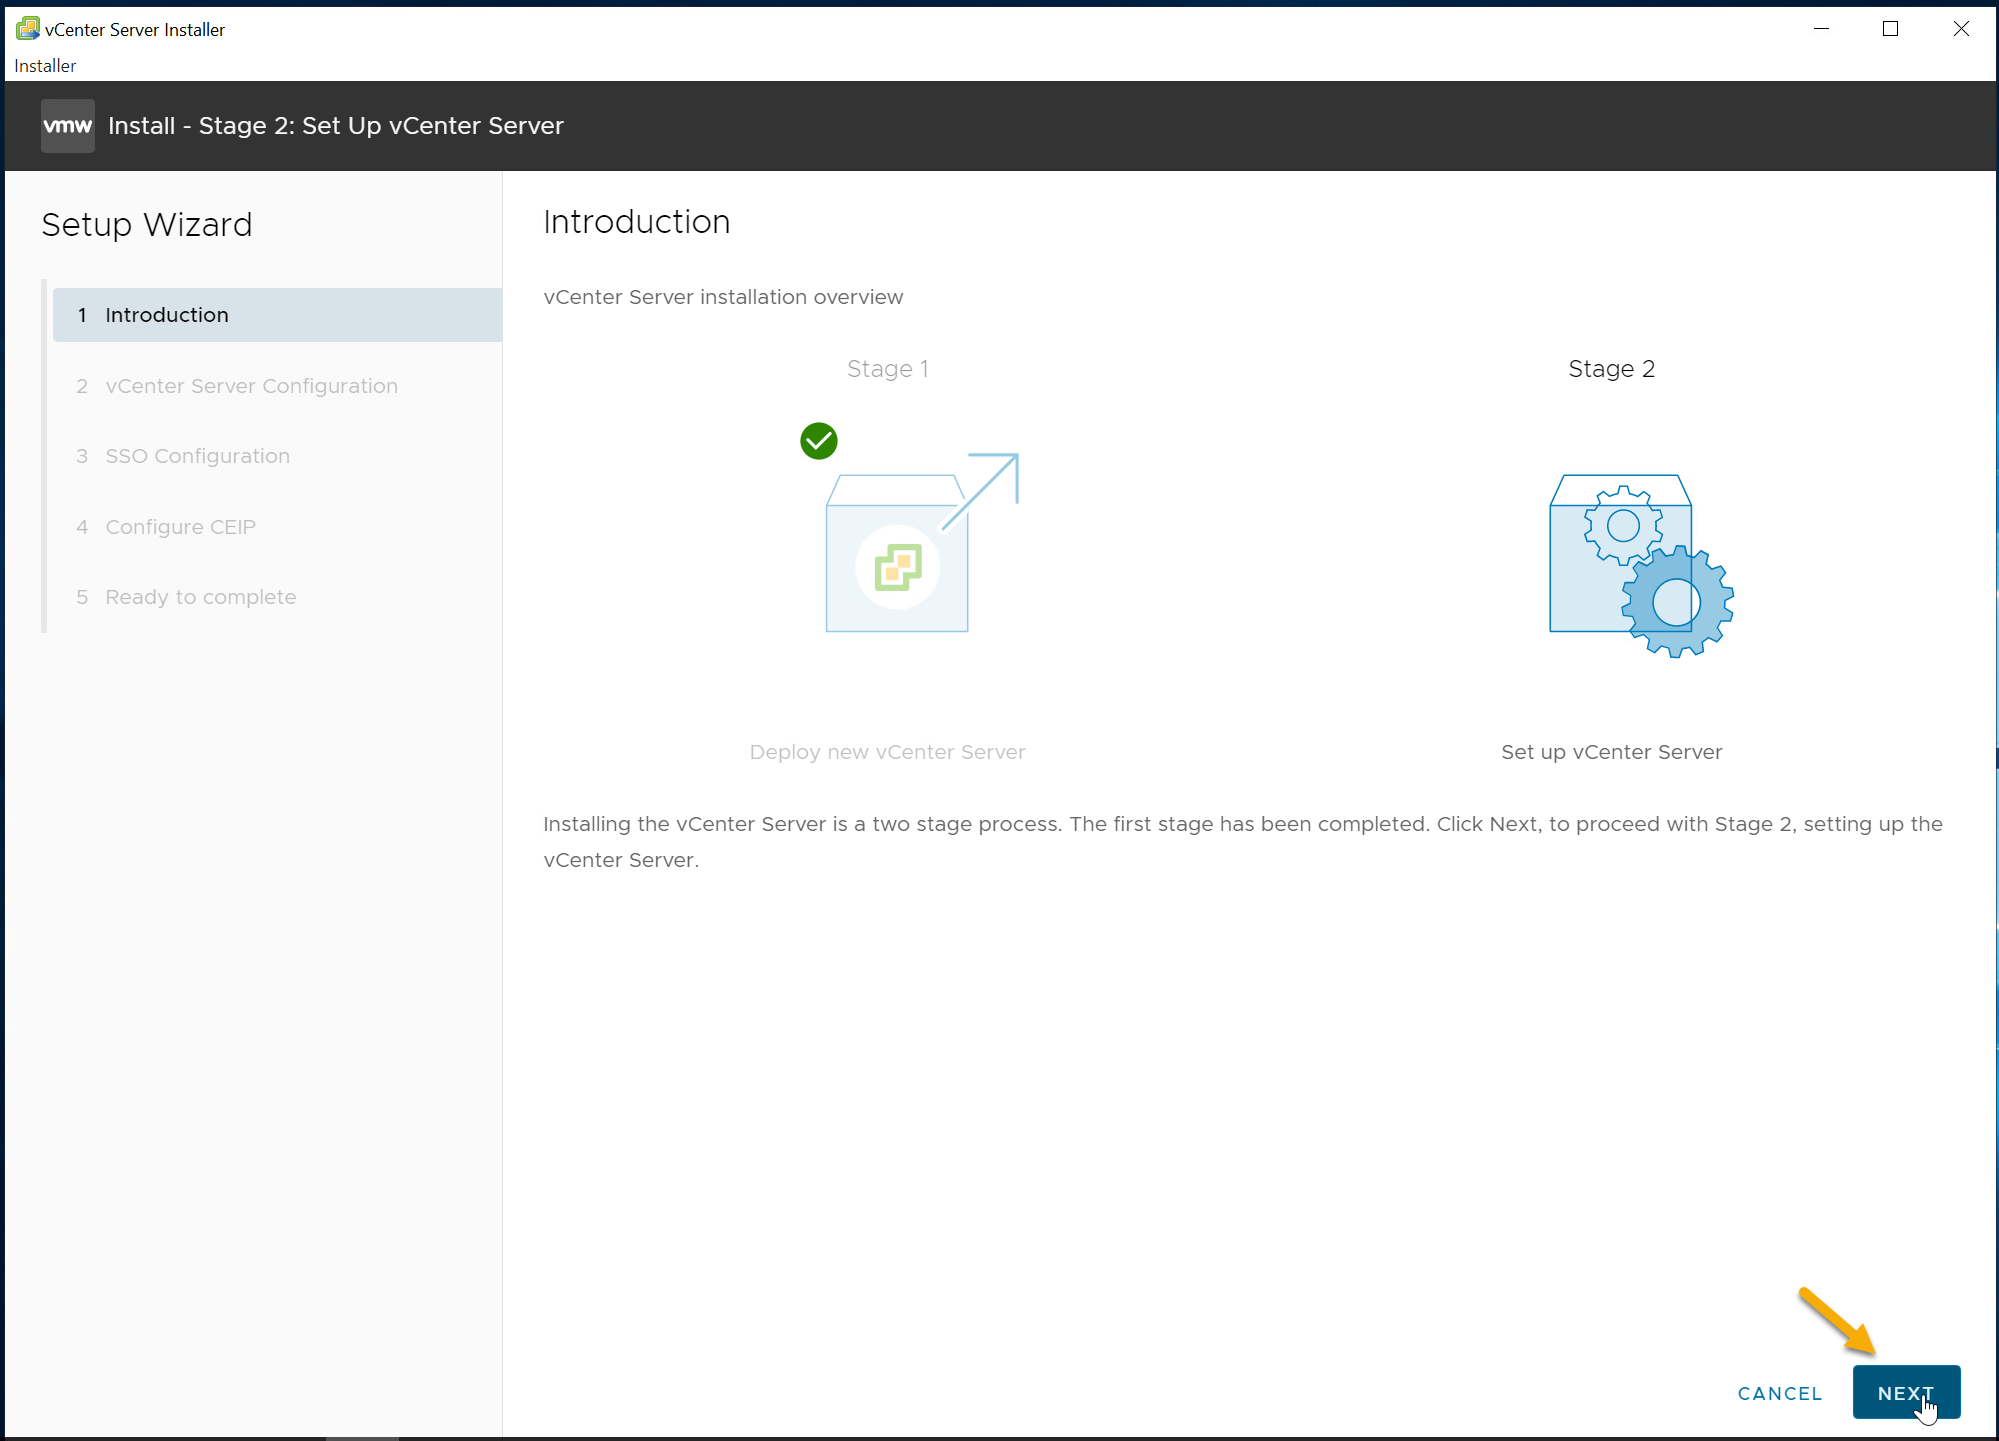
- Review the introduction screen and Click “Next” to continue.
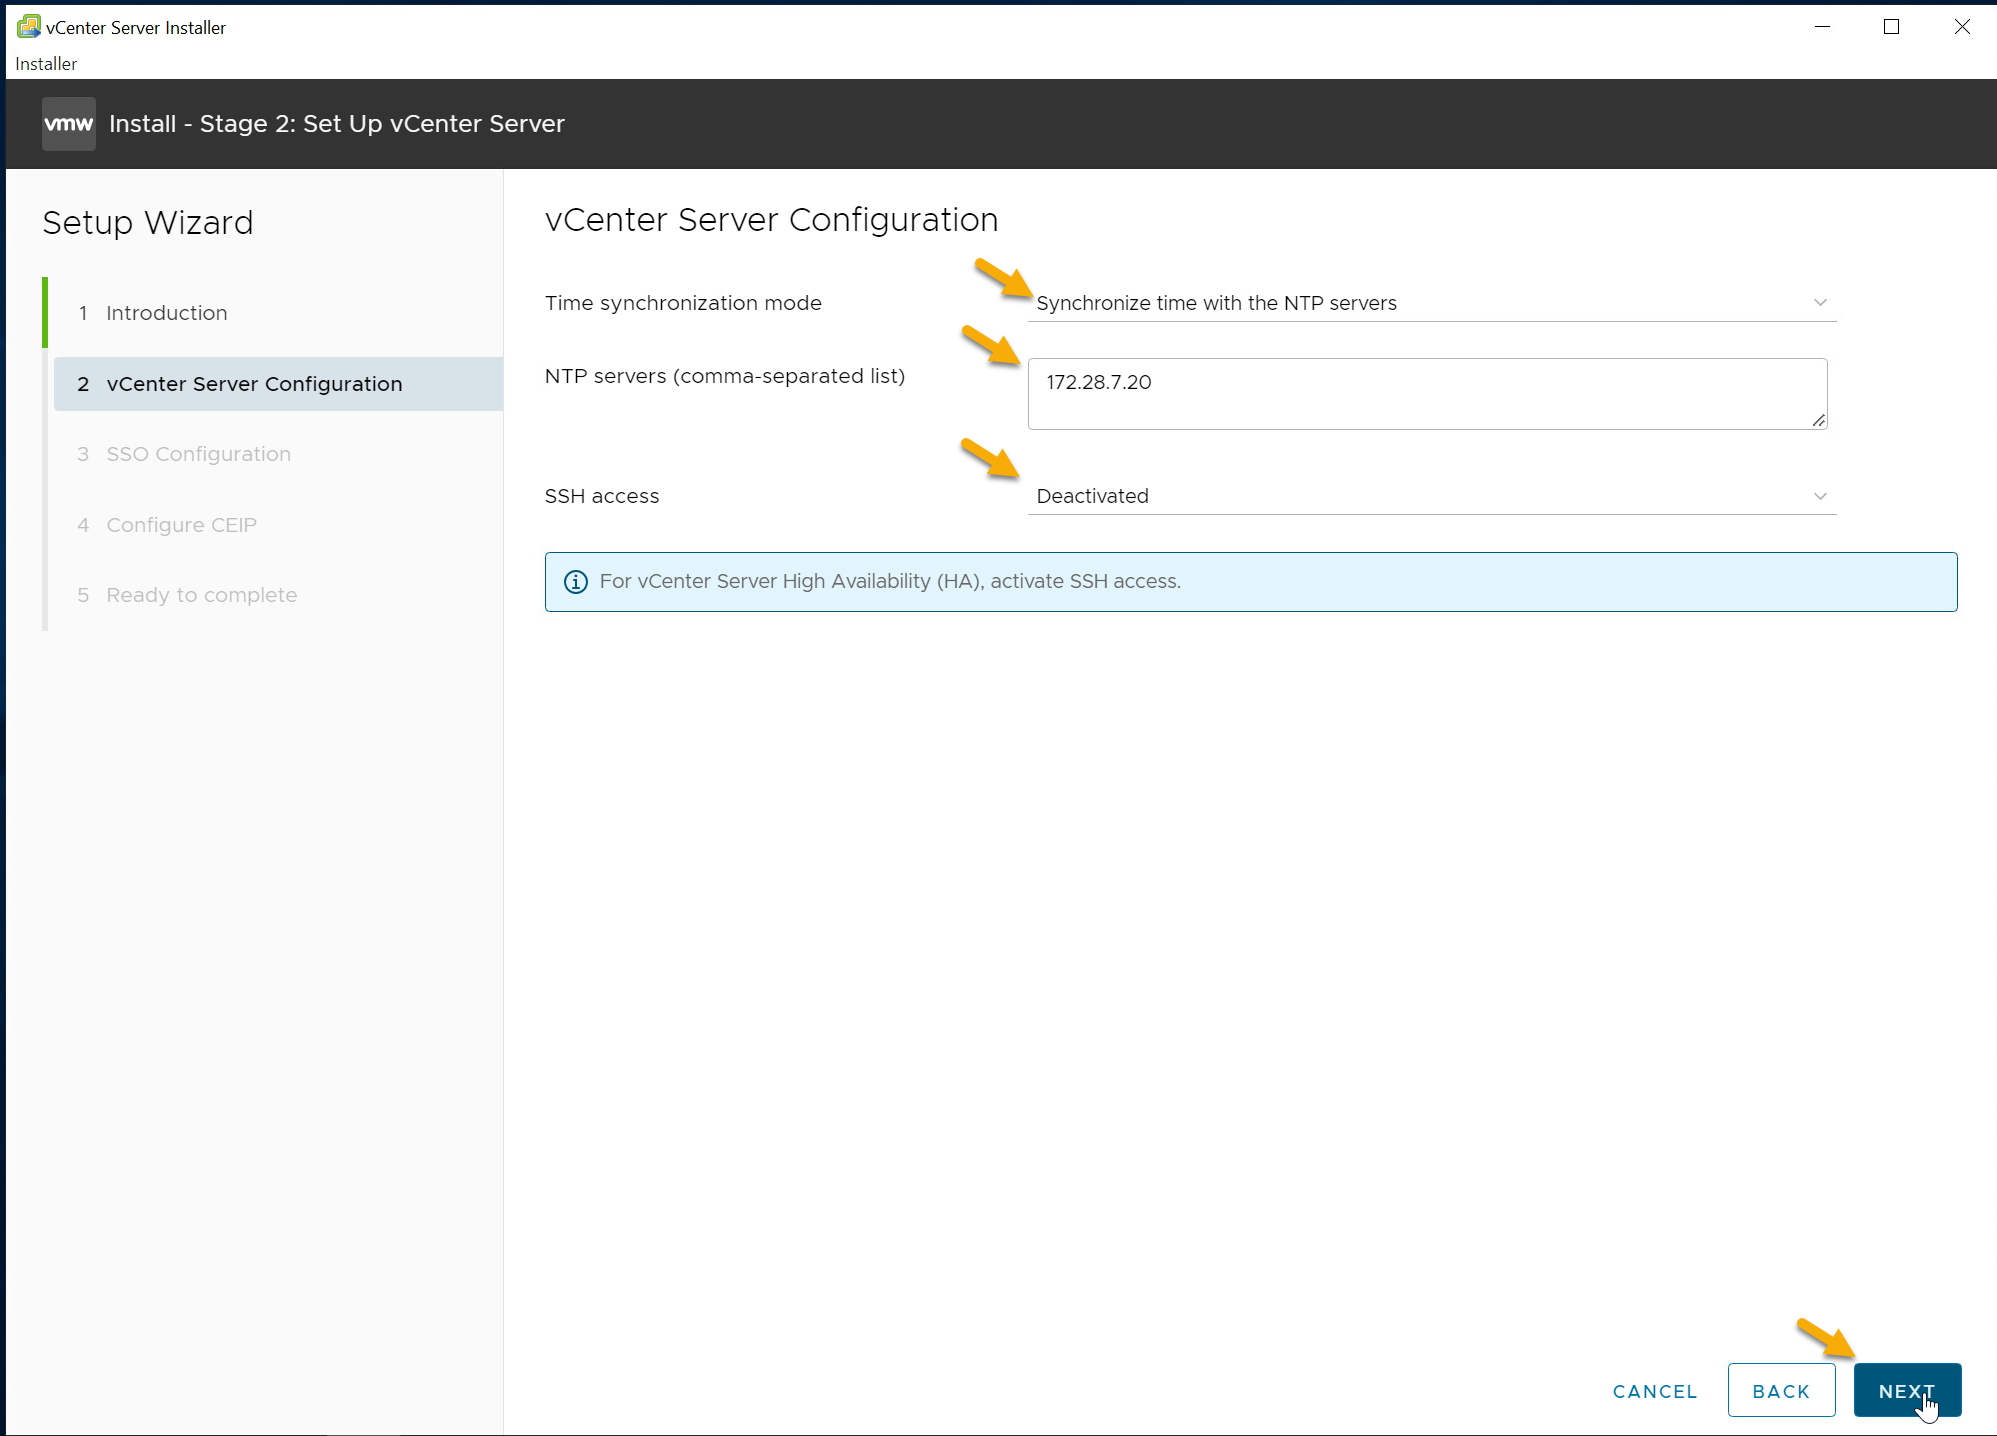
- Configure NTP and SSH configuration for the VCSA. After configuring NTP and SSH, Click “Next” to continue.
-
Time synchronization mode
- Select one of the following:
- synchronize time with NTP Server
- Uses a Network Time Protocol server for synchronizing the time. If you select this option, you must enter the names or IP addresses of the NTP servers separated by commas.
- synchronize time with the ESXi host
- Enables periodic time synchronization, and VMware Tools sets the time of the guest operating system to be the same as the time of the ESXi host.
- synchronize time with NTP Server
- Select one of the following:
-
SSH Access
- Select one of the following:
- Disabled
- Enabled
- Select one of the following:
Note: For vCenter Server High Availablity (HA), Enable SSH access.
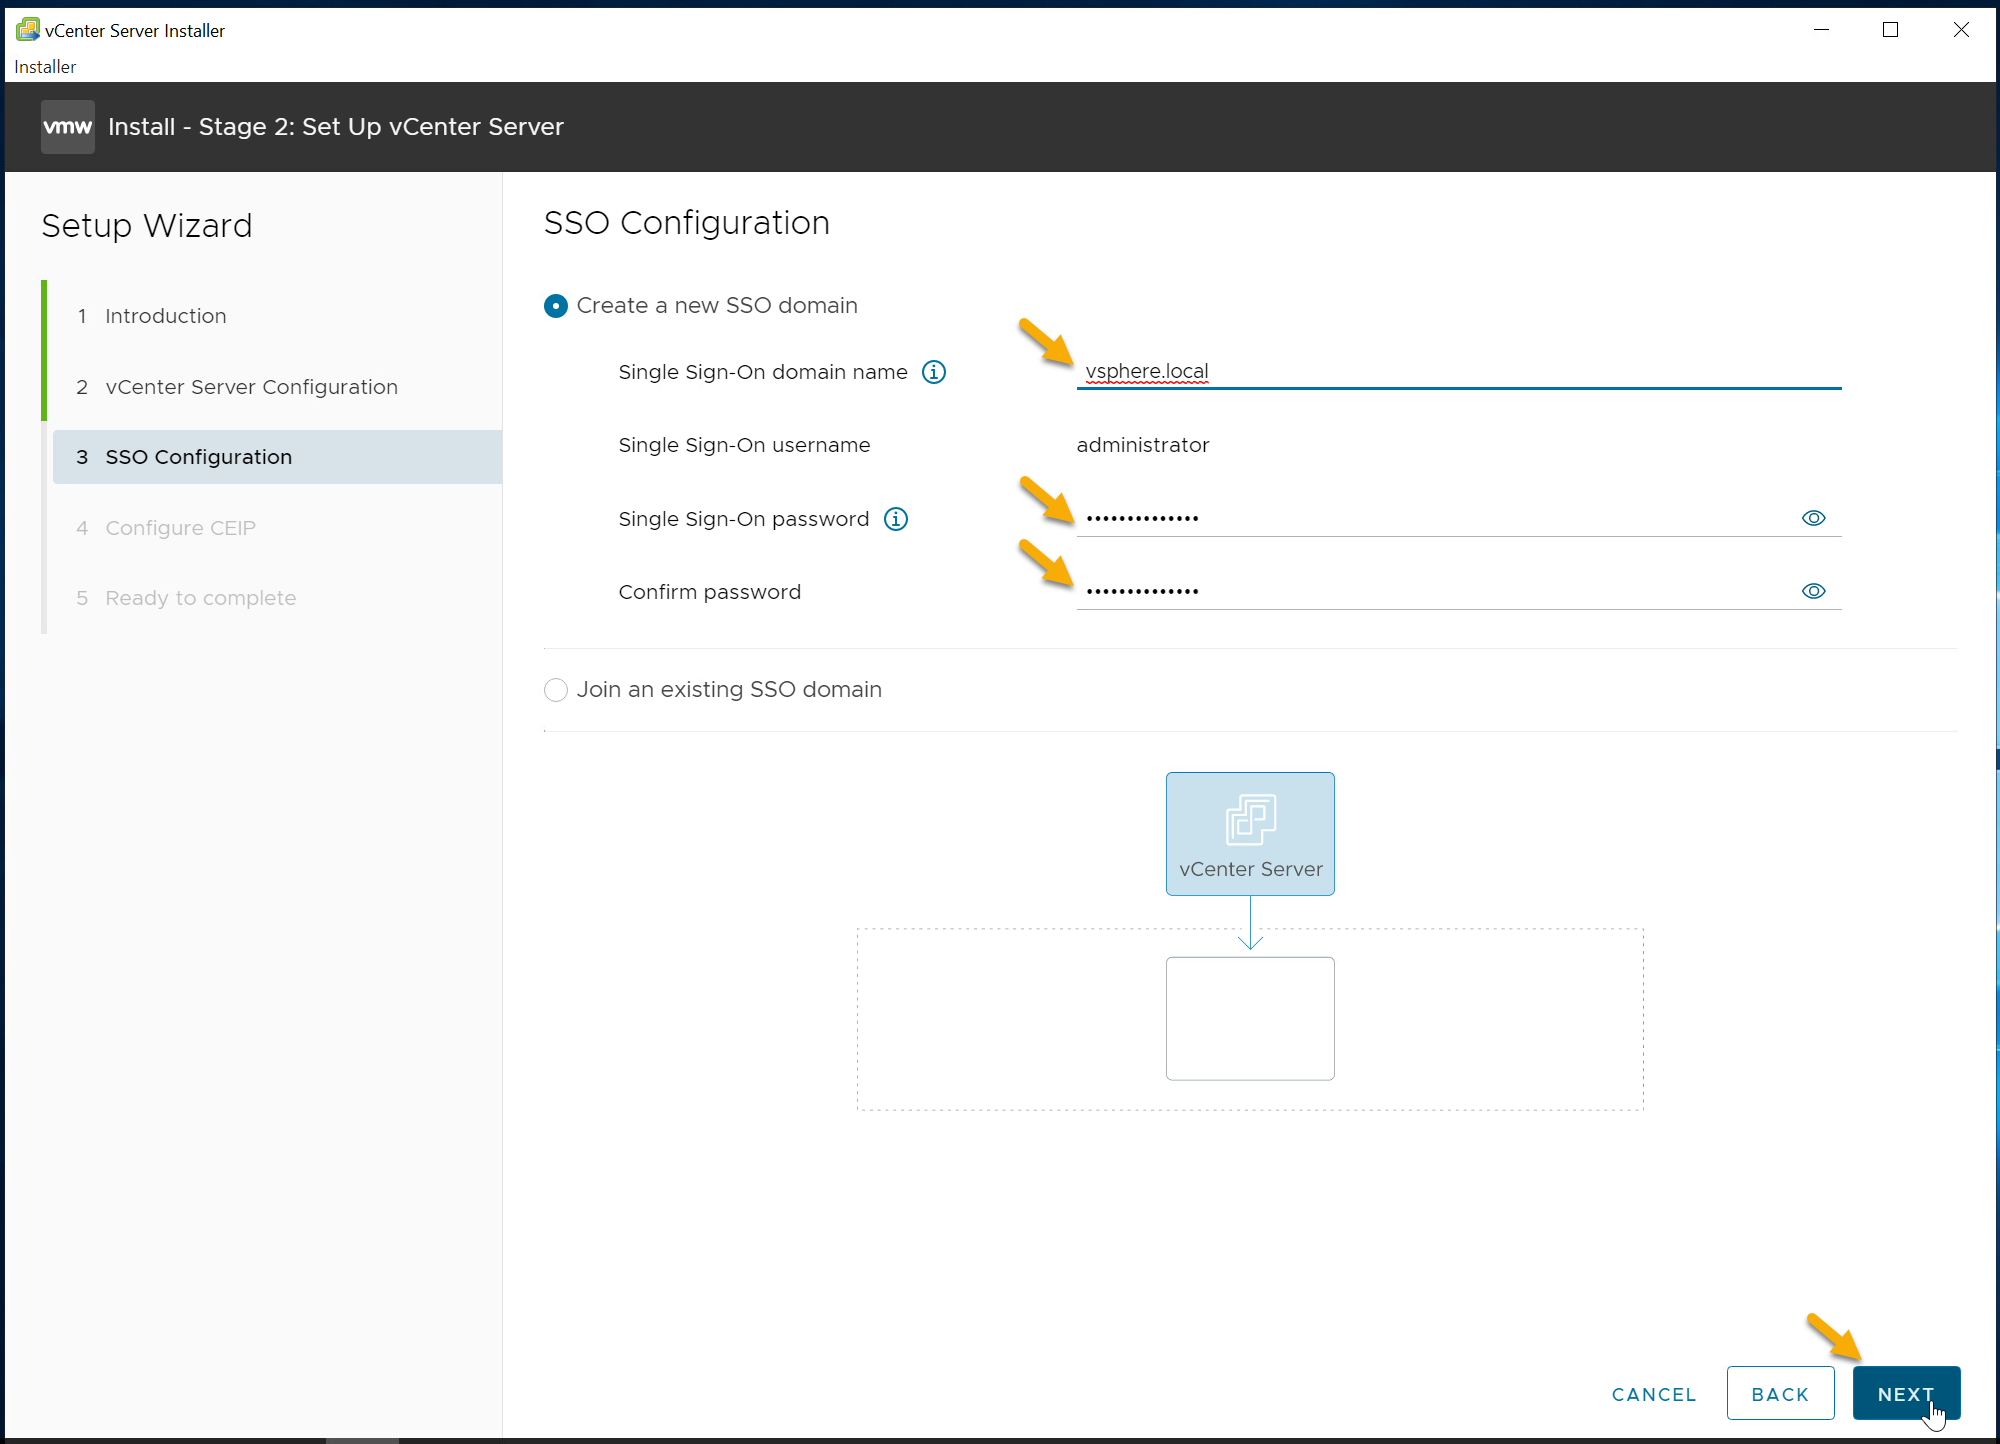
- Choose your SSO Configuration and Click “Next” to continue.
SSO (Single Sign-On) domain allows you to create a new local idenity source to be used for your vSphere enviroment. This is NOT your Active Directory domain!
-
Create new a SSO domain
- Single Sign-On Domain (I highly recommend keeping this as “vsphere.local”)
- vsphere.local
- Single Sign-On username
- administrator
- Single Sign-On Password
- Create a password for “administrator” account
- Confirm password
- Confirm the password for “administrator” account
- Single Sign-On Domain (I highly recommend keeping this as “vsphere.local”)
-
Join Existing SSO Domain
- This option allows you to join another vSphere SSO domain.
In this demo I will be creating new SSO domain.
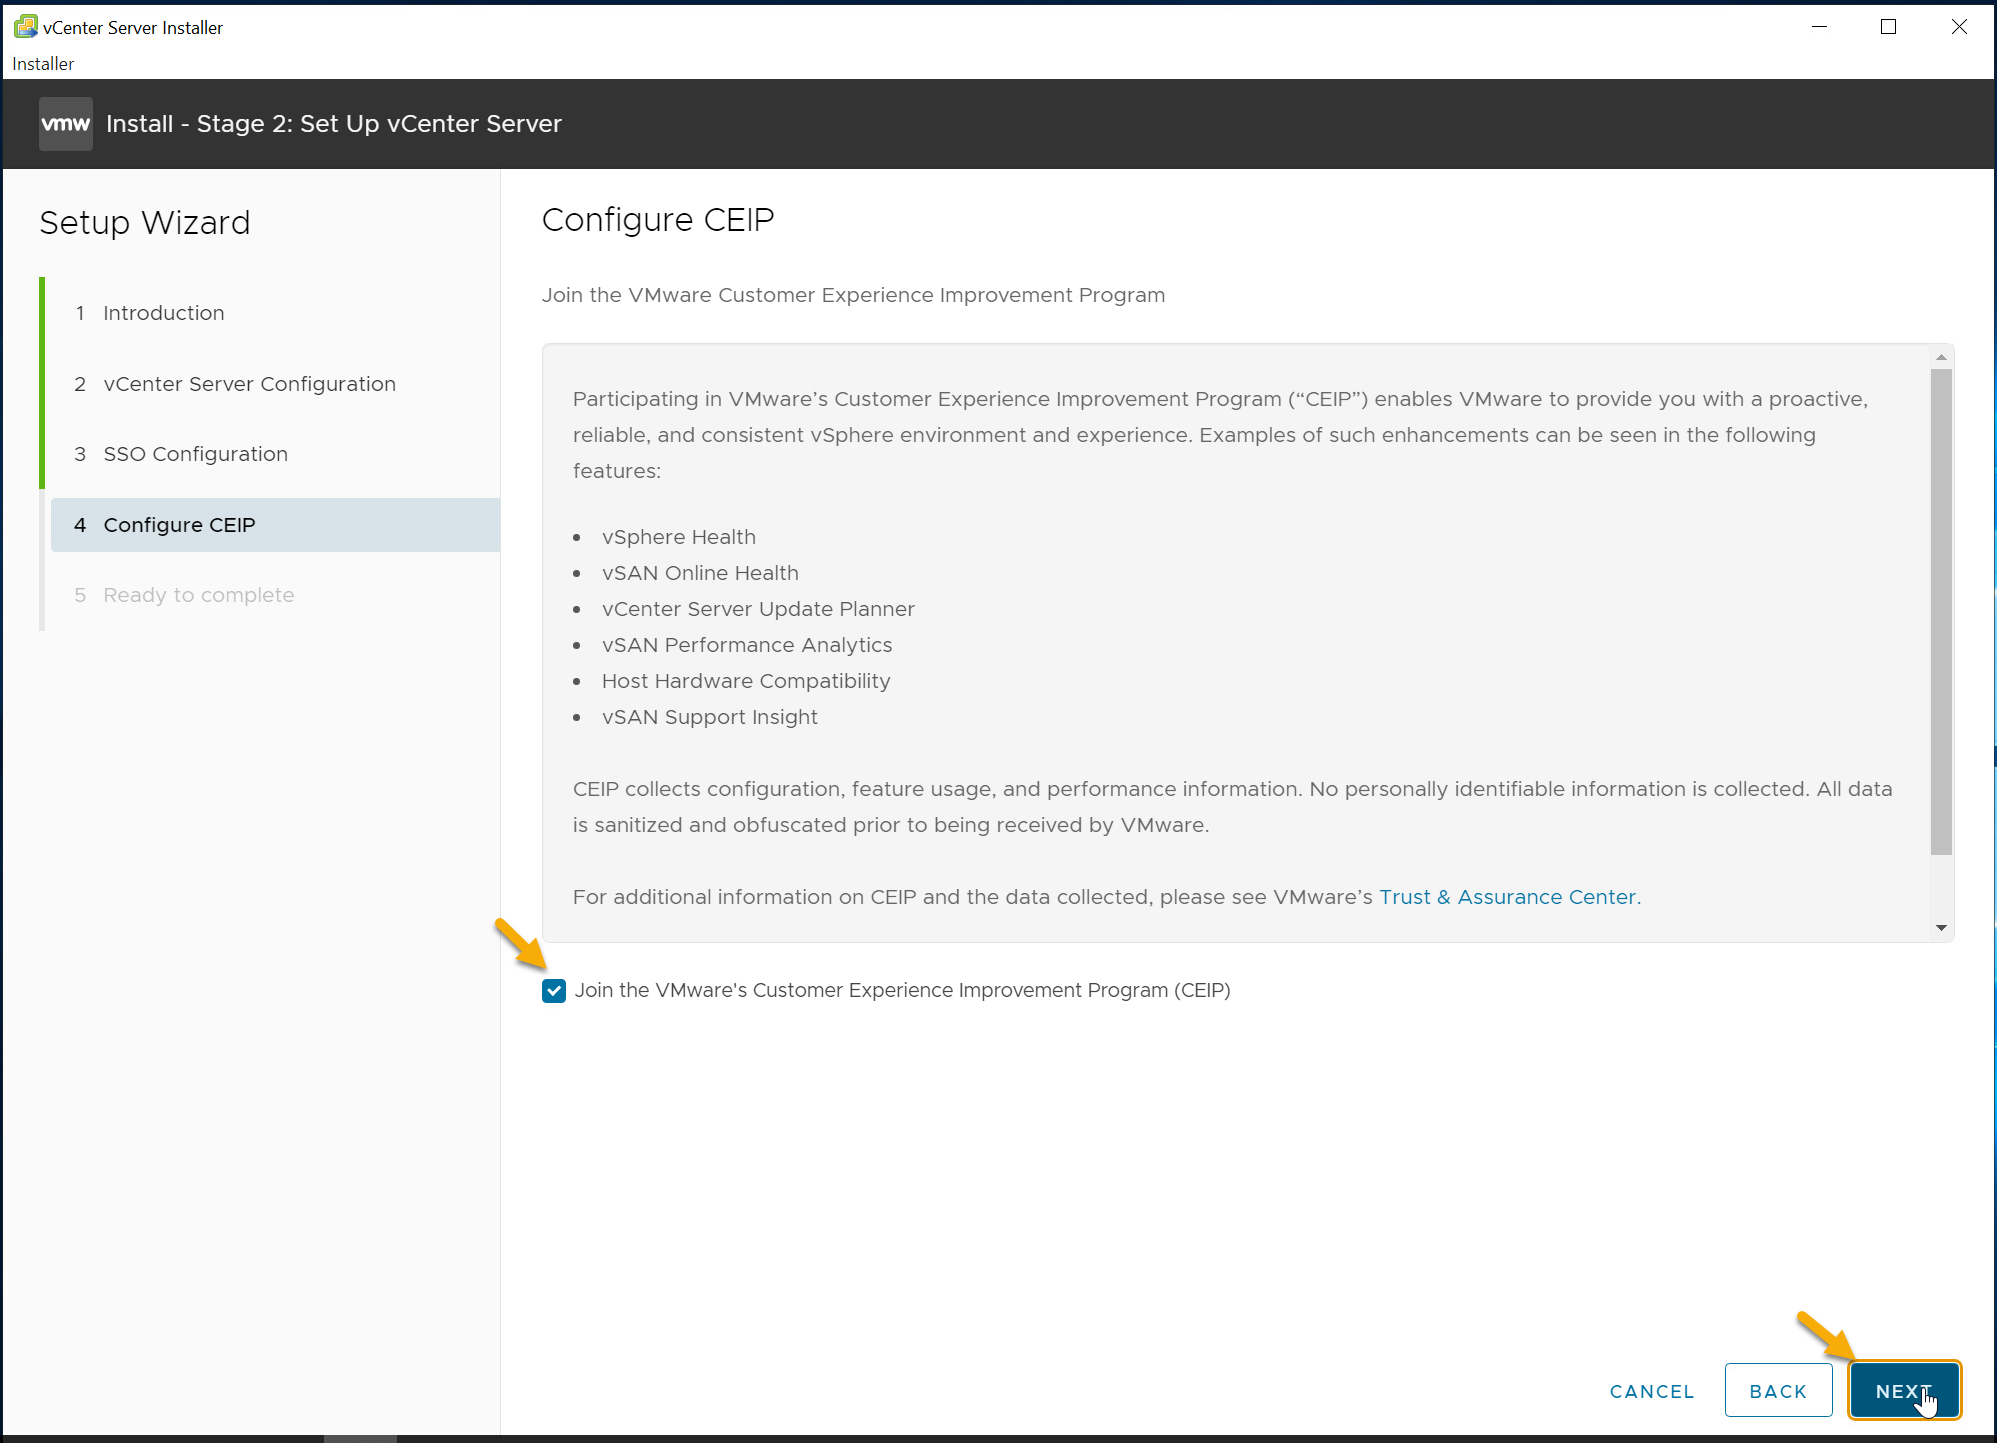
- Configure CEIP and Click “Next” to continue.
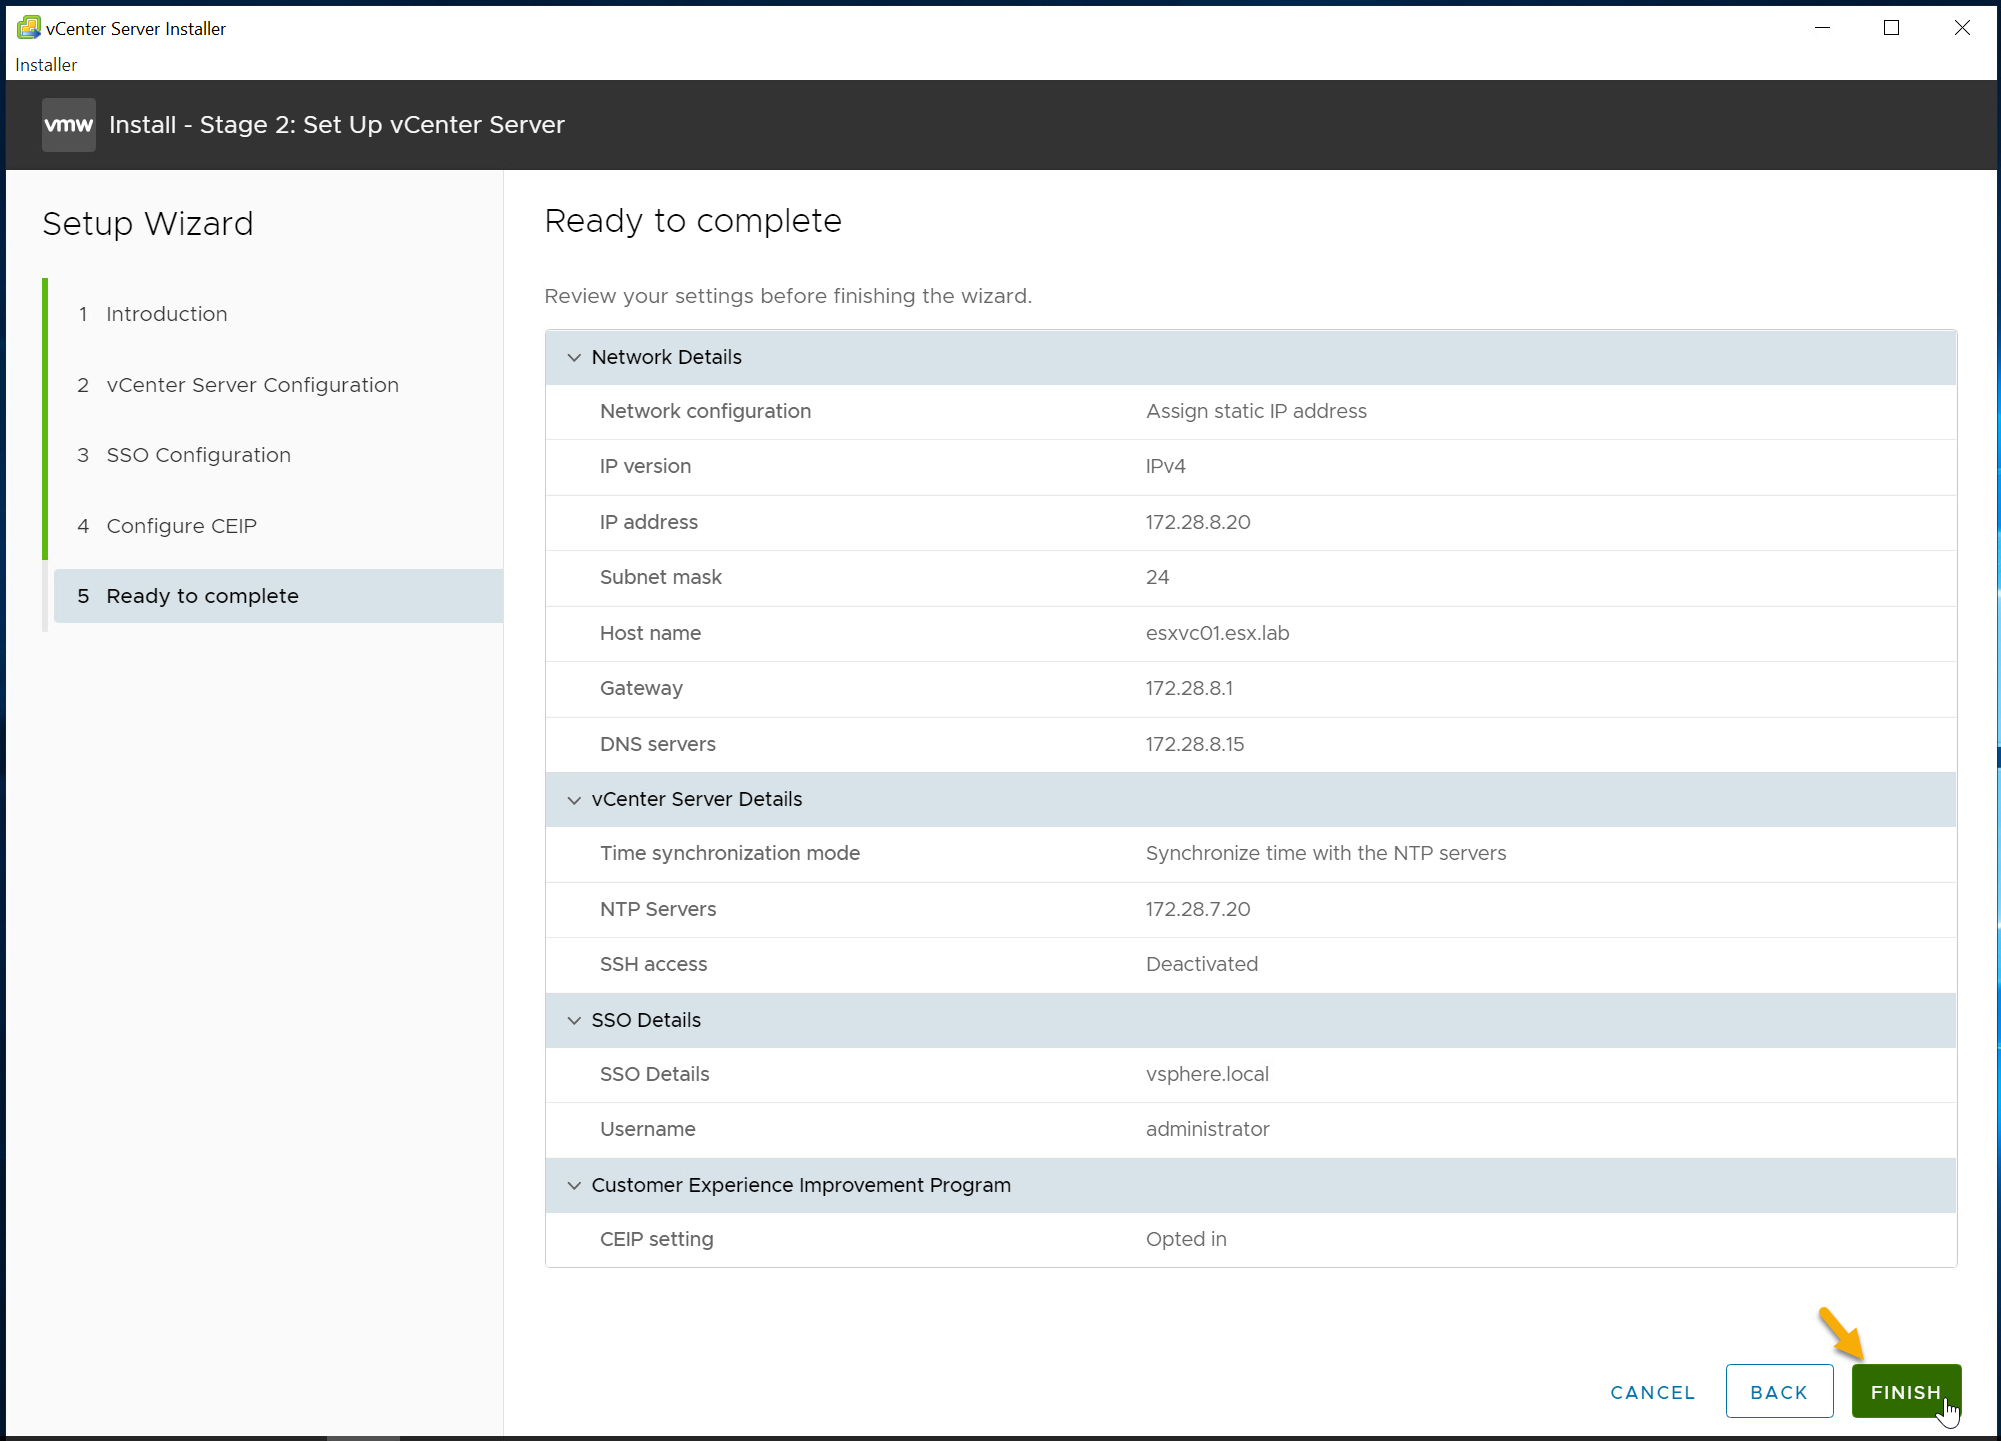
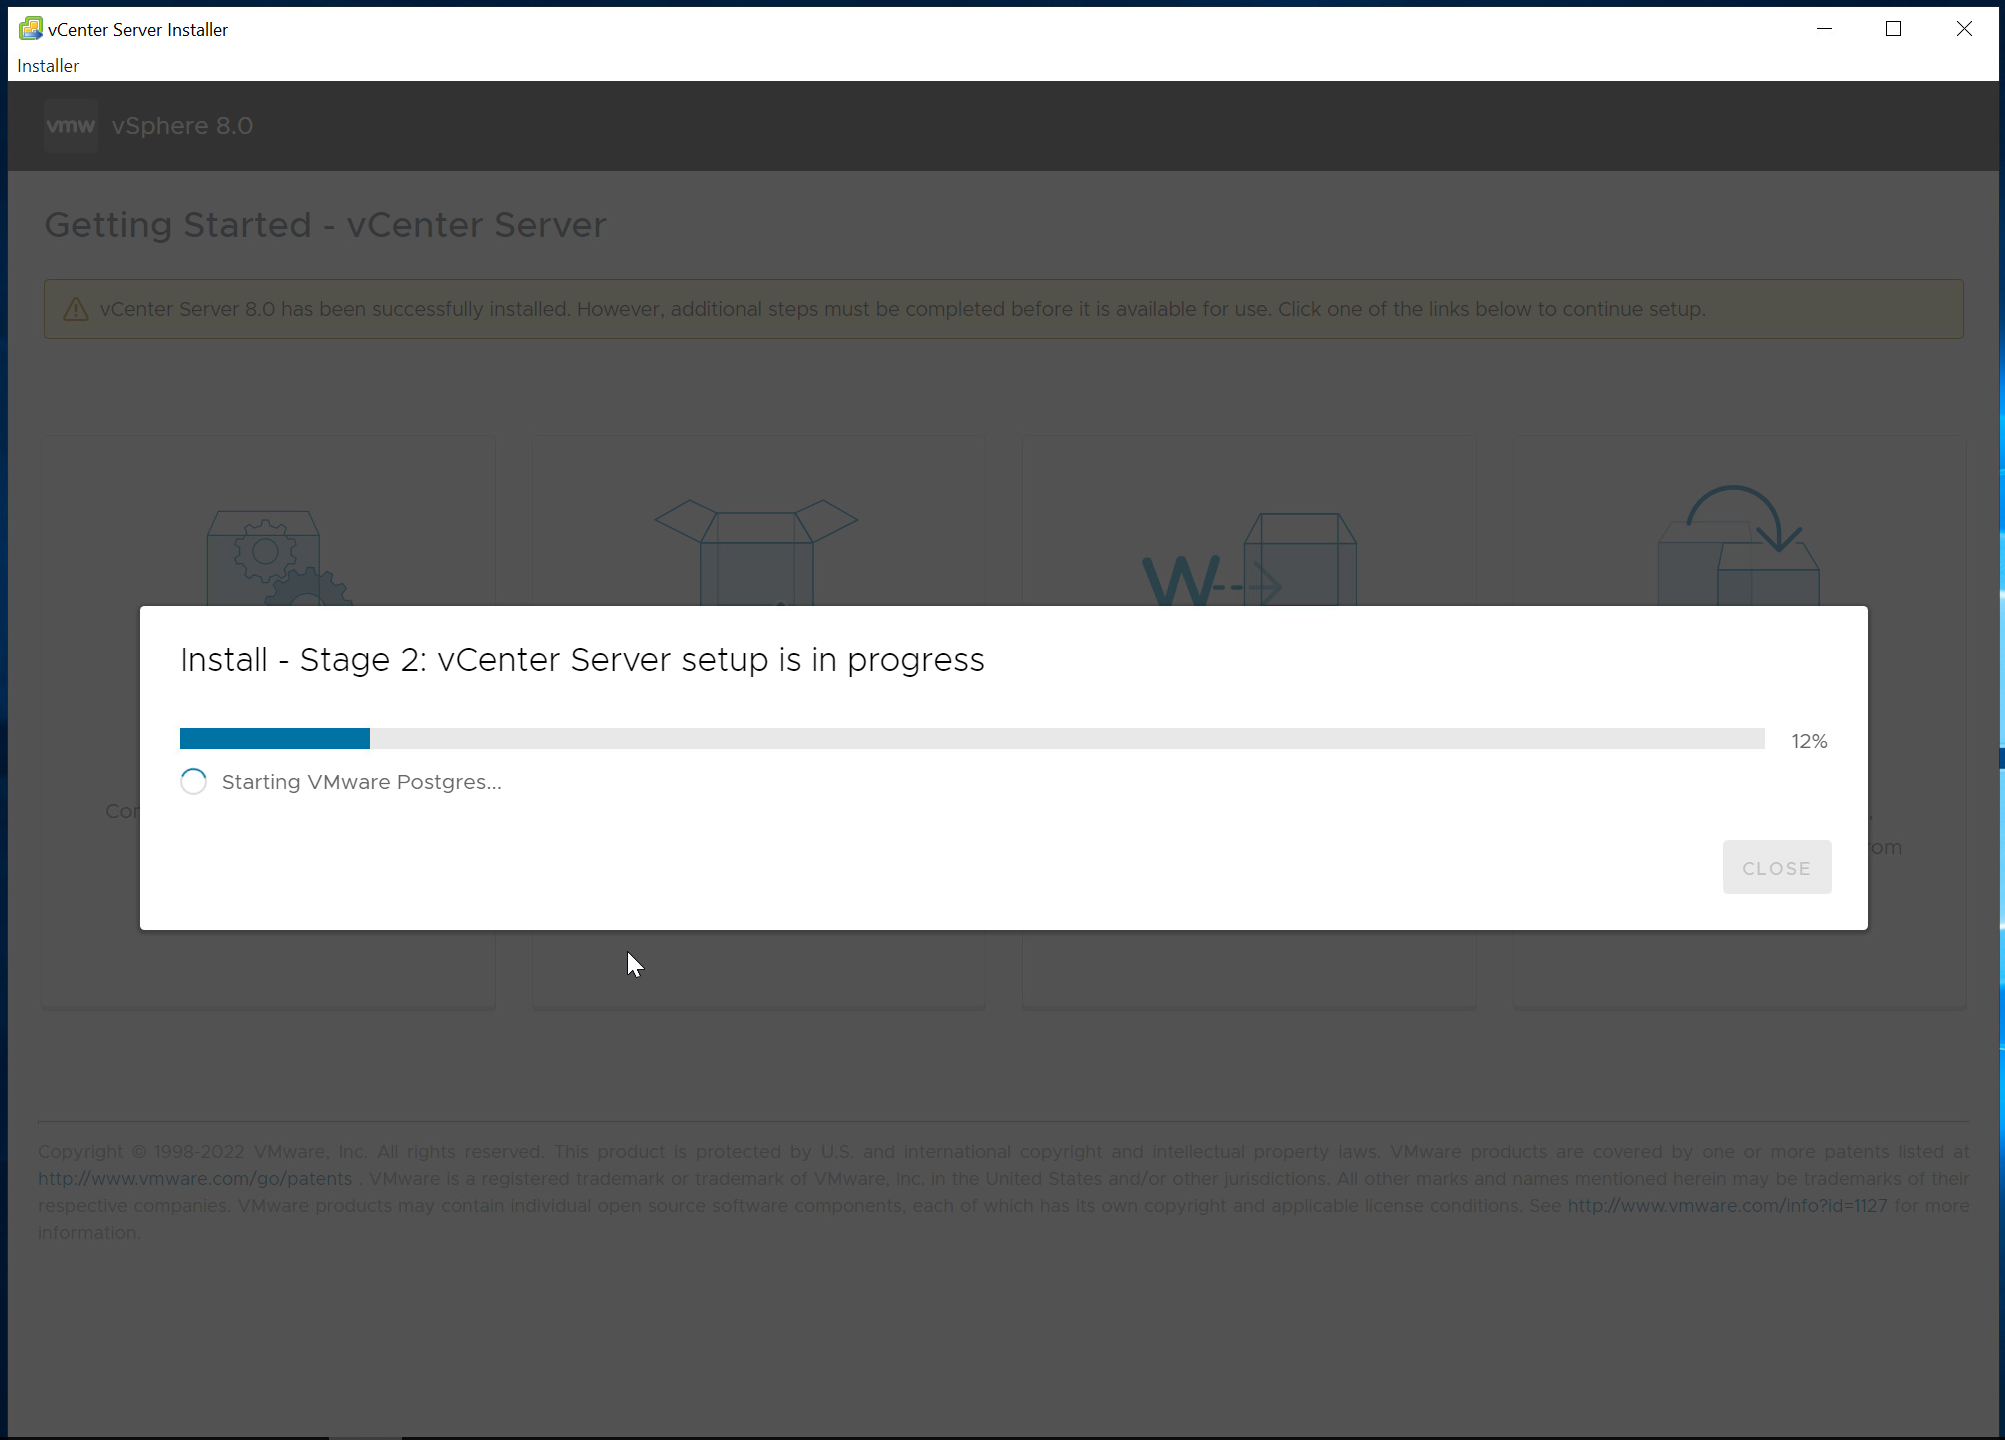
- Review Ready to complete screen and verify configuration. Click “Finish” to initiate stage 2.
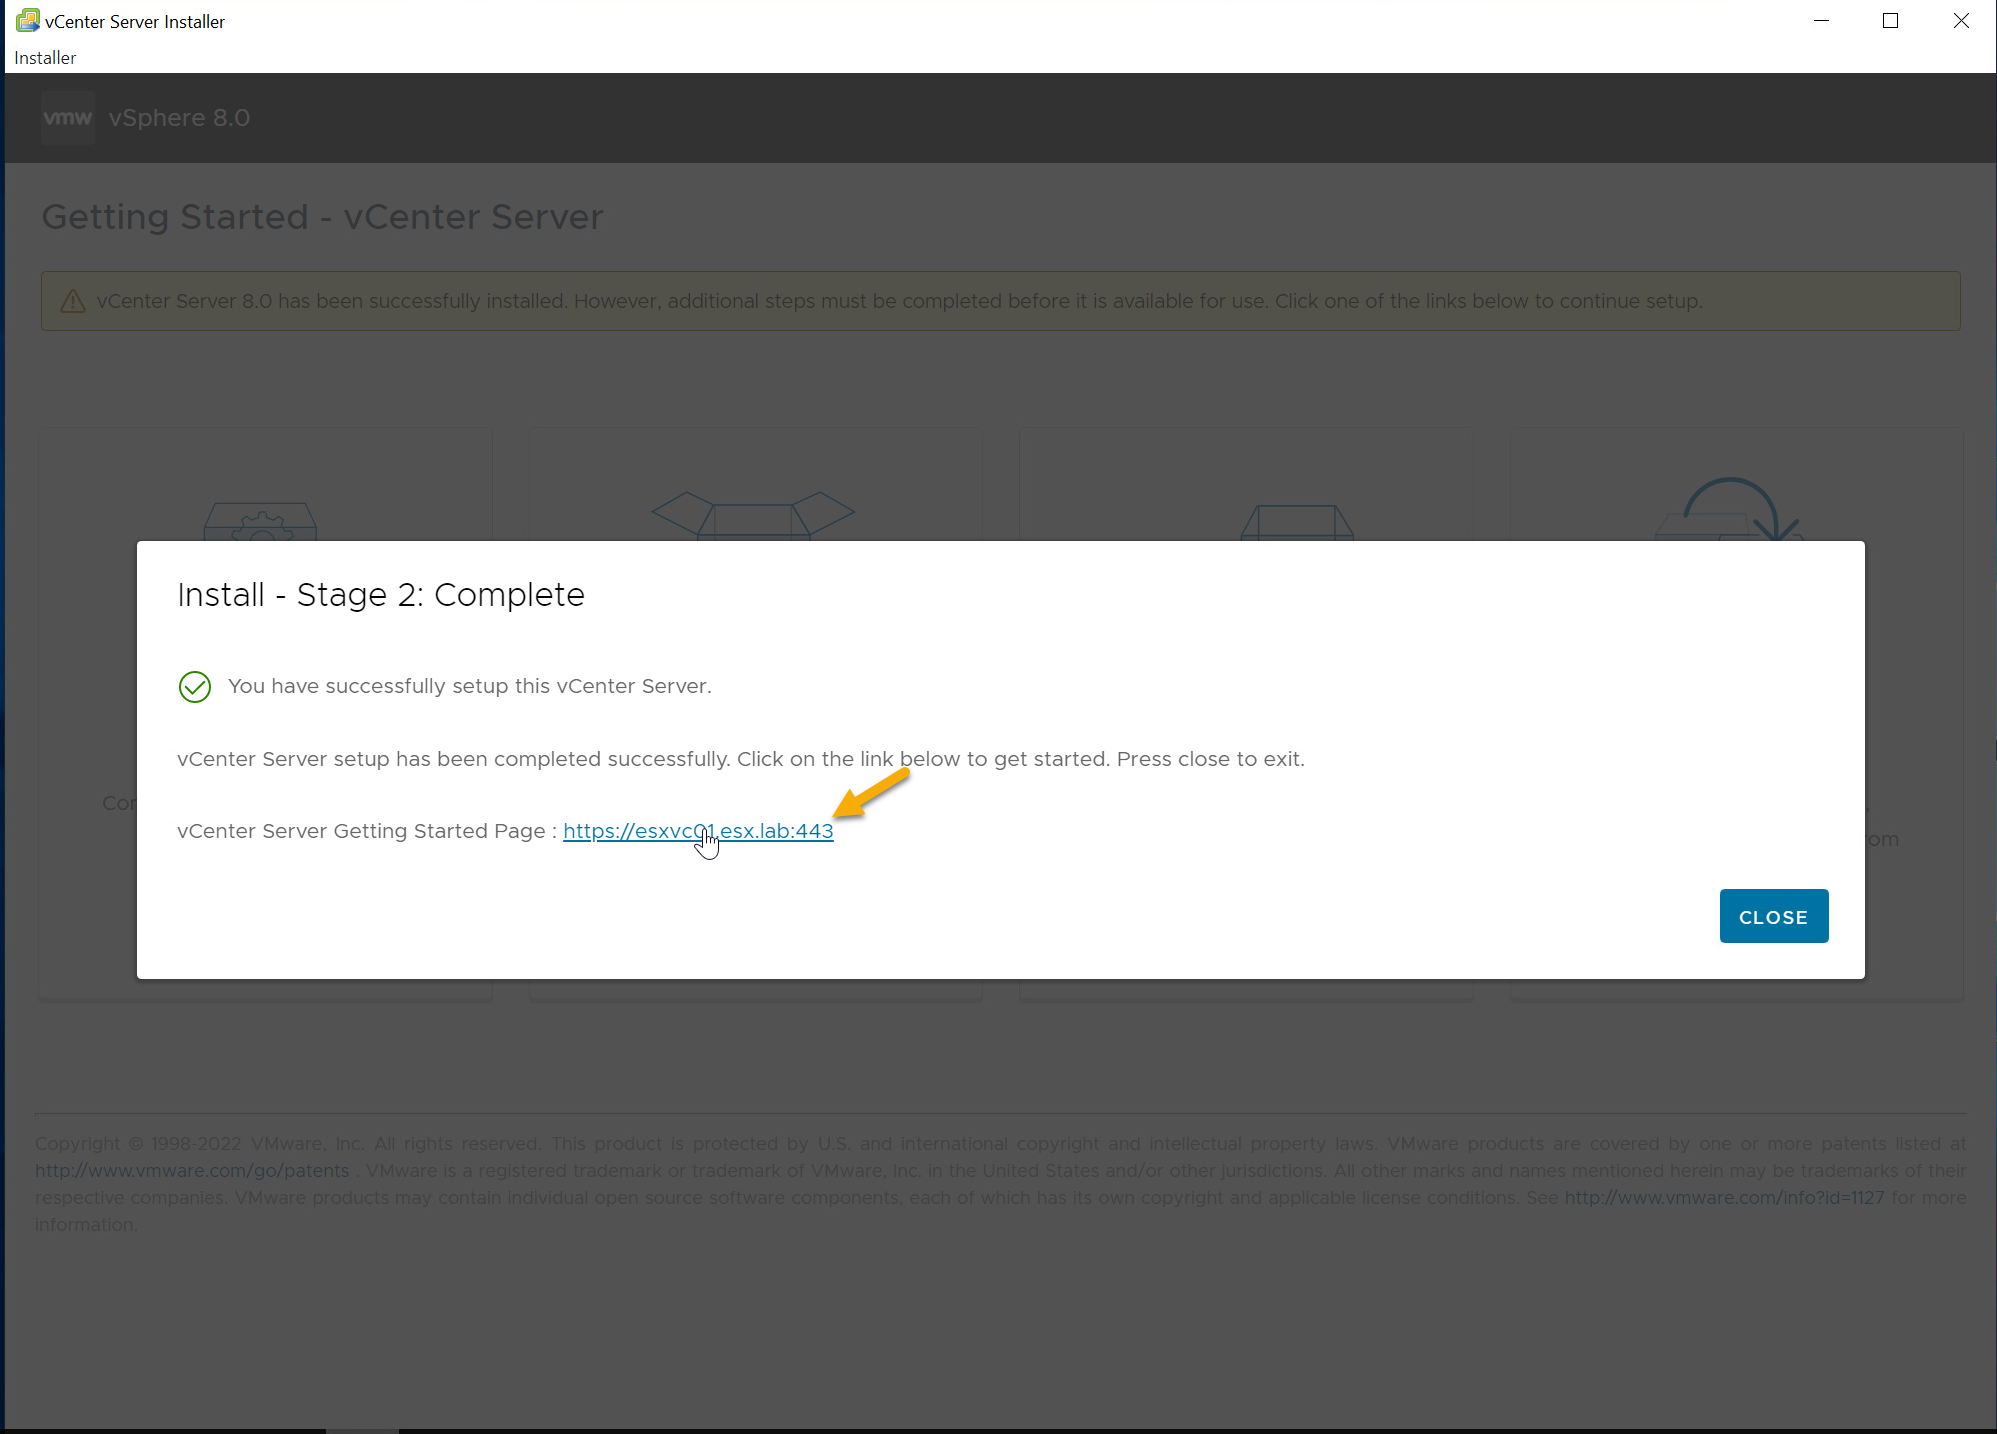
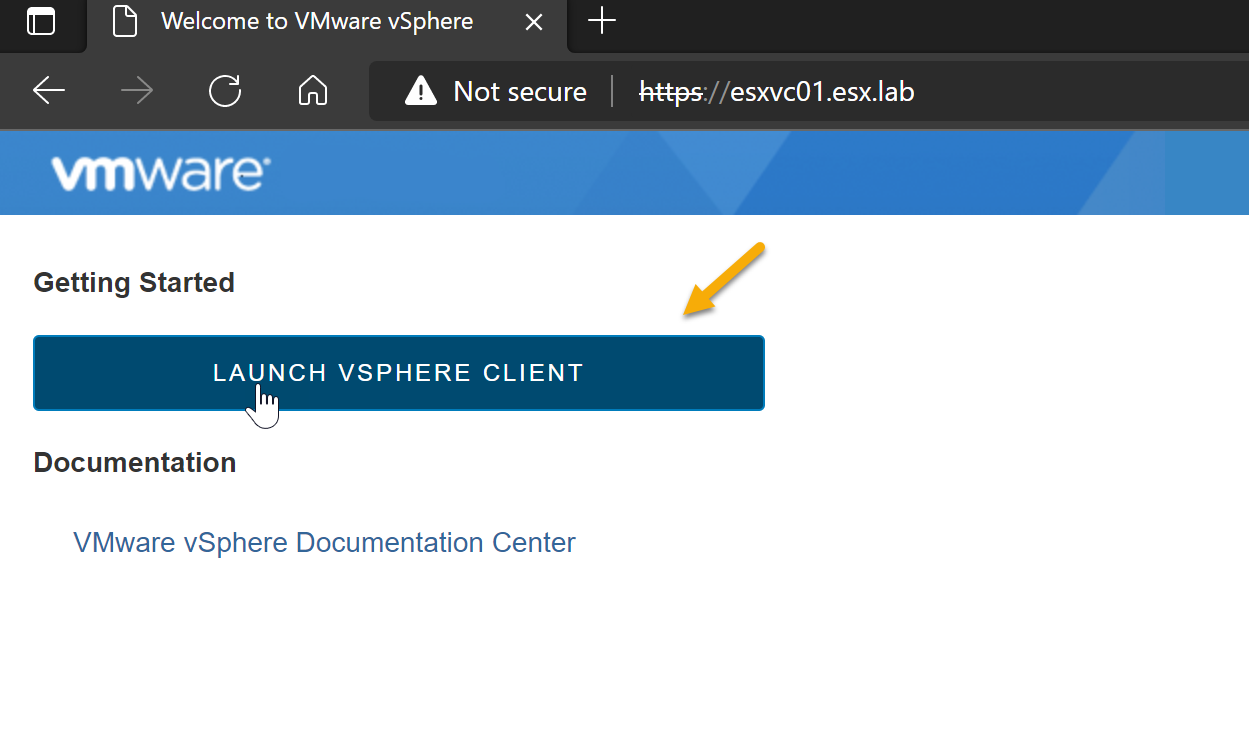
- After sucesfully completing stage 2, you will be presented with a URL. Click the URL to launch the vSphere Client. You can now close the vCenter Server Installer.
- Click “Launch vSphere Client (HTML5)”
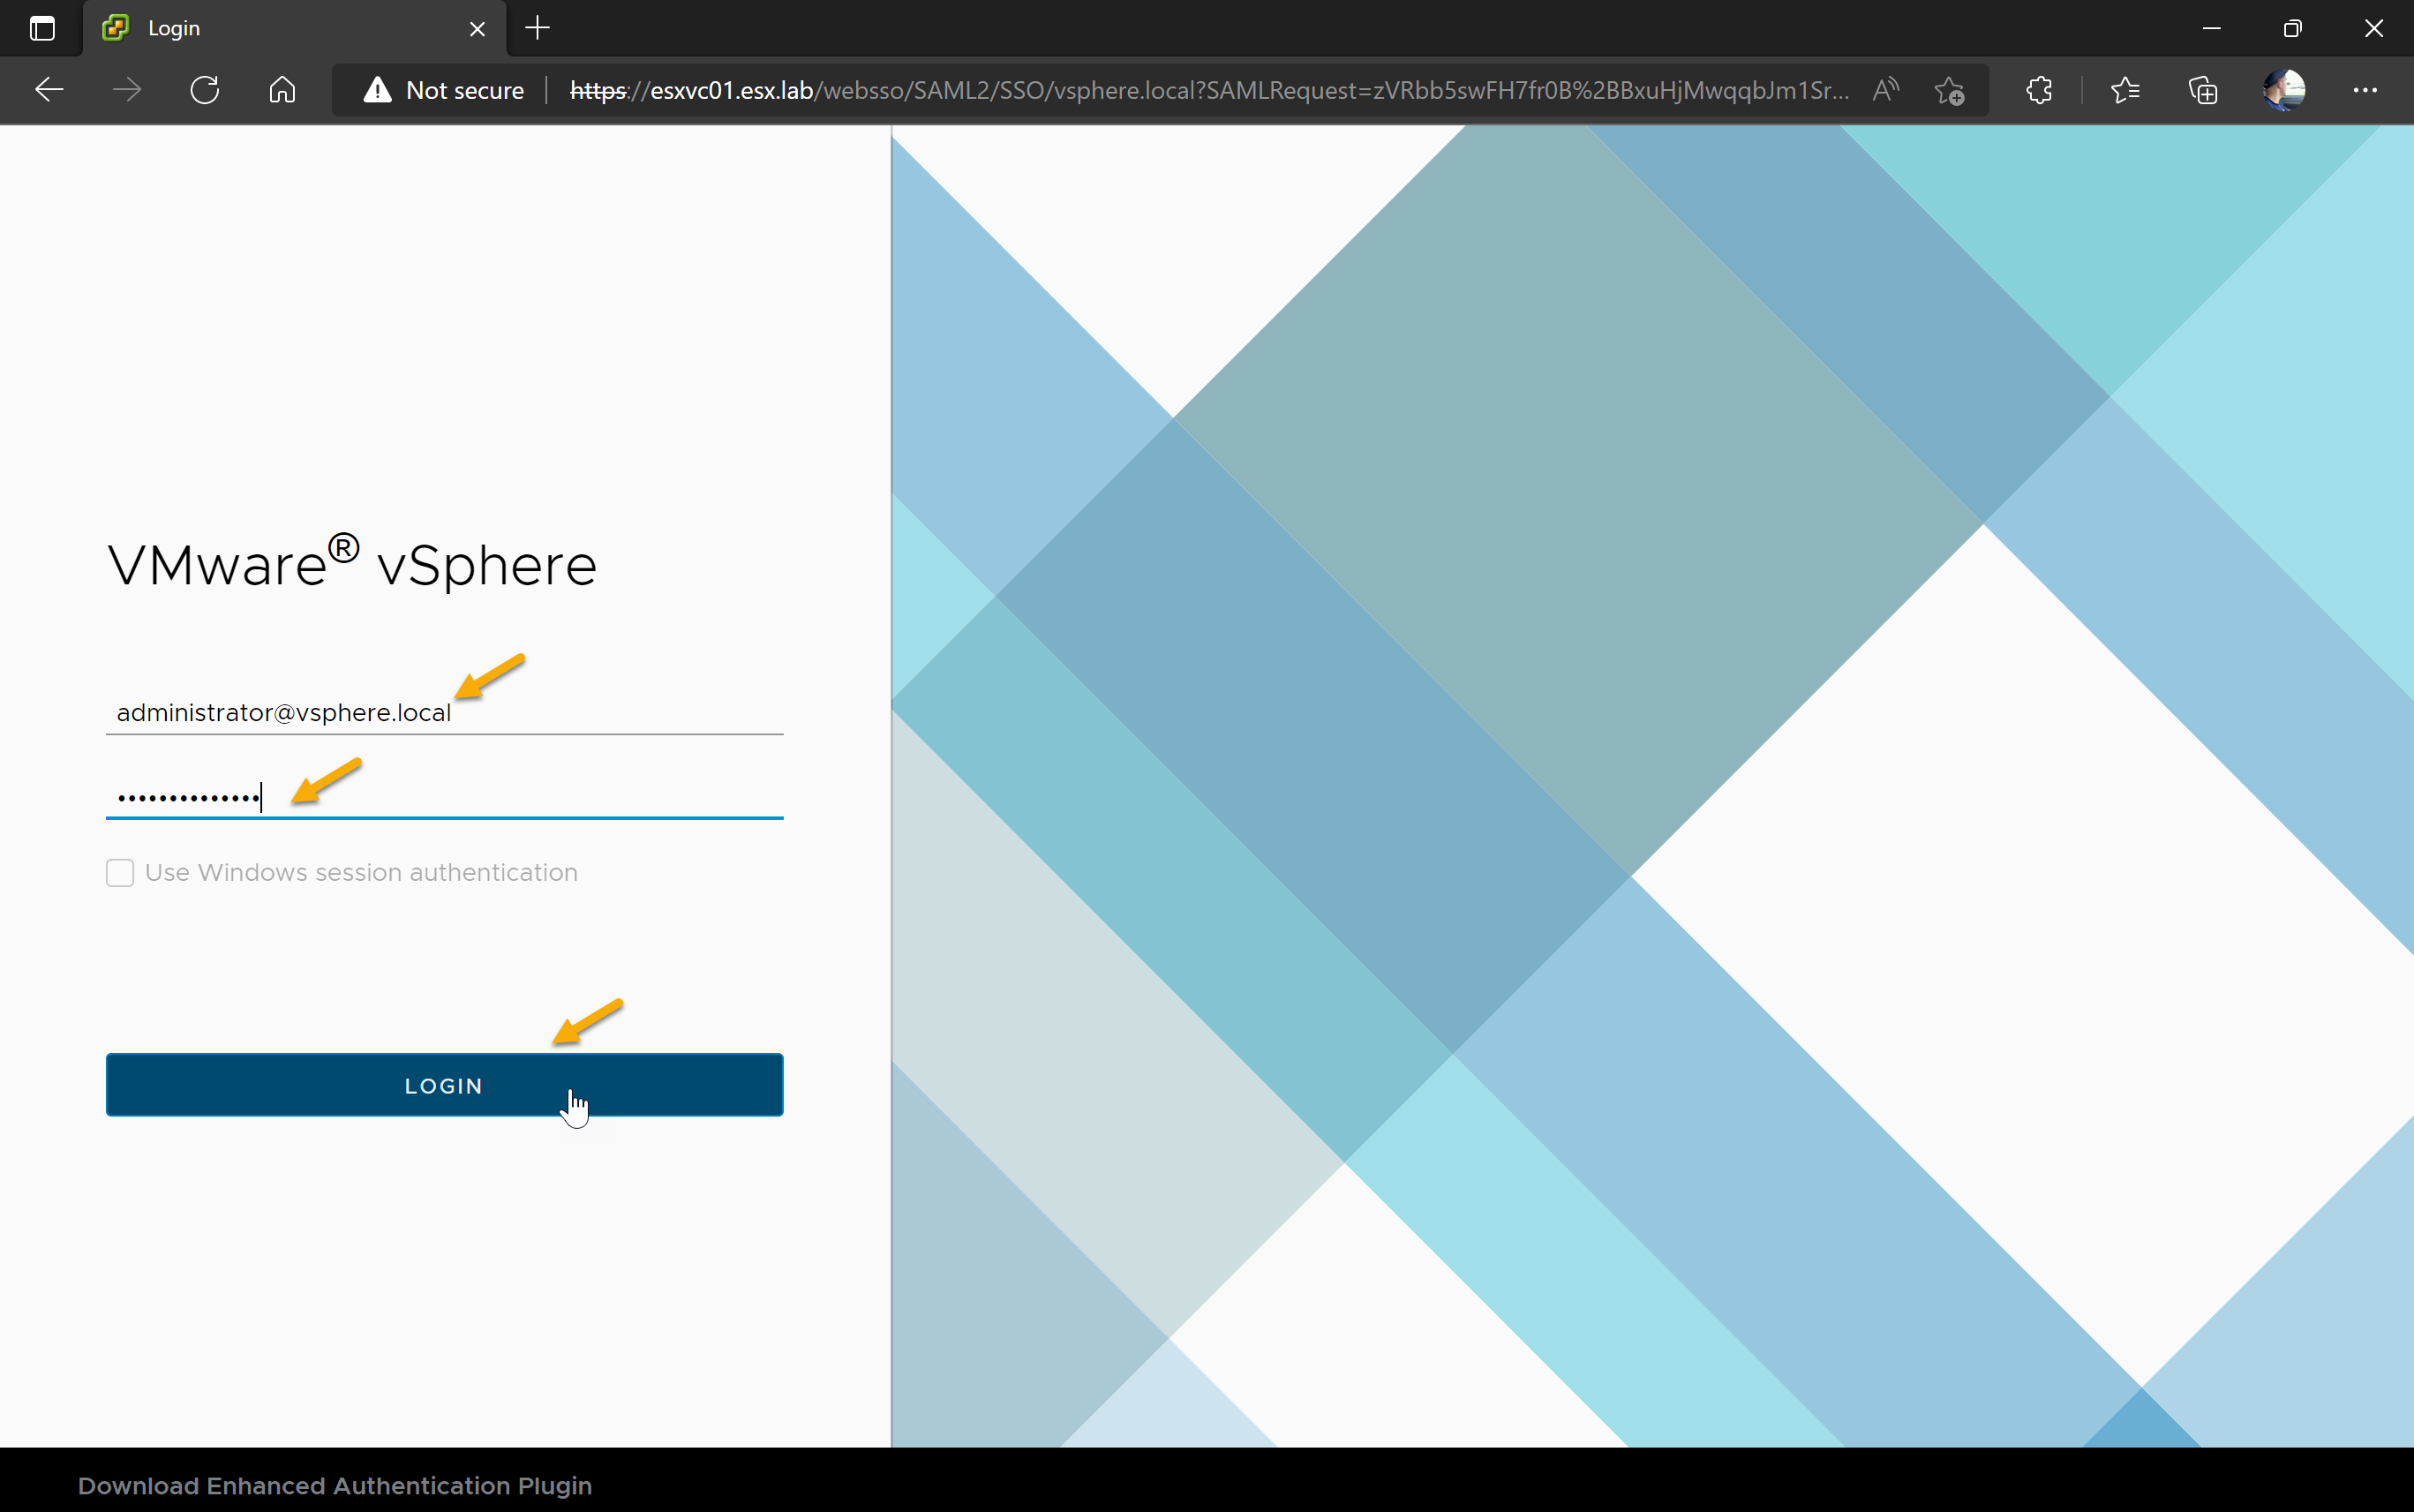
- Log into vSphere client using administrator@vsphere.local account.
- You have succesfully deployed the vCenter Server Appliance!
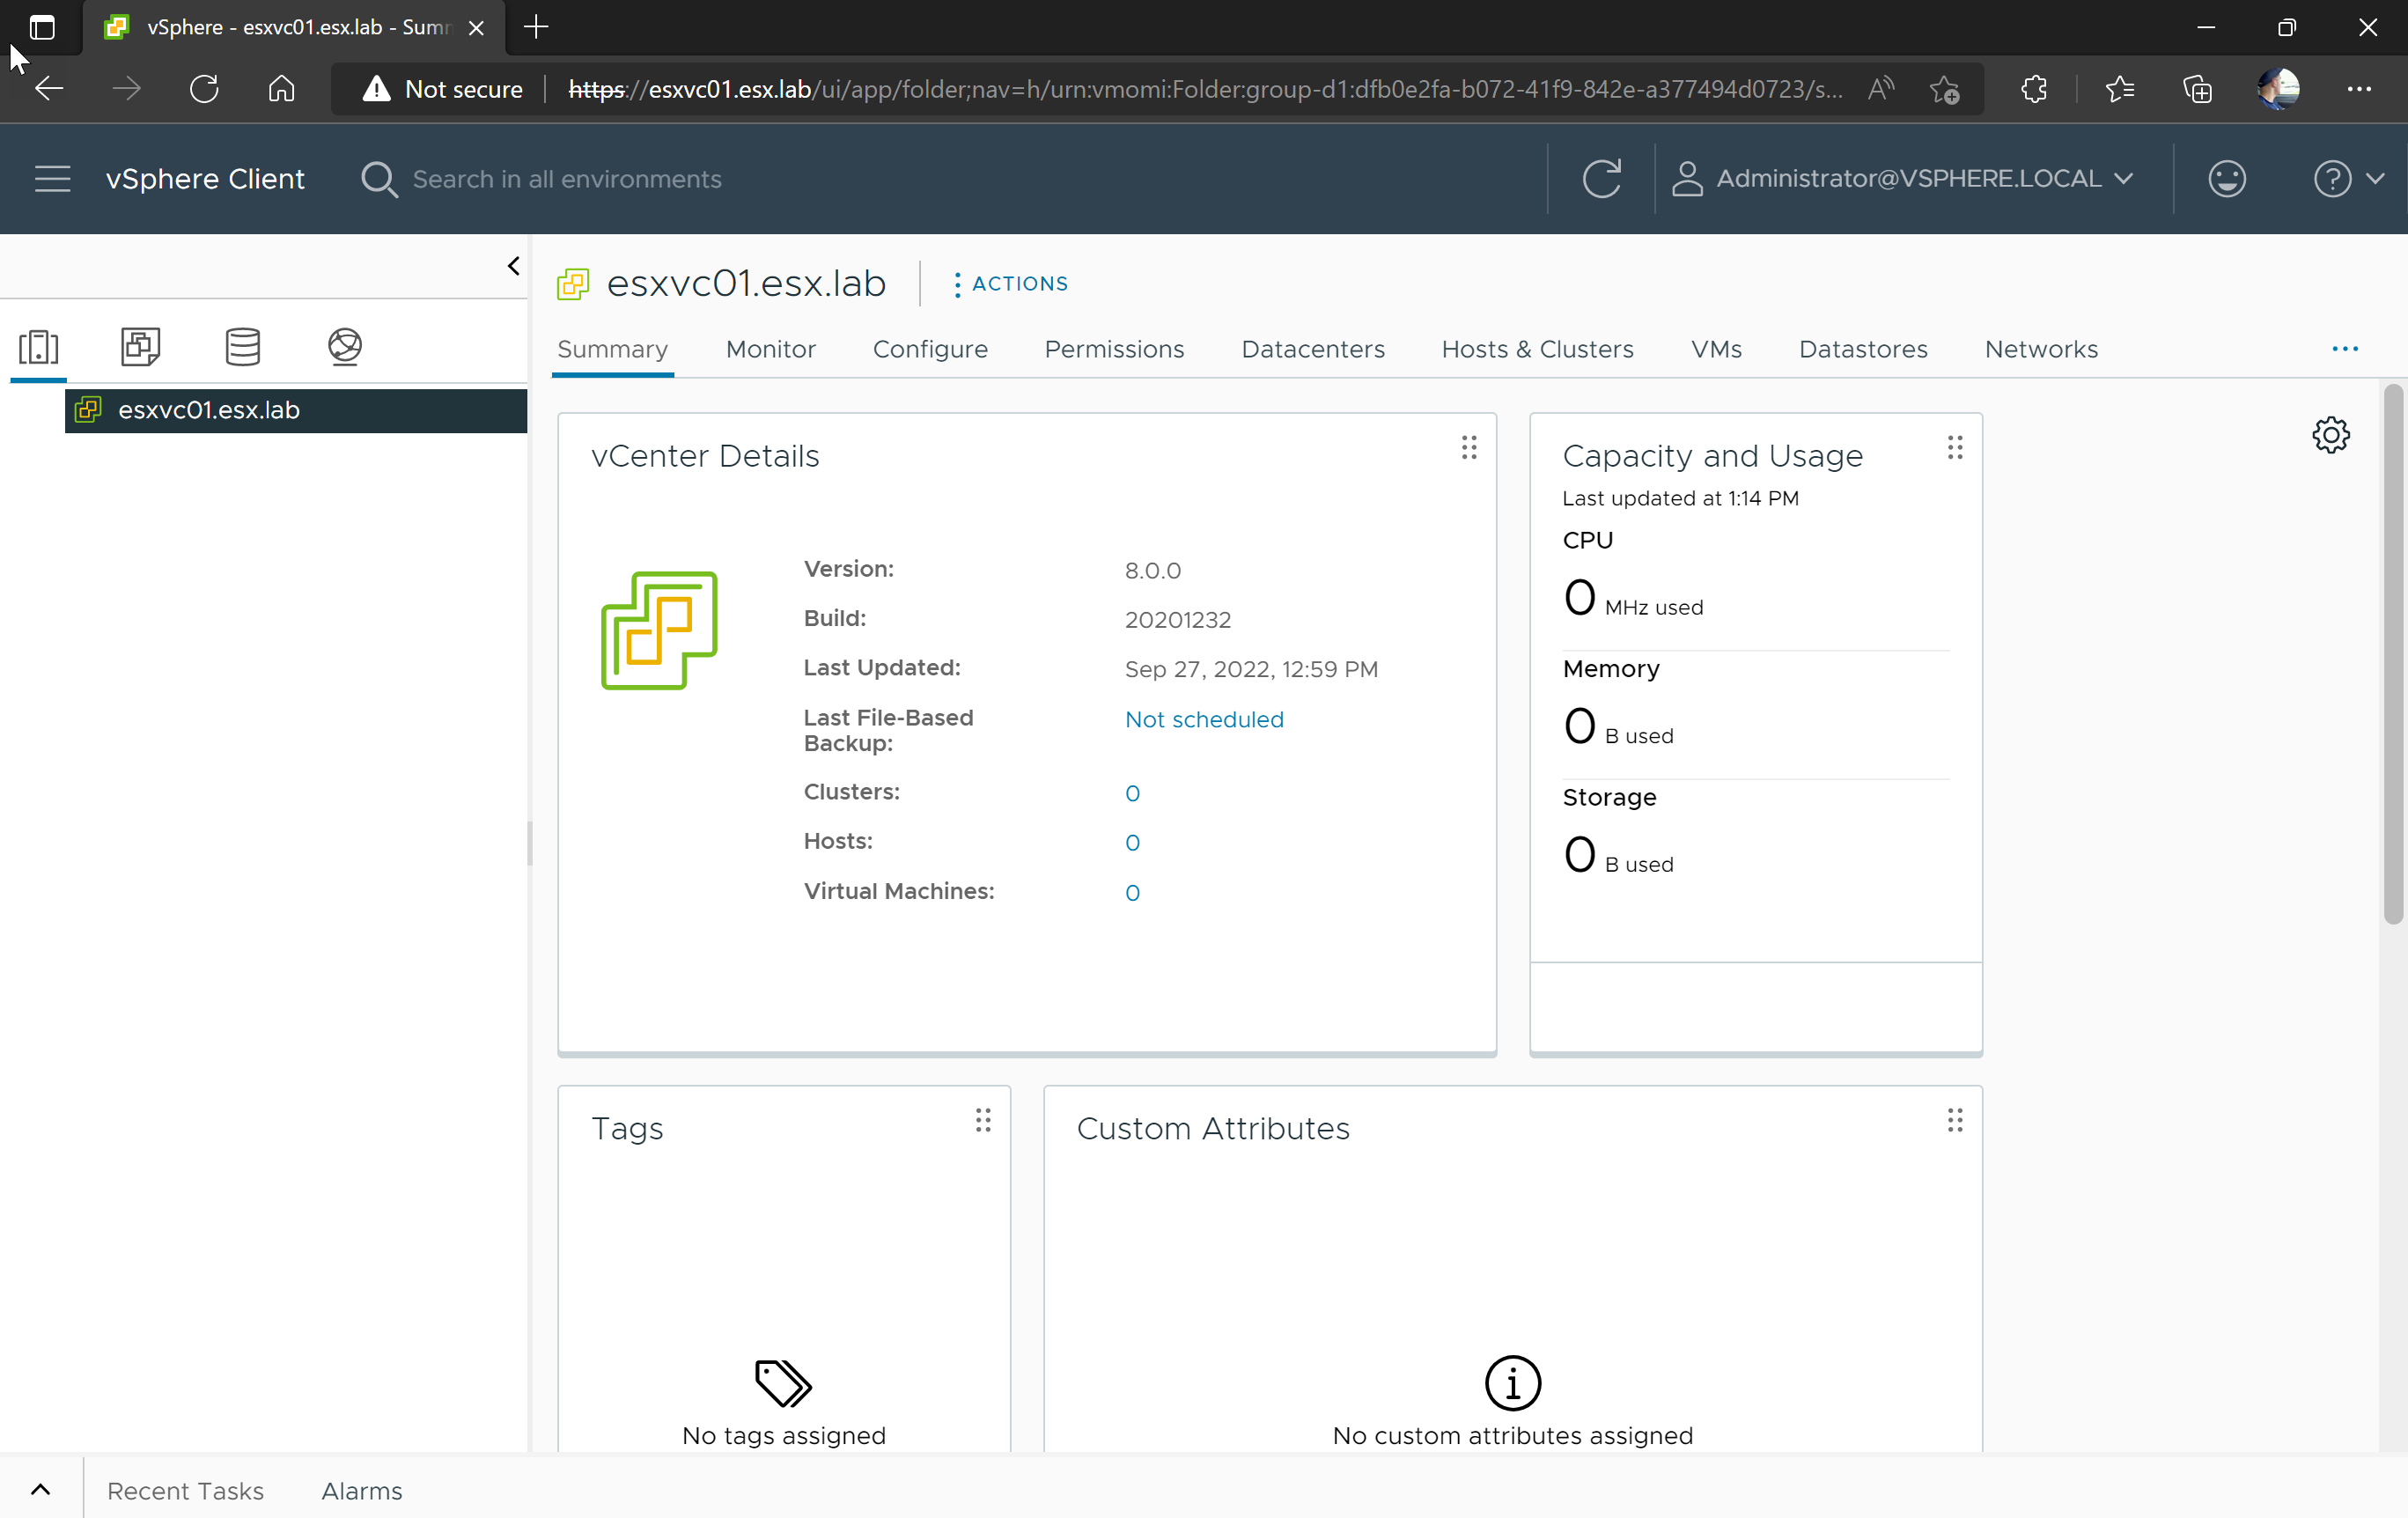
Whats next?
You can now start to add inventory items like a new datacenter, new cluster, add ESXi hosts, create a virtual machine, etc or start configuring the vCenter Server configuration like adding licenses, configure permissions, etc. Plese see VMware Docs After You Deploy the vCenter Server Appliance