VMware Cloud Foundation 4.2 LCM Manifest Not Found
The Problem: VCF version information call failed and LCM MANIFEST NOT FOUND
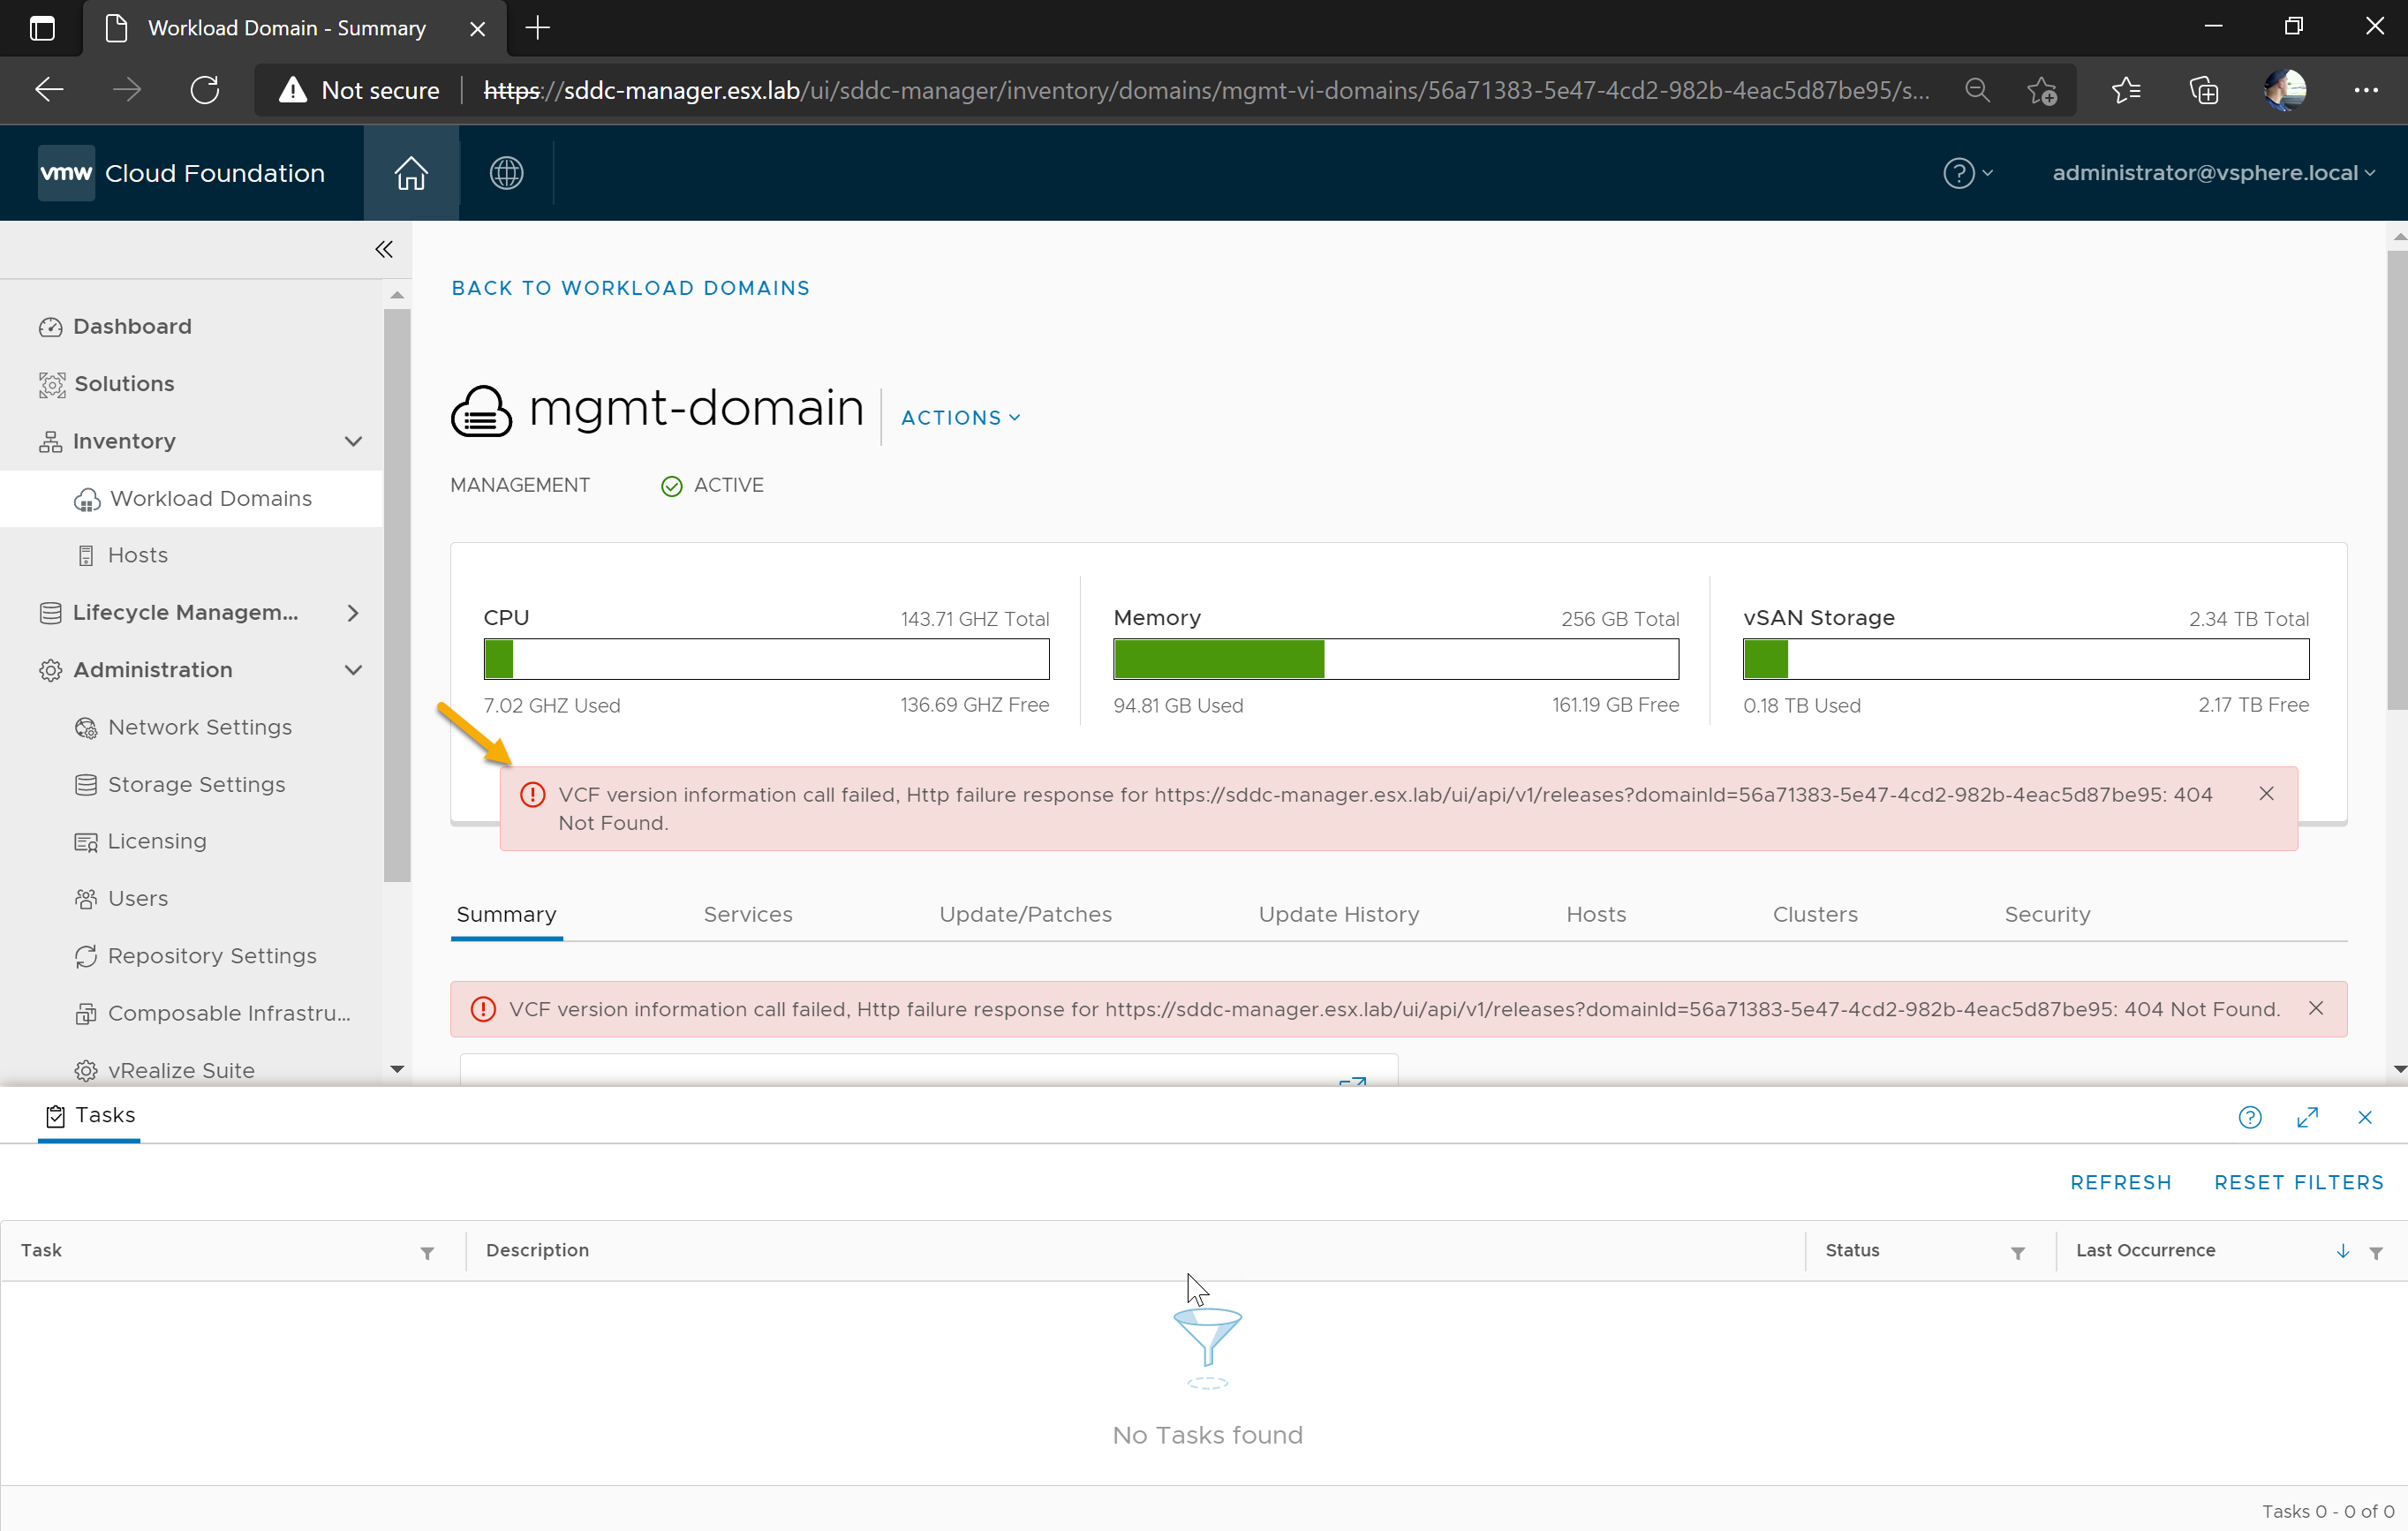
Recently I was assigined to a project within my company to deploy VMware Cloud Foundation 4.2 within one of our dark sites. After succesfully deploying and logging into SDDC manager for the first time. We were greeted with a red banner stating the following:
1VCF version information call failed. http failure for https://<sddc manager url>/ui/api/v1/release?domainid=56a7183-5e47-4cd2-982b-4ea5d87be95: 404 error not found
2
Going to the url in question showed “LCM MANIFEST NOT FOUND”. After digging through VCF 4.2 release notes we found “LCM MANIFEST NOT FOUND” under known issues. This error displays when manifest file is out of date or not present. The solution stated in the releaese notes is to download the latest manifest and upload it to SDDC Manager using the LCM tools.
I will be going over how to download and upload the latest LCM manifest into SDDC Manager.
Prerequisites
You will need the following before continuing:
- LCM tools (Bundle Transfer Utility) outside of your airgap enviroment. The LCM tools are included inside SDDC Manager.
- Note: Can be found under the “Drivers and Tools” from VMware Cloud Foundation download page.
- MyVMware account that has entitlement for VMware Cloud Foundation.
- A endpoint (Linux or Windows) that has internet connectivity.
- For this demo, I will be using a Windows 10 workstation.
- Java Runtime Environment Installed
- Can be downloaded here
- WinSCP Installed
- Can be downloaded here
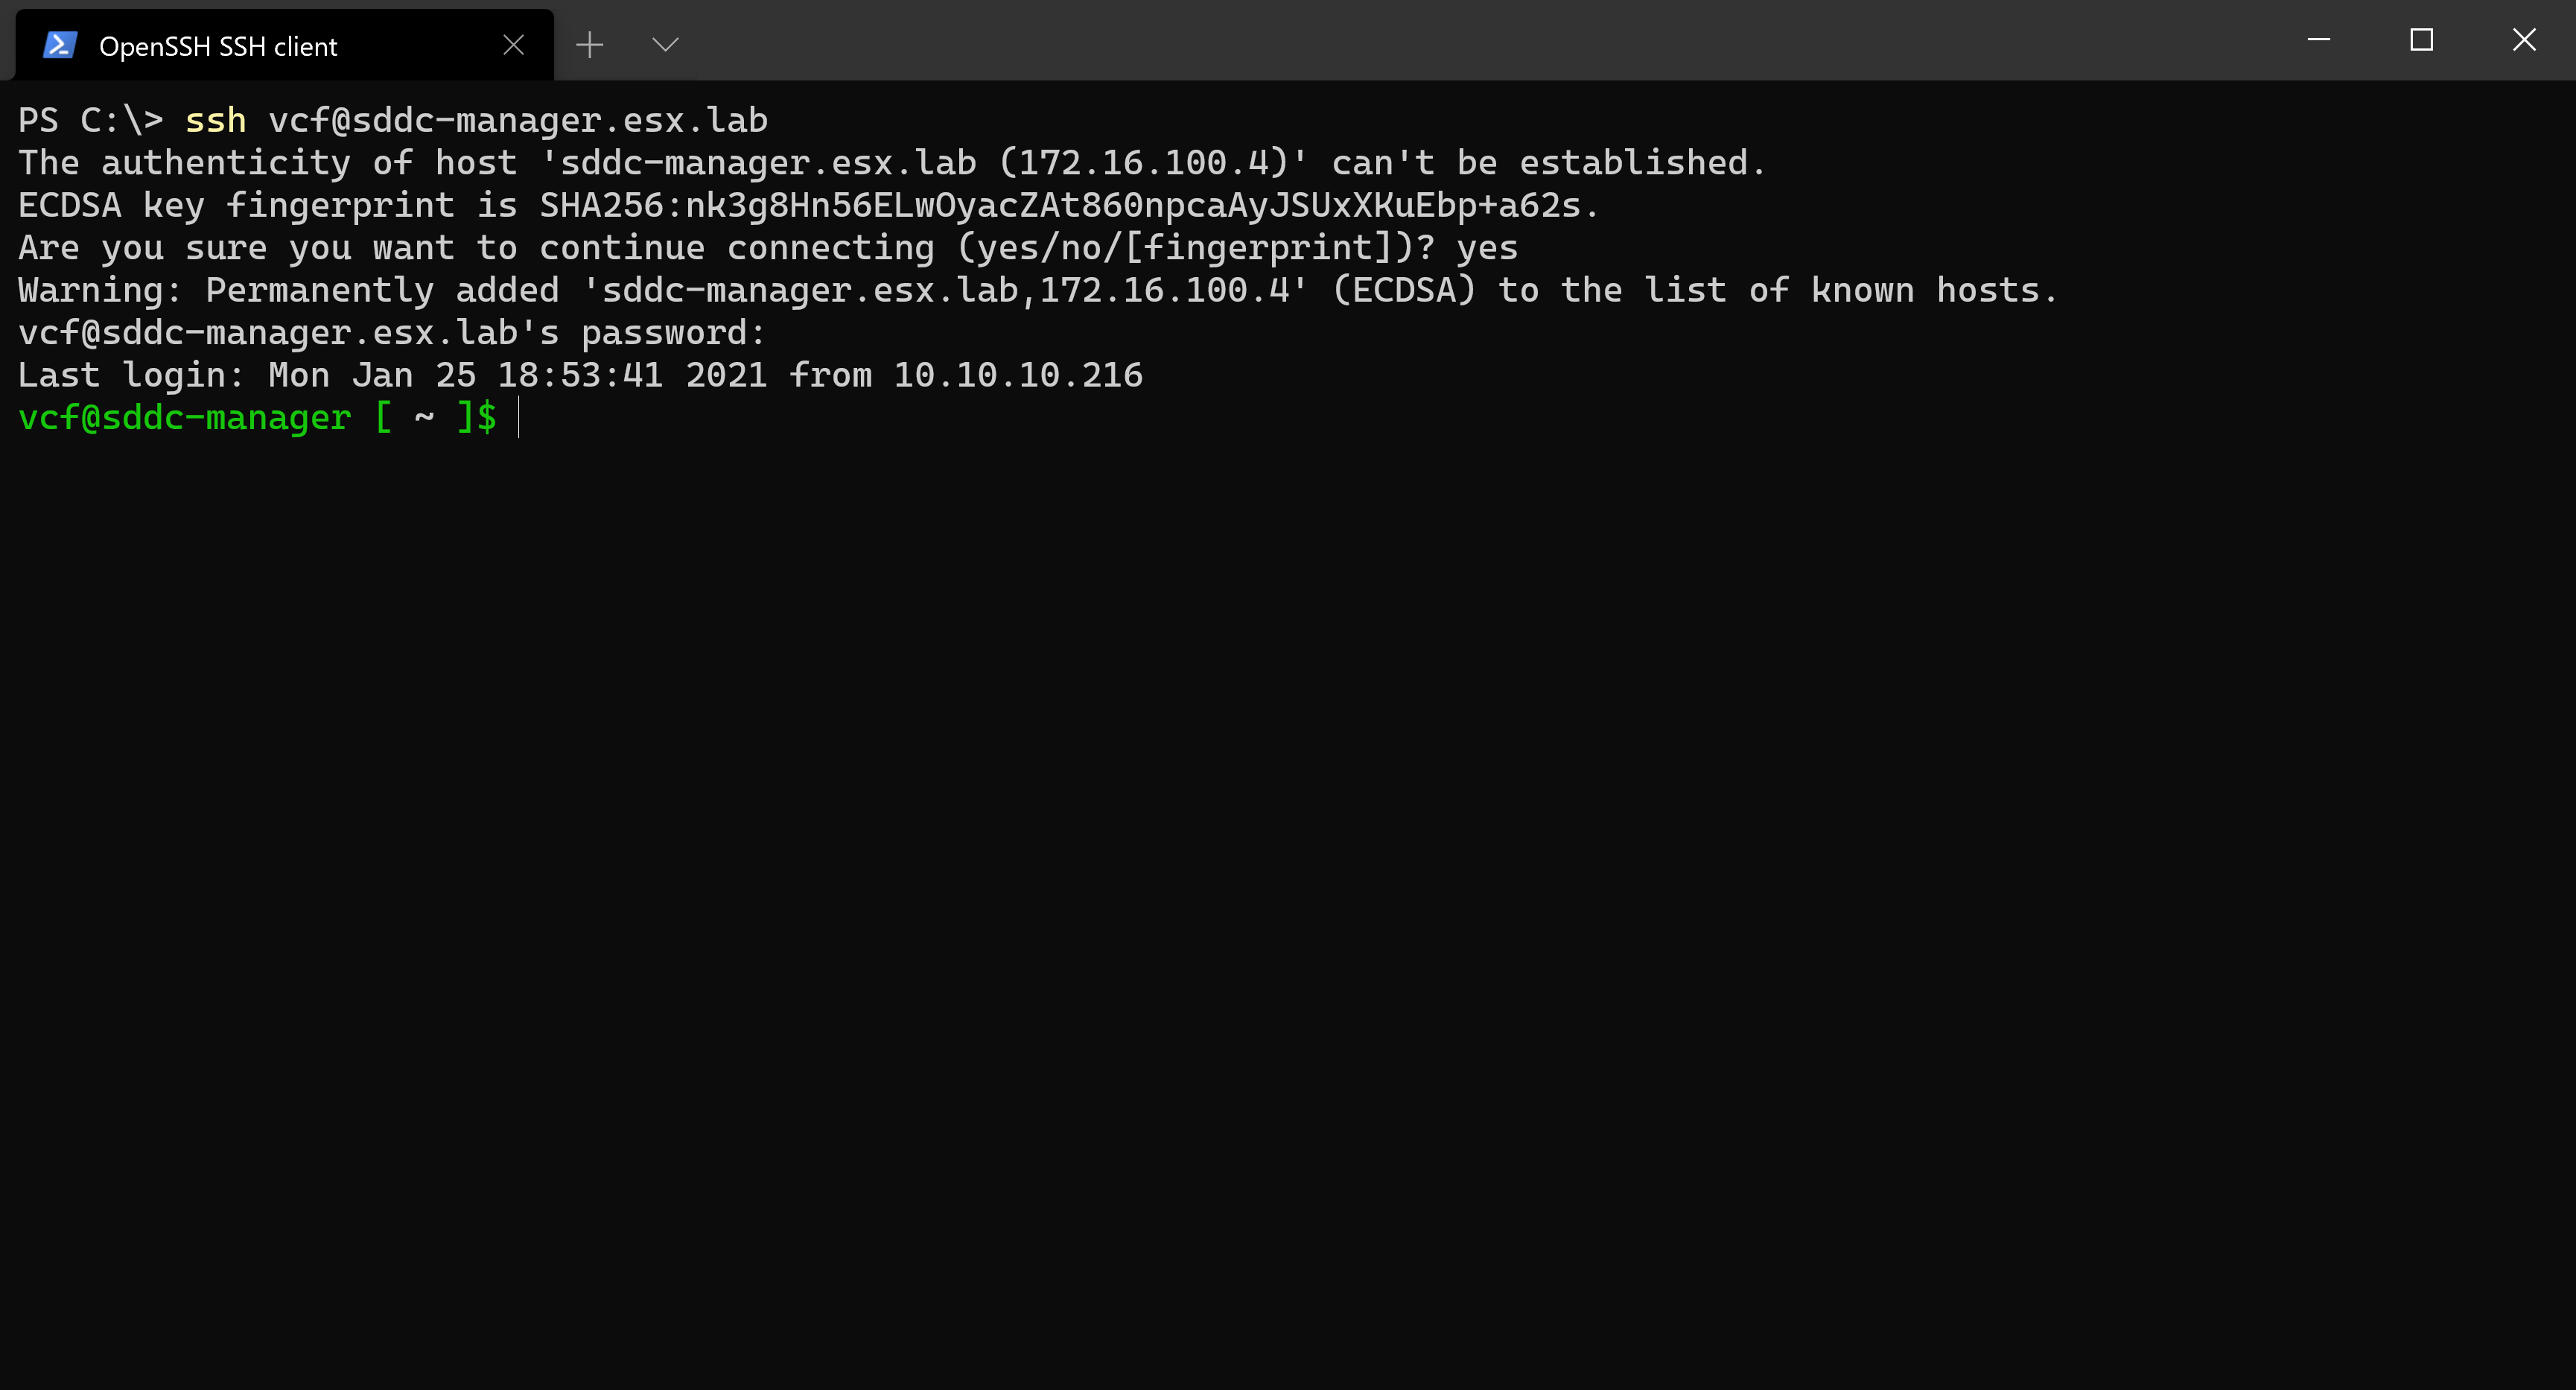
How to SSH into SDDC Manager
You can either use openSSH client that is now built into Windows 10 since build 1803 or Putty
- Use the user name “vcf” and password
How to download and import the LCM manifest into SDDC Manager
1. Obtian the LCM Tools
There are two methods for obtaining the LCM tools:
-
Download the LCM Tools from MyVMware. This can be found under the “Drivers and Tools” from VMware Cloud Foundation download page.
-
Copy the LCM tool from the internal SDDC Manager VM to the external workstation with Interent Connectivity.
1Note: You can skip the section below if you choose to download the LCM tools from MyVMware.
2
Copy the LCM tool from the internal SDDC Manager VM to the external workstation with Interent Connectivity.
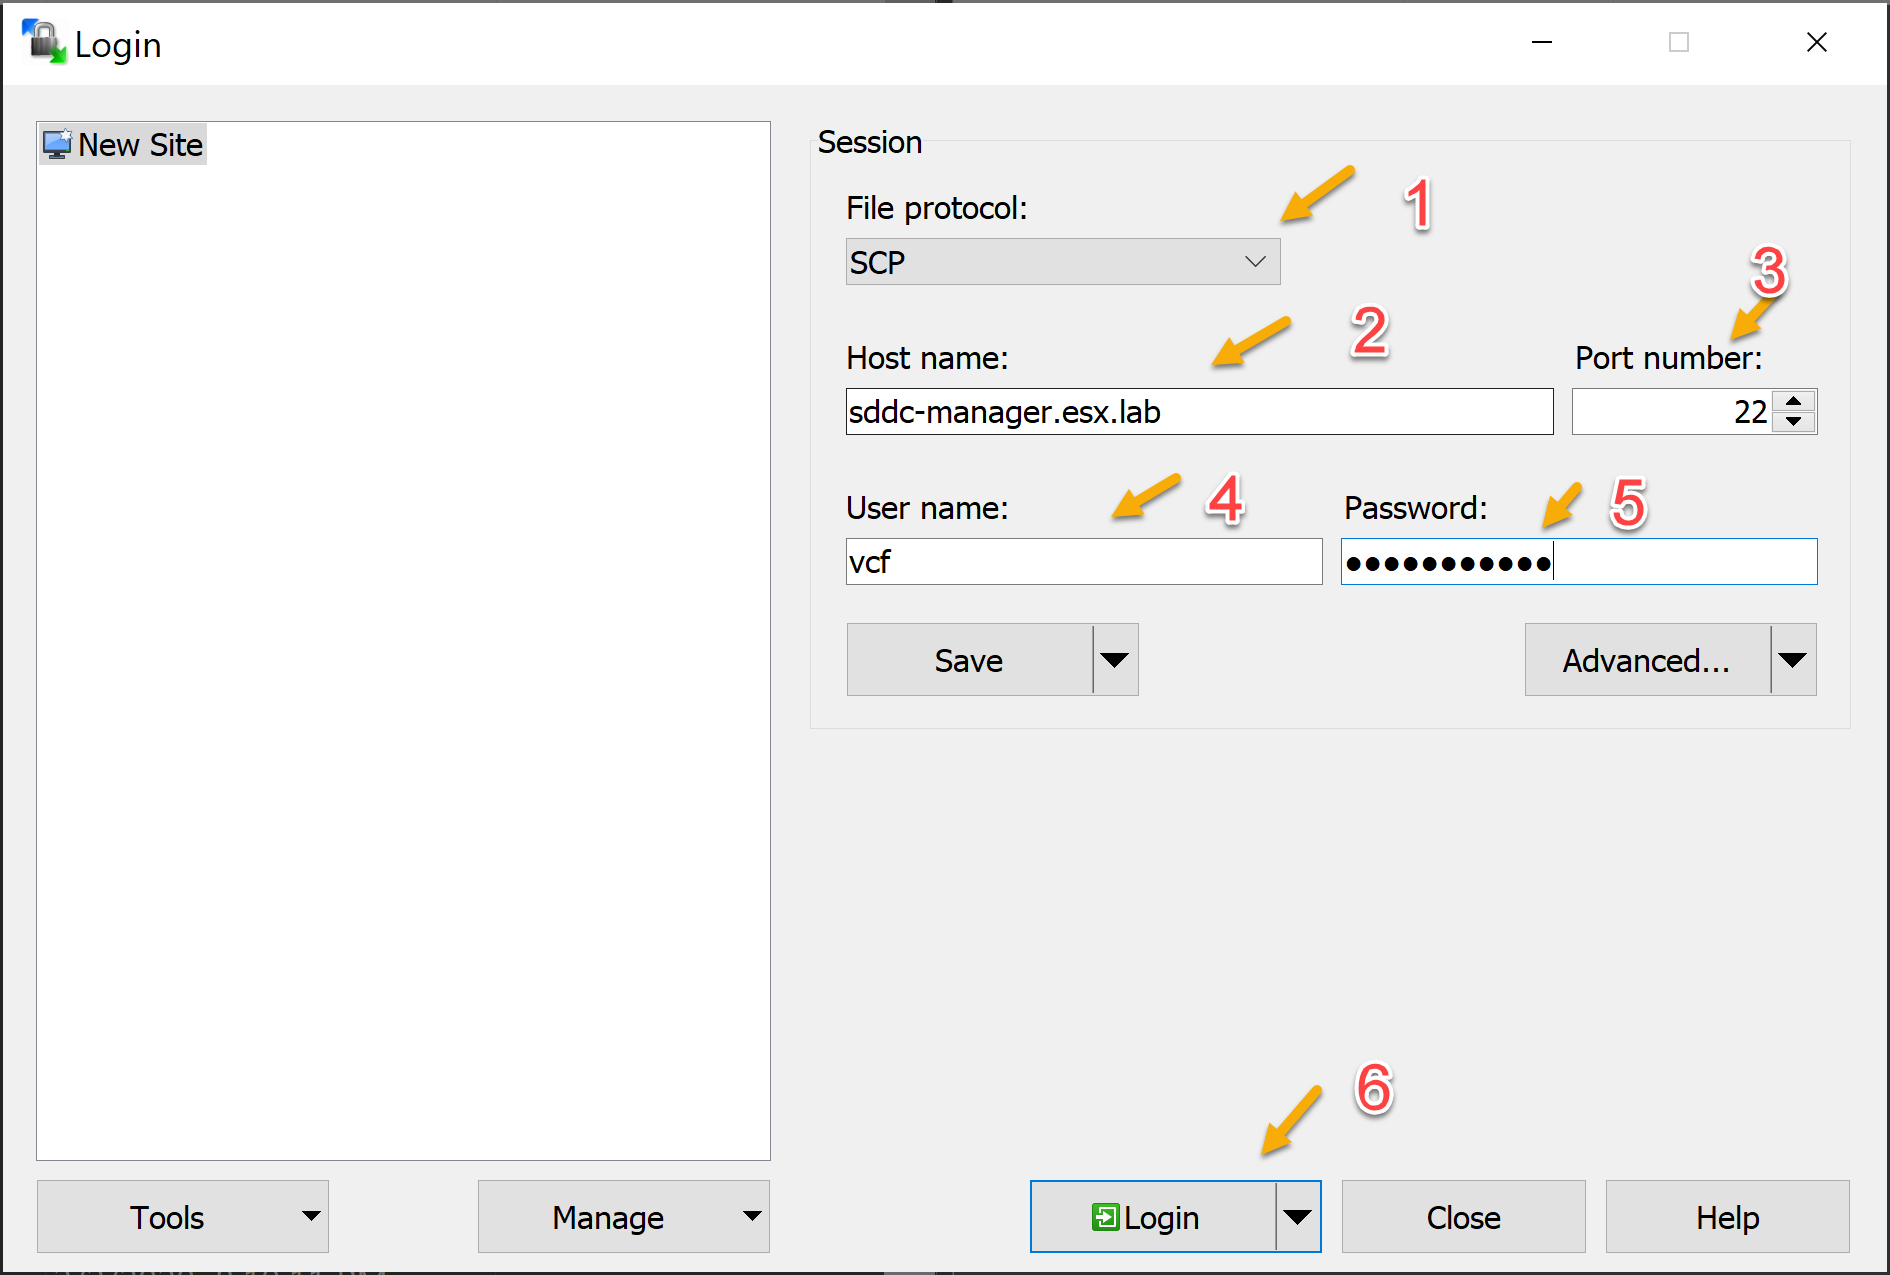
Connect to the SDDC Manager using WinSCP
- Open WinSCP
- Set file protocol to “SCP”
- Provide the Hostname or IP to your SDDC Manager (example, sddc-manager.esx.lab)
- Port Number should be 22
- Username should be “vcf”
- Enter the password for “vcf” and press login
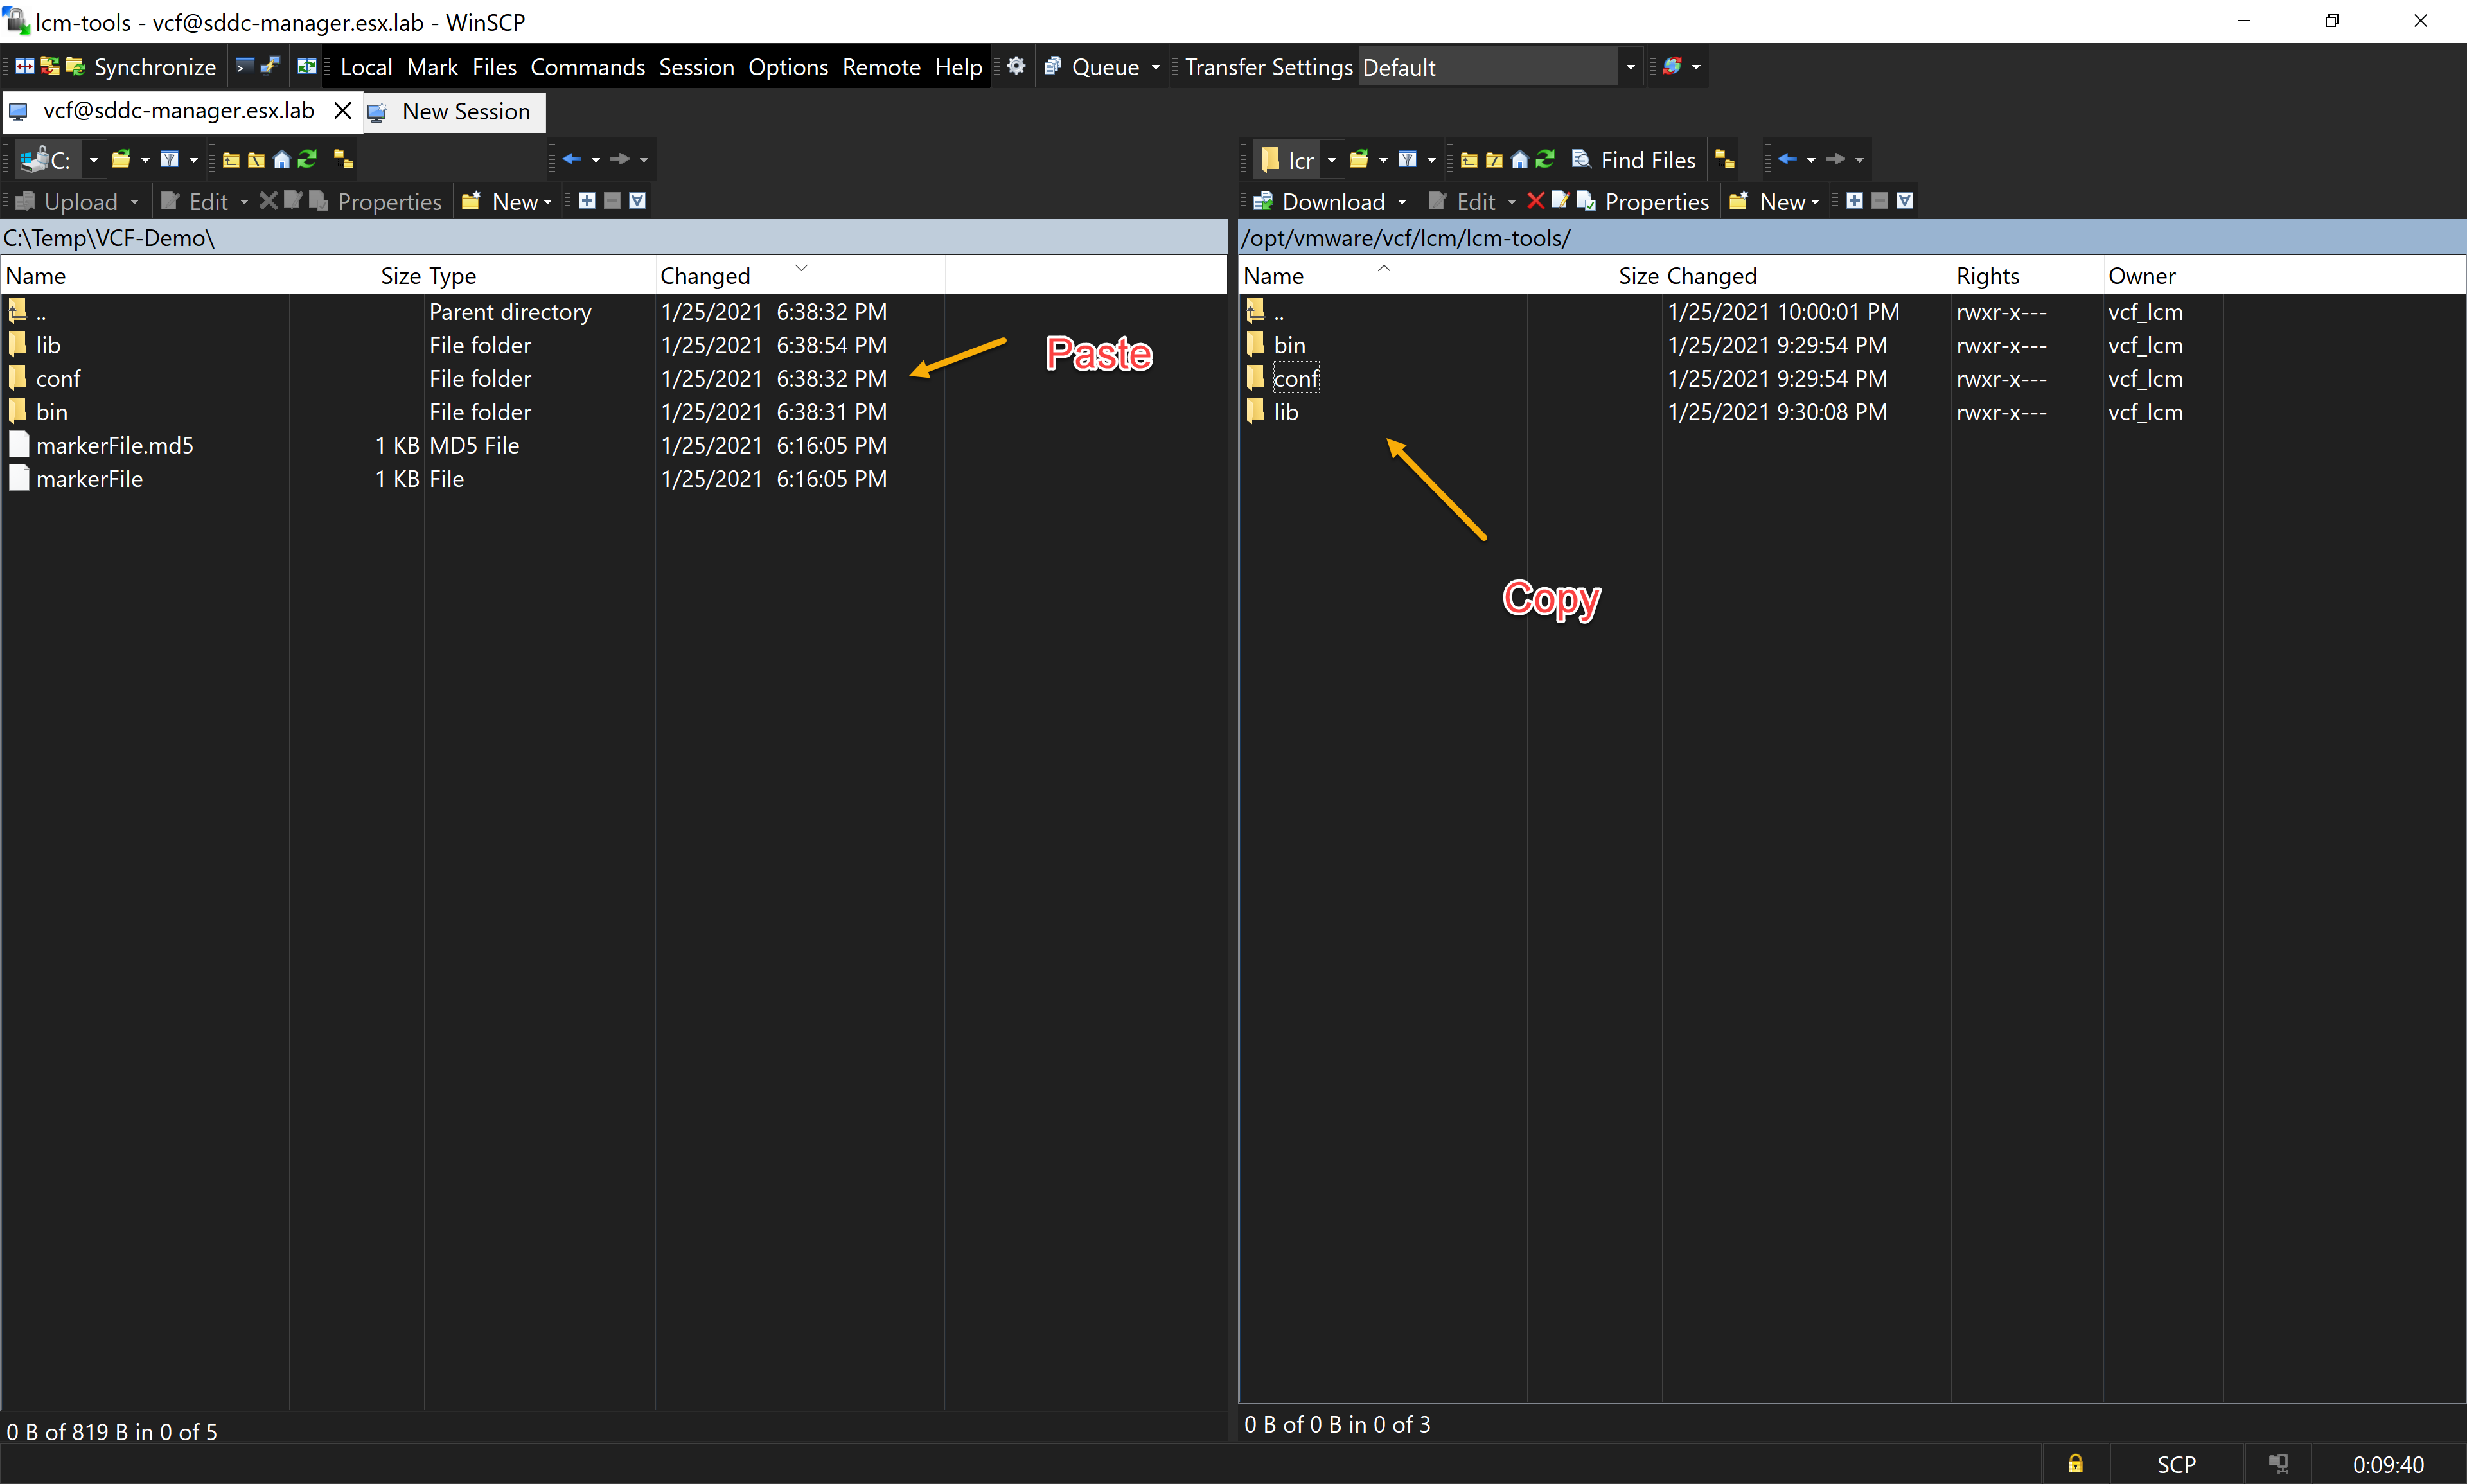
Copy LCM tools from the internal SDDC Manager to workstation.
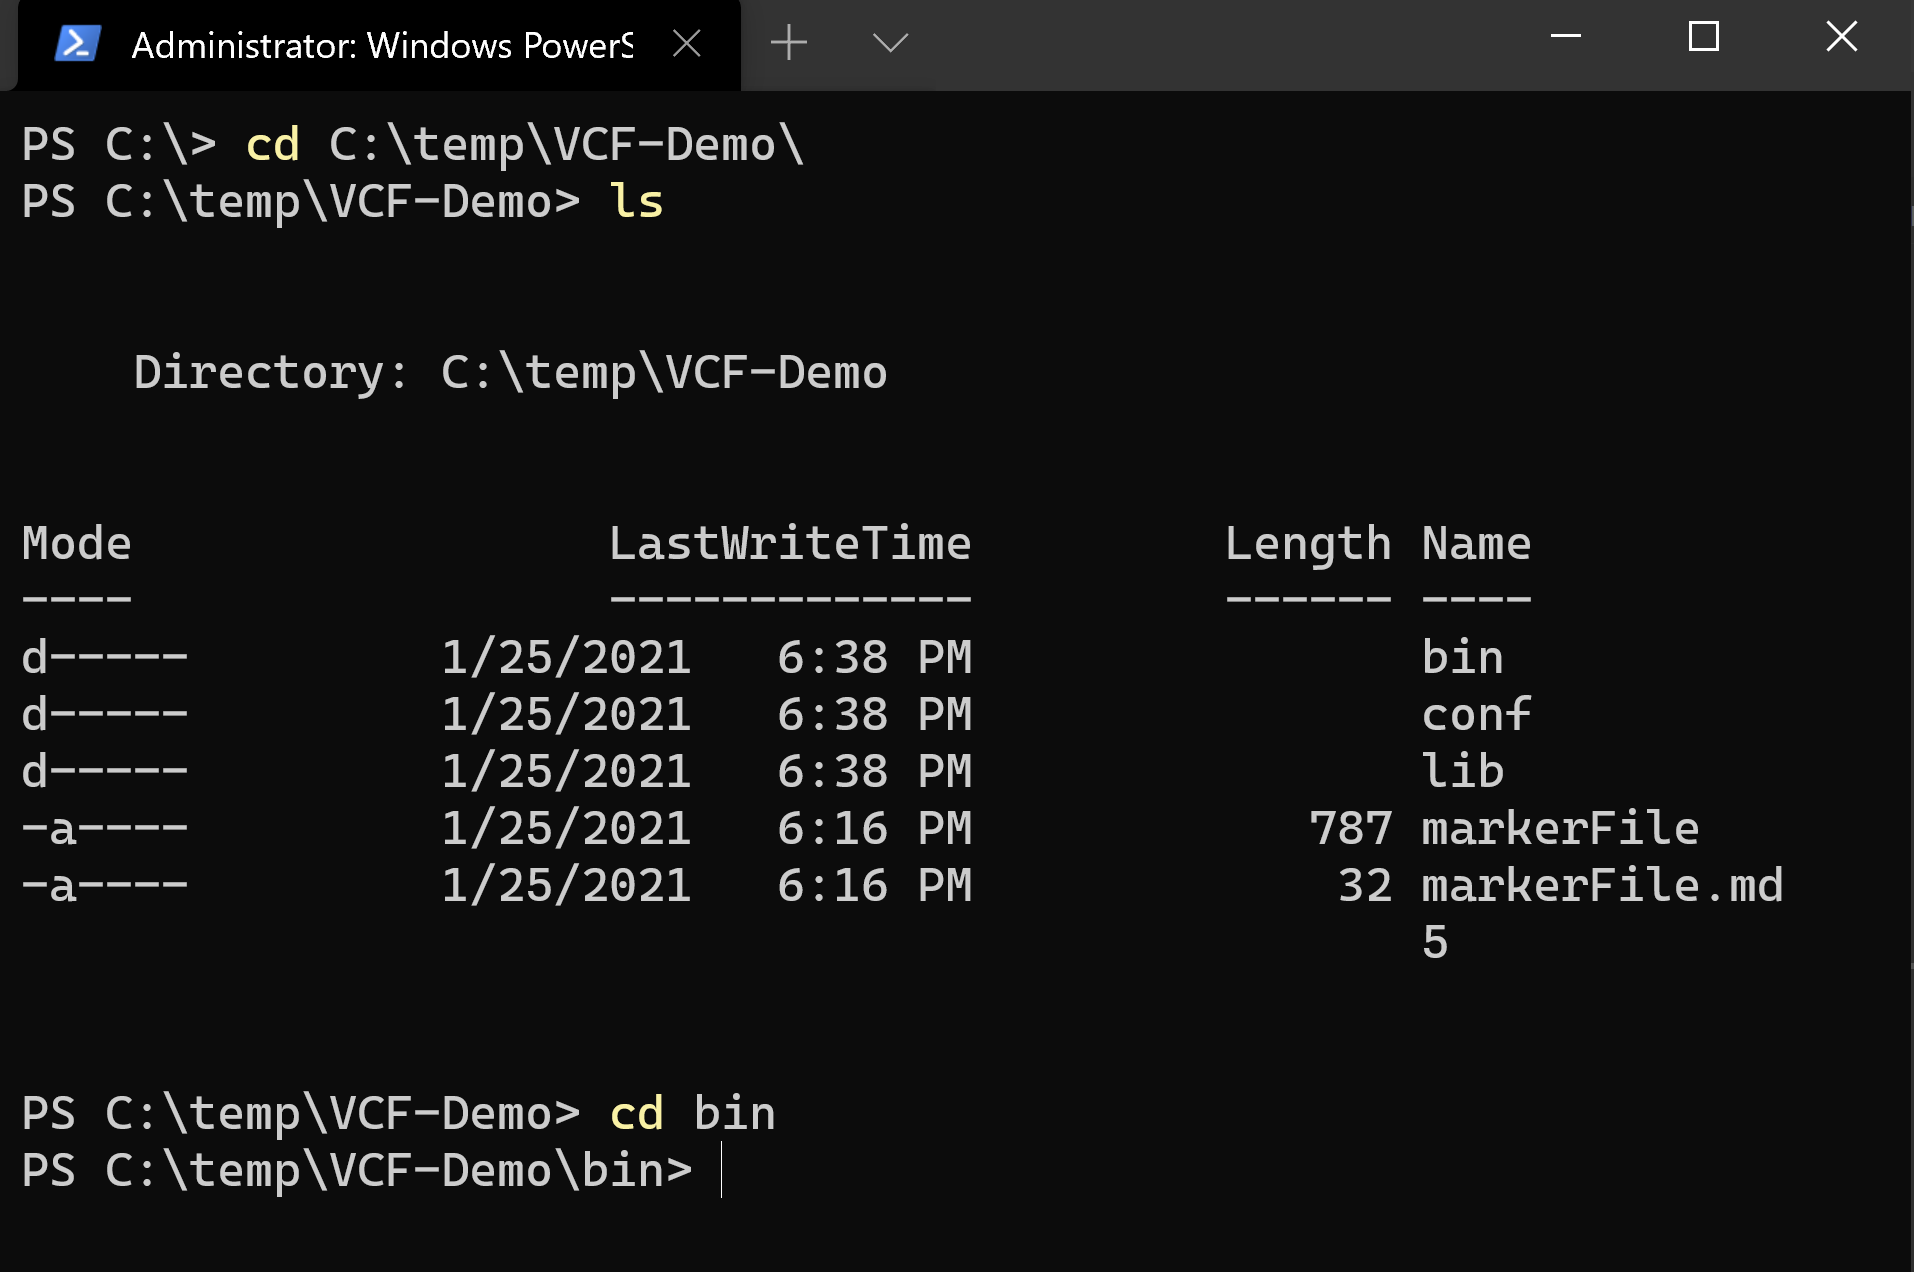
- Change directory in WinSCP
1cd /opt/vmware/vcf/lcm/lcm-tools/
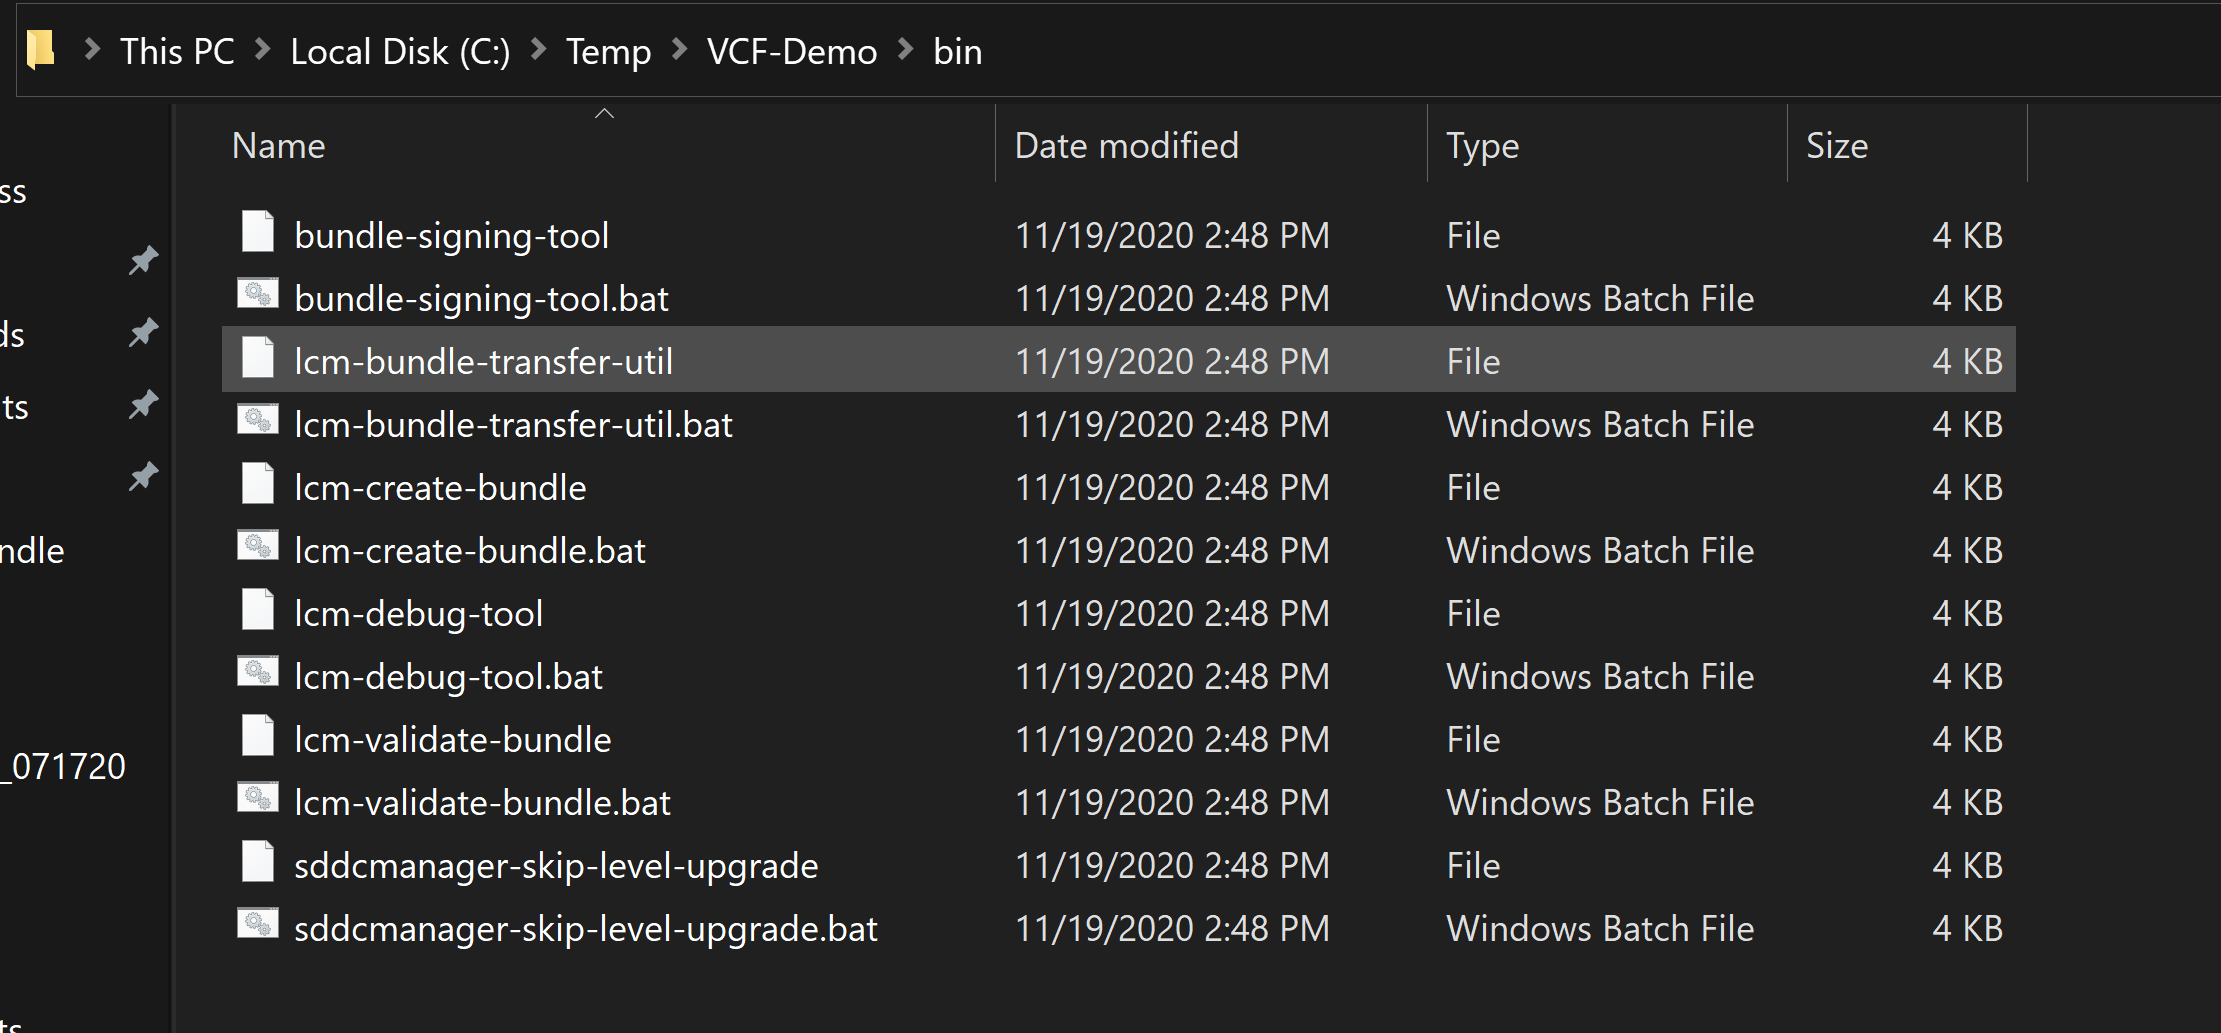
- Copy the following folders to the same directory you copied the markerfile. * bin * conf * lib
Verify the contents of the directory
 1 ├── bin
 2 	├── bundle-signing-tool
 3 	├── bundle-signing-tool.bat
 4 	├── lcm-bundle-transfer-util
 5 	├── lcm-bundle-transfer-util.bat
 6 	├── lcm-create-bundle
 7 	├── lcm-create-bundle.bat
 8 	├── lcm-debug-tool
 9 	├── lcm-debug-tool.bat
10 	├── lcm-validate-bundle
11 	├── lcm-validate-bundle.bats
12 	├── sddcmanager-skip-level-upgrade
13 	├── sddcmanager-skip-level-upgrade.bat
14├── conf
15        ├── skiplevelupgrade
16 	├── telemetry
17 	├── application-prod.properties
18 	├── application-skiplevelupgrade.properties
19 	├── feature.properties
20 	├── logback-prod.xml
21 	├── logback-skiplevelupgrade.xml
22 	├── logback.xml
23 	├── README.txt
24 ├──  lib
25        ├── *.jar files
Copy the contents of the directory you created on the internal workstation to the external workstation with internet connectivity.
For this demo, we are going to assume I have already copied the LCM tools outside of the dark site environment.
2. Downloading Maninfest on the interent connected workstation
This part will require a MyVMware account that has entitlement for VMware Cloud Foundation.
-
On the workstation with interent access. Run Powershell or Command Prompt as administrator.
-
Chanage directory to the folder where the LCM tools are extacted.
-
Change directory to the “bin” folder
-
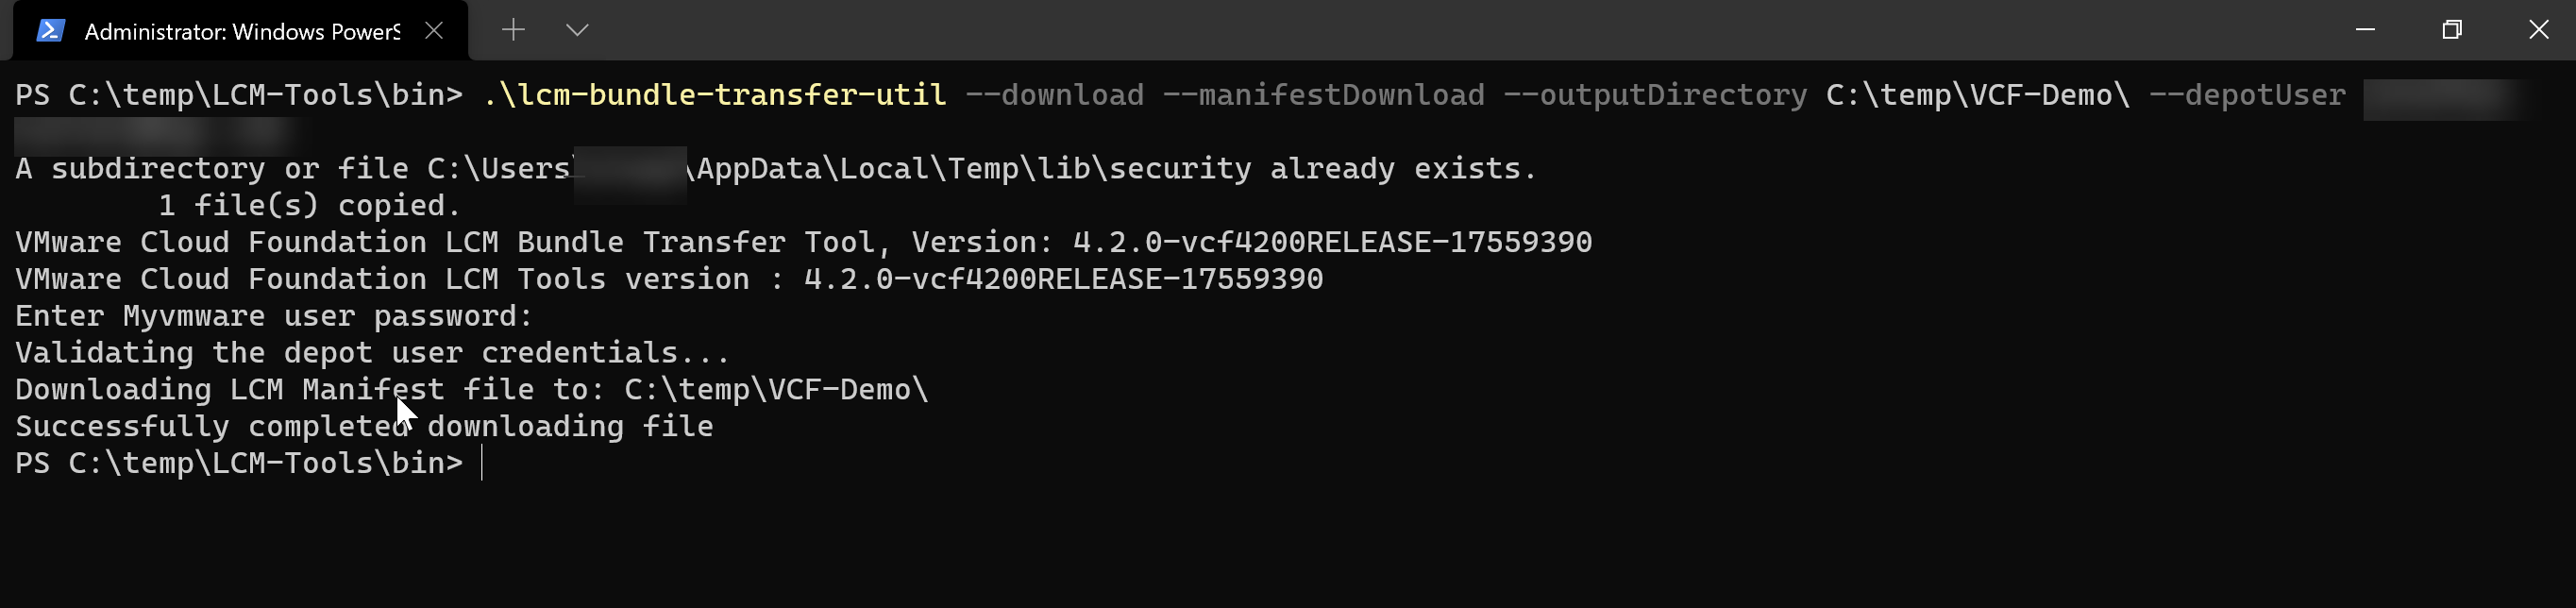
Type the following command: (Note it is case sensitive!)
1.\lcm-bundle-transfer-util --download --manifestDownload --outputDirectory C:\temp\VCF-Demo\ --depotUser 'MyVMware Account'
2
- Type in your MyVMware password
- The tool should start downloading the manifest file needed
- You should see the following output after the download has completed.
3. Uploading the manfiest file to the SDDC Manager VM
For this demo, we are going to assume I have already copied the update bundle back into dark site environment.
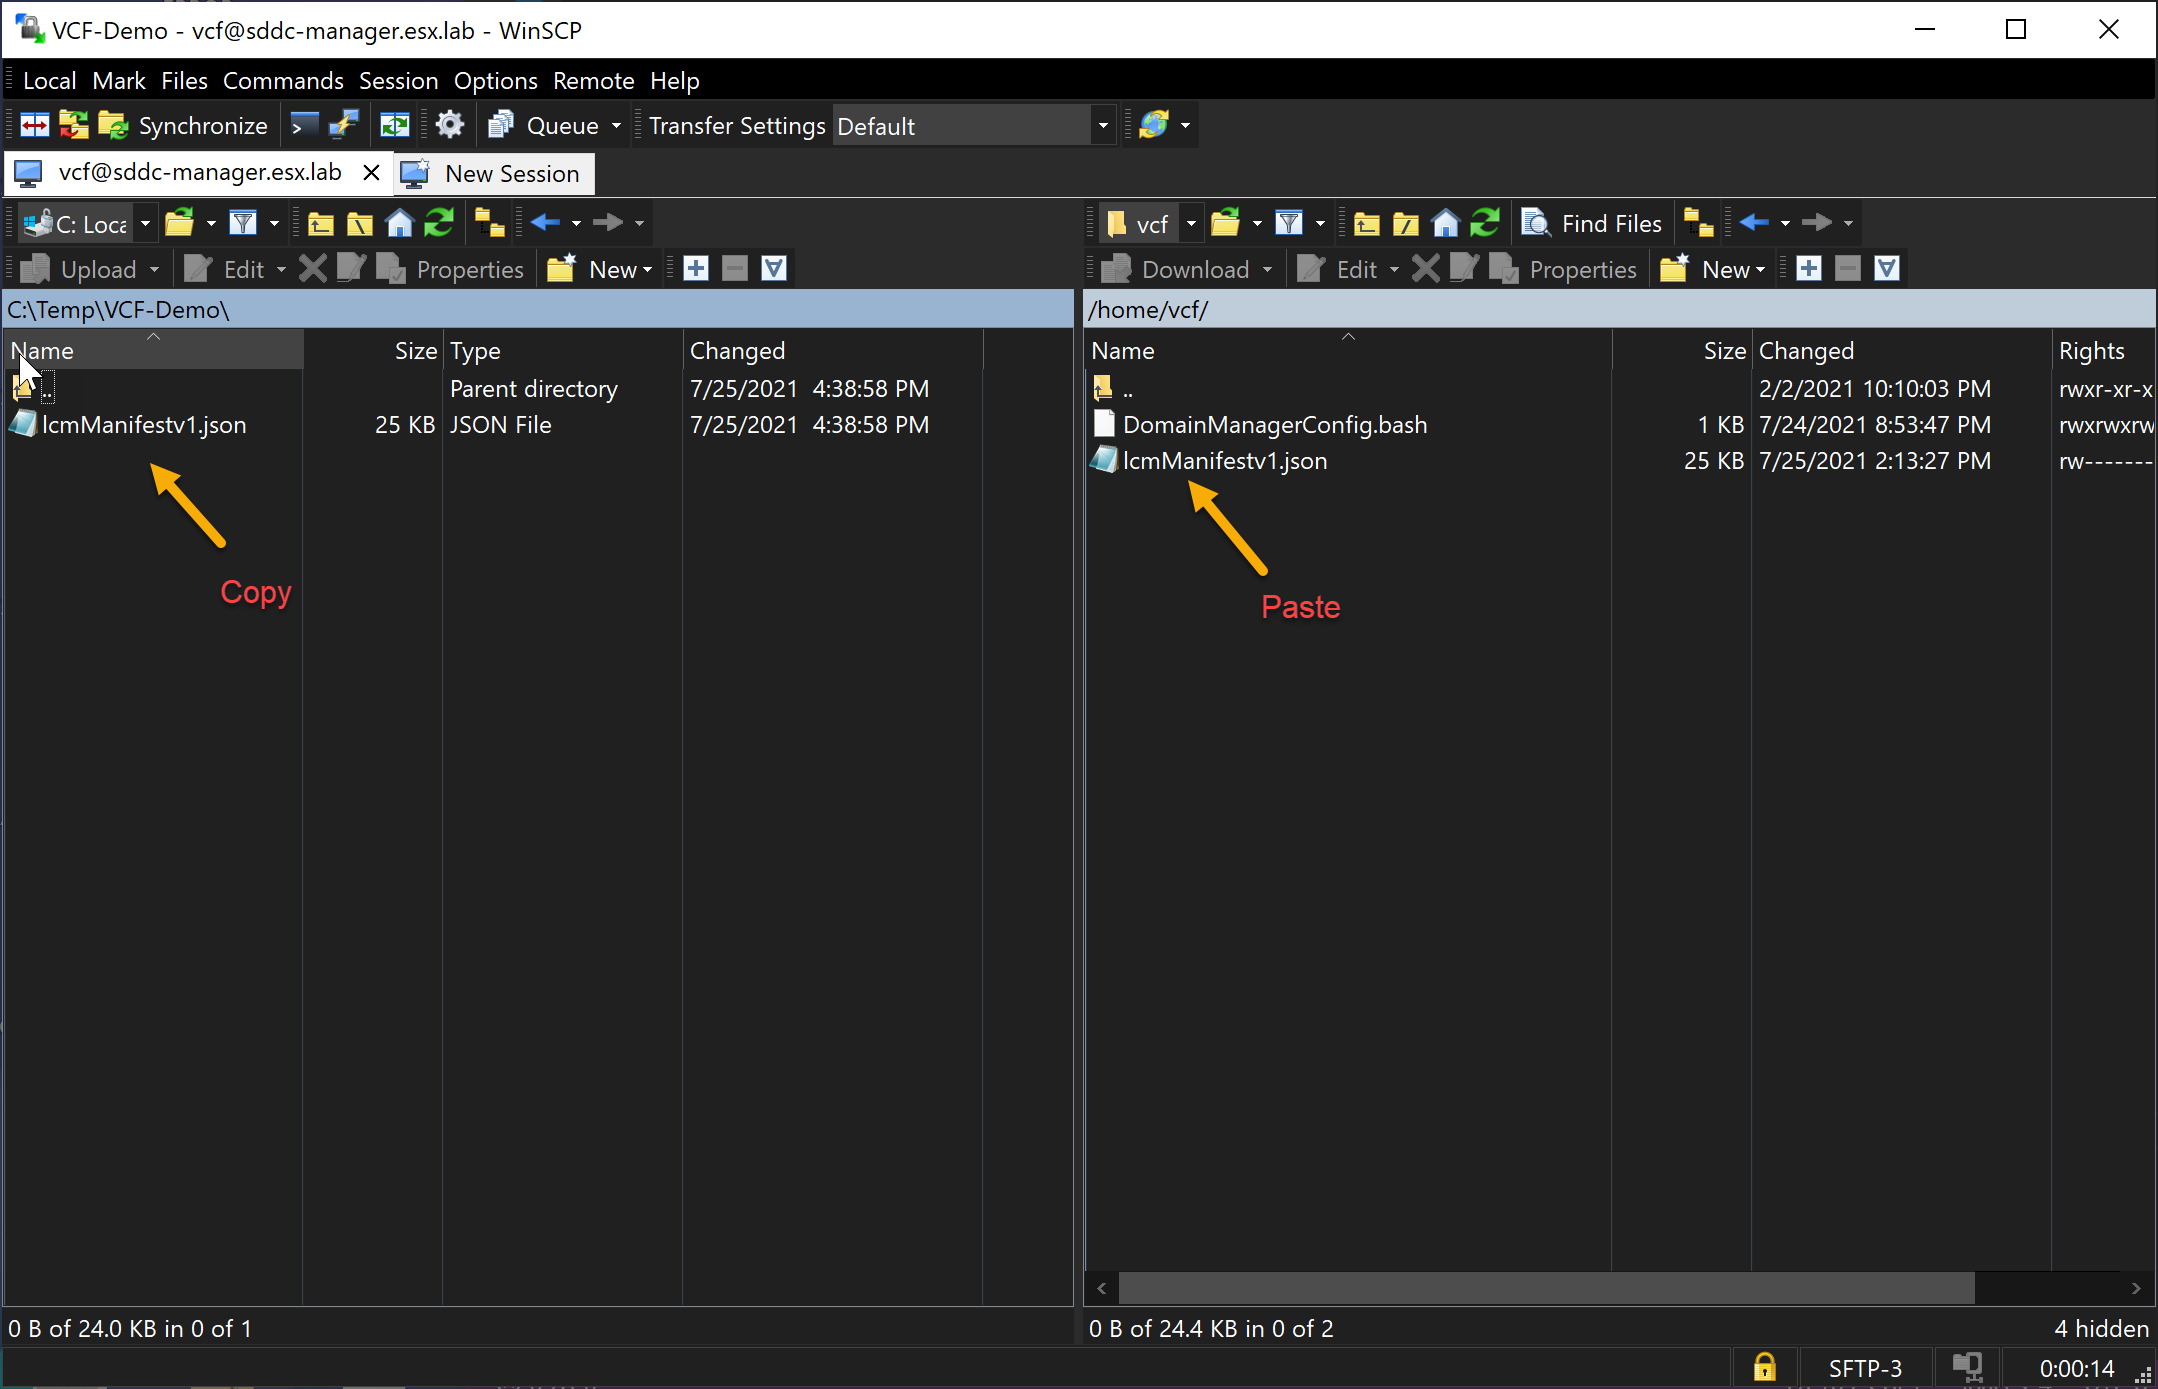
- Open WinSCP and connect to the SDDC Manager VM
- Change directory in WinSCP
1/home/vcf
- Copy the manifest file you downloaded into a directory (Ex. /home/vcf/) on the SDDC Manager
1 lcmManifestv1.json
2
4. Importing the manifest file
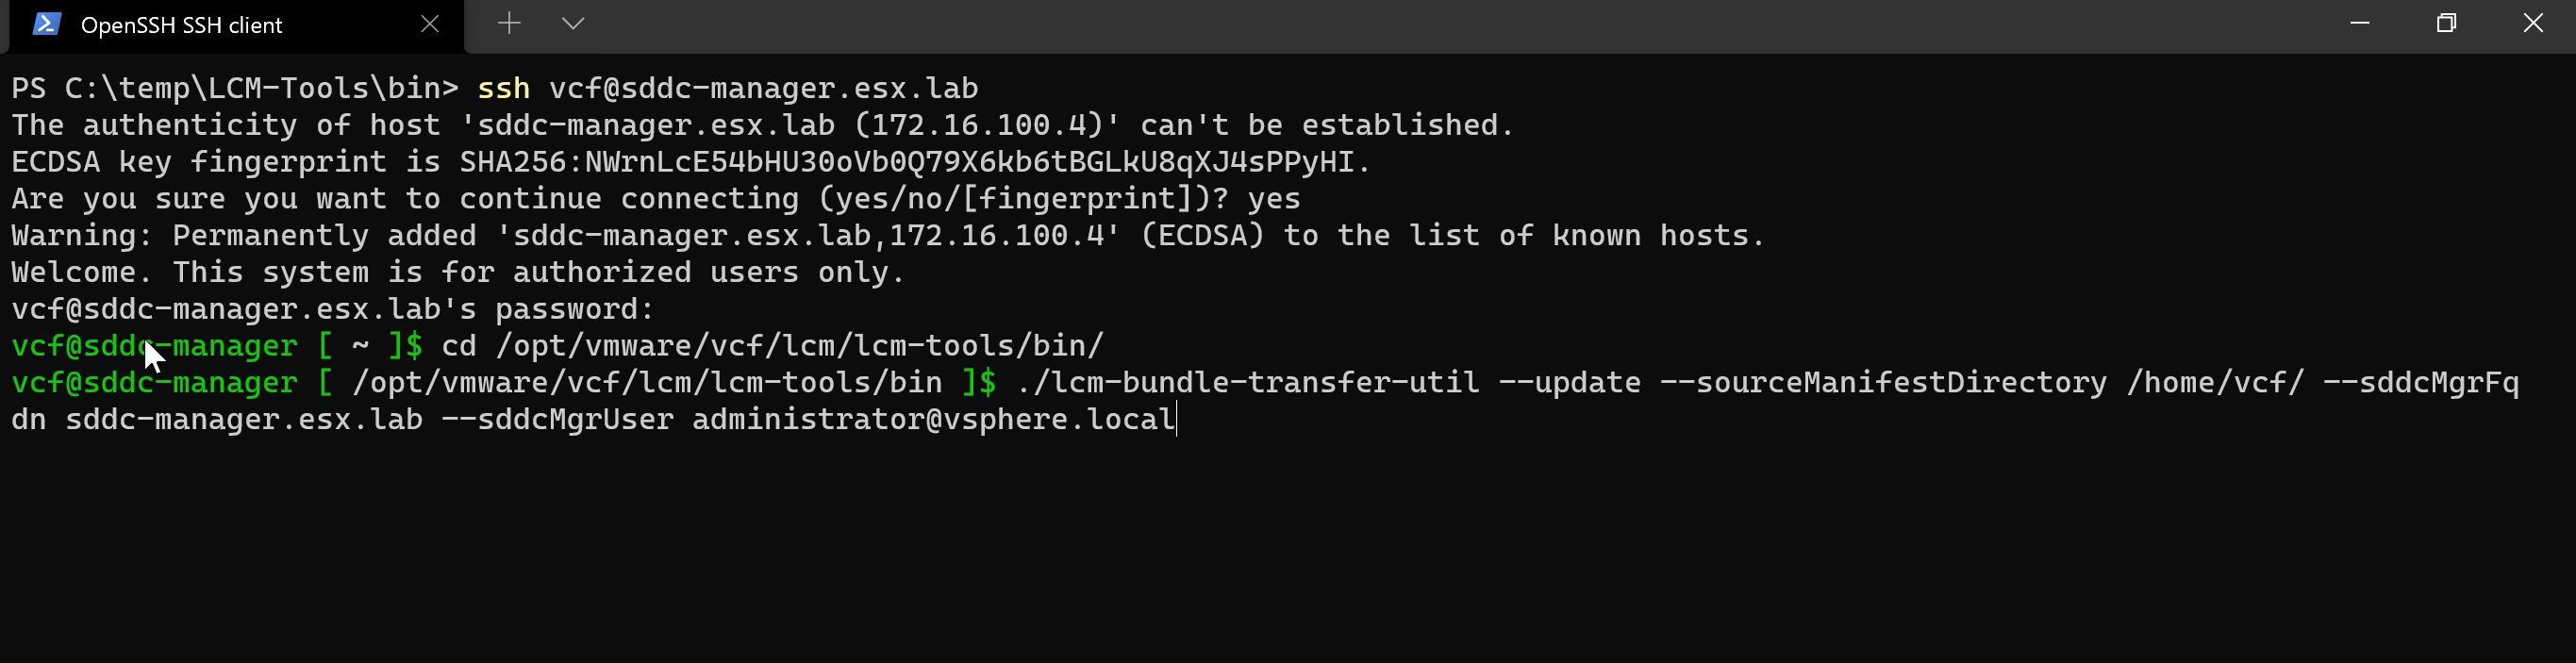
- SSH into SDDC Manager VM
- Change directory to the following
1cd /opt/vmware/vcf/lcm/lcm-tools/bin
- Run the following command: (Note it is case sensitive!)
1./lcm-bundle-transfer-util --update --sourceManifestDirectory Manifest-Downloaded-Directory --sddcMgrFqdn "SDDC Manager FQDN" --sddcMgrUser administrator@vsphere.local
2
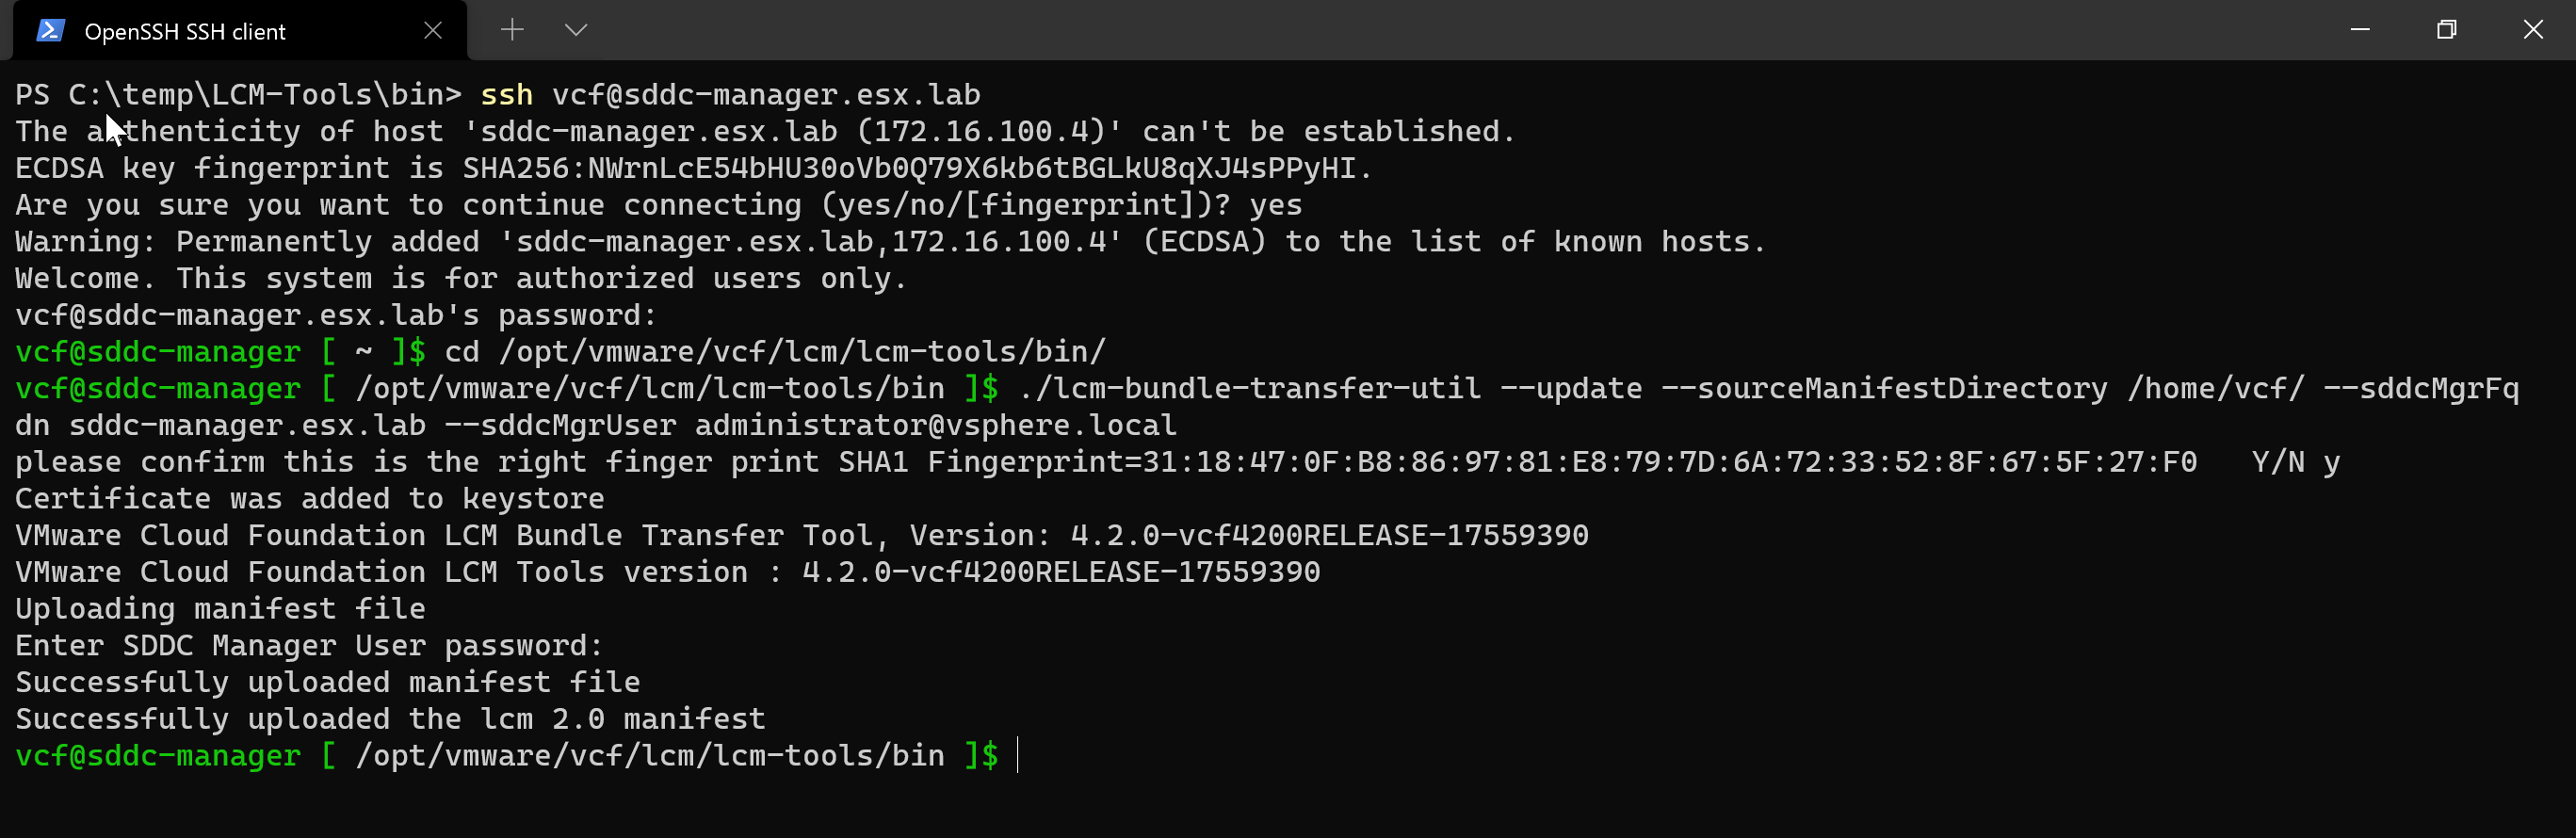
-
Wait for the tool to validate the manifest file
-
You should see the following output when the process is completed.
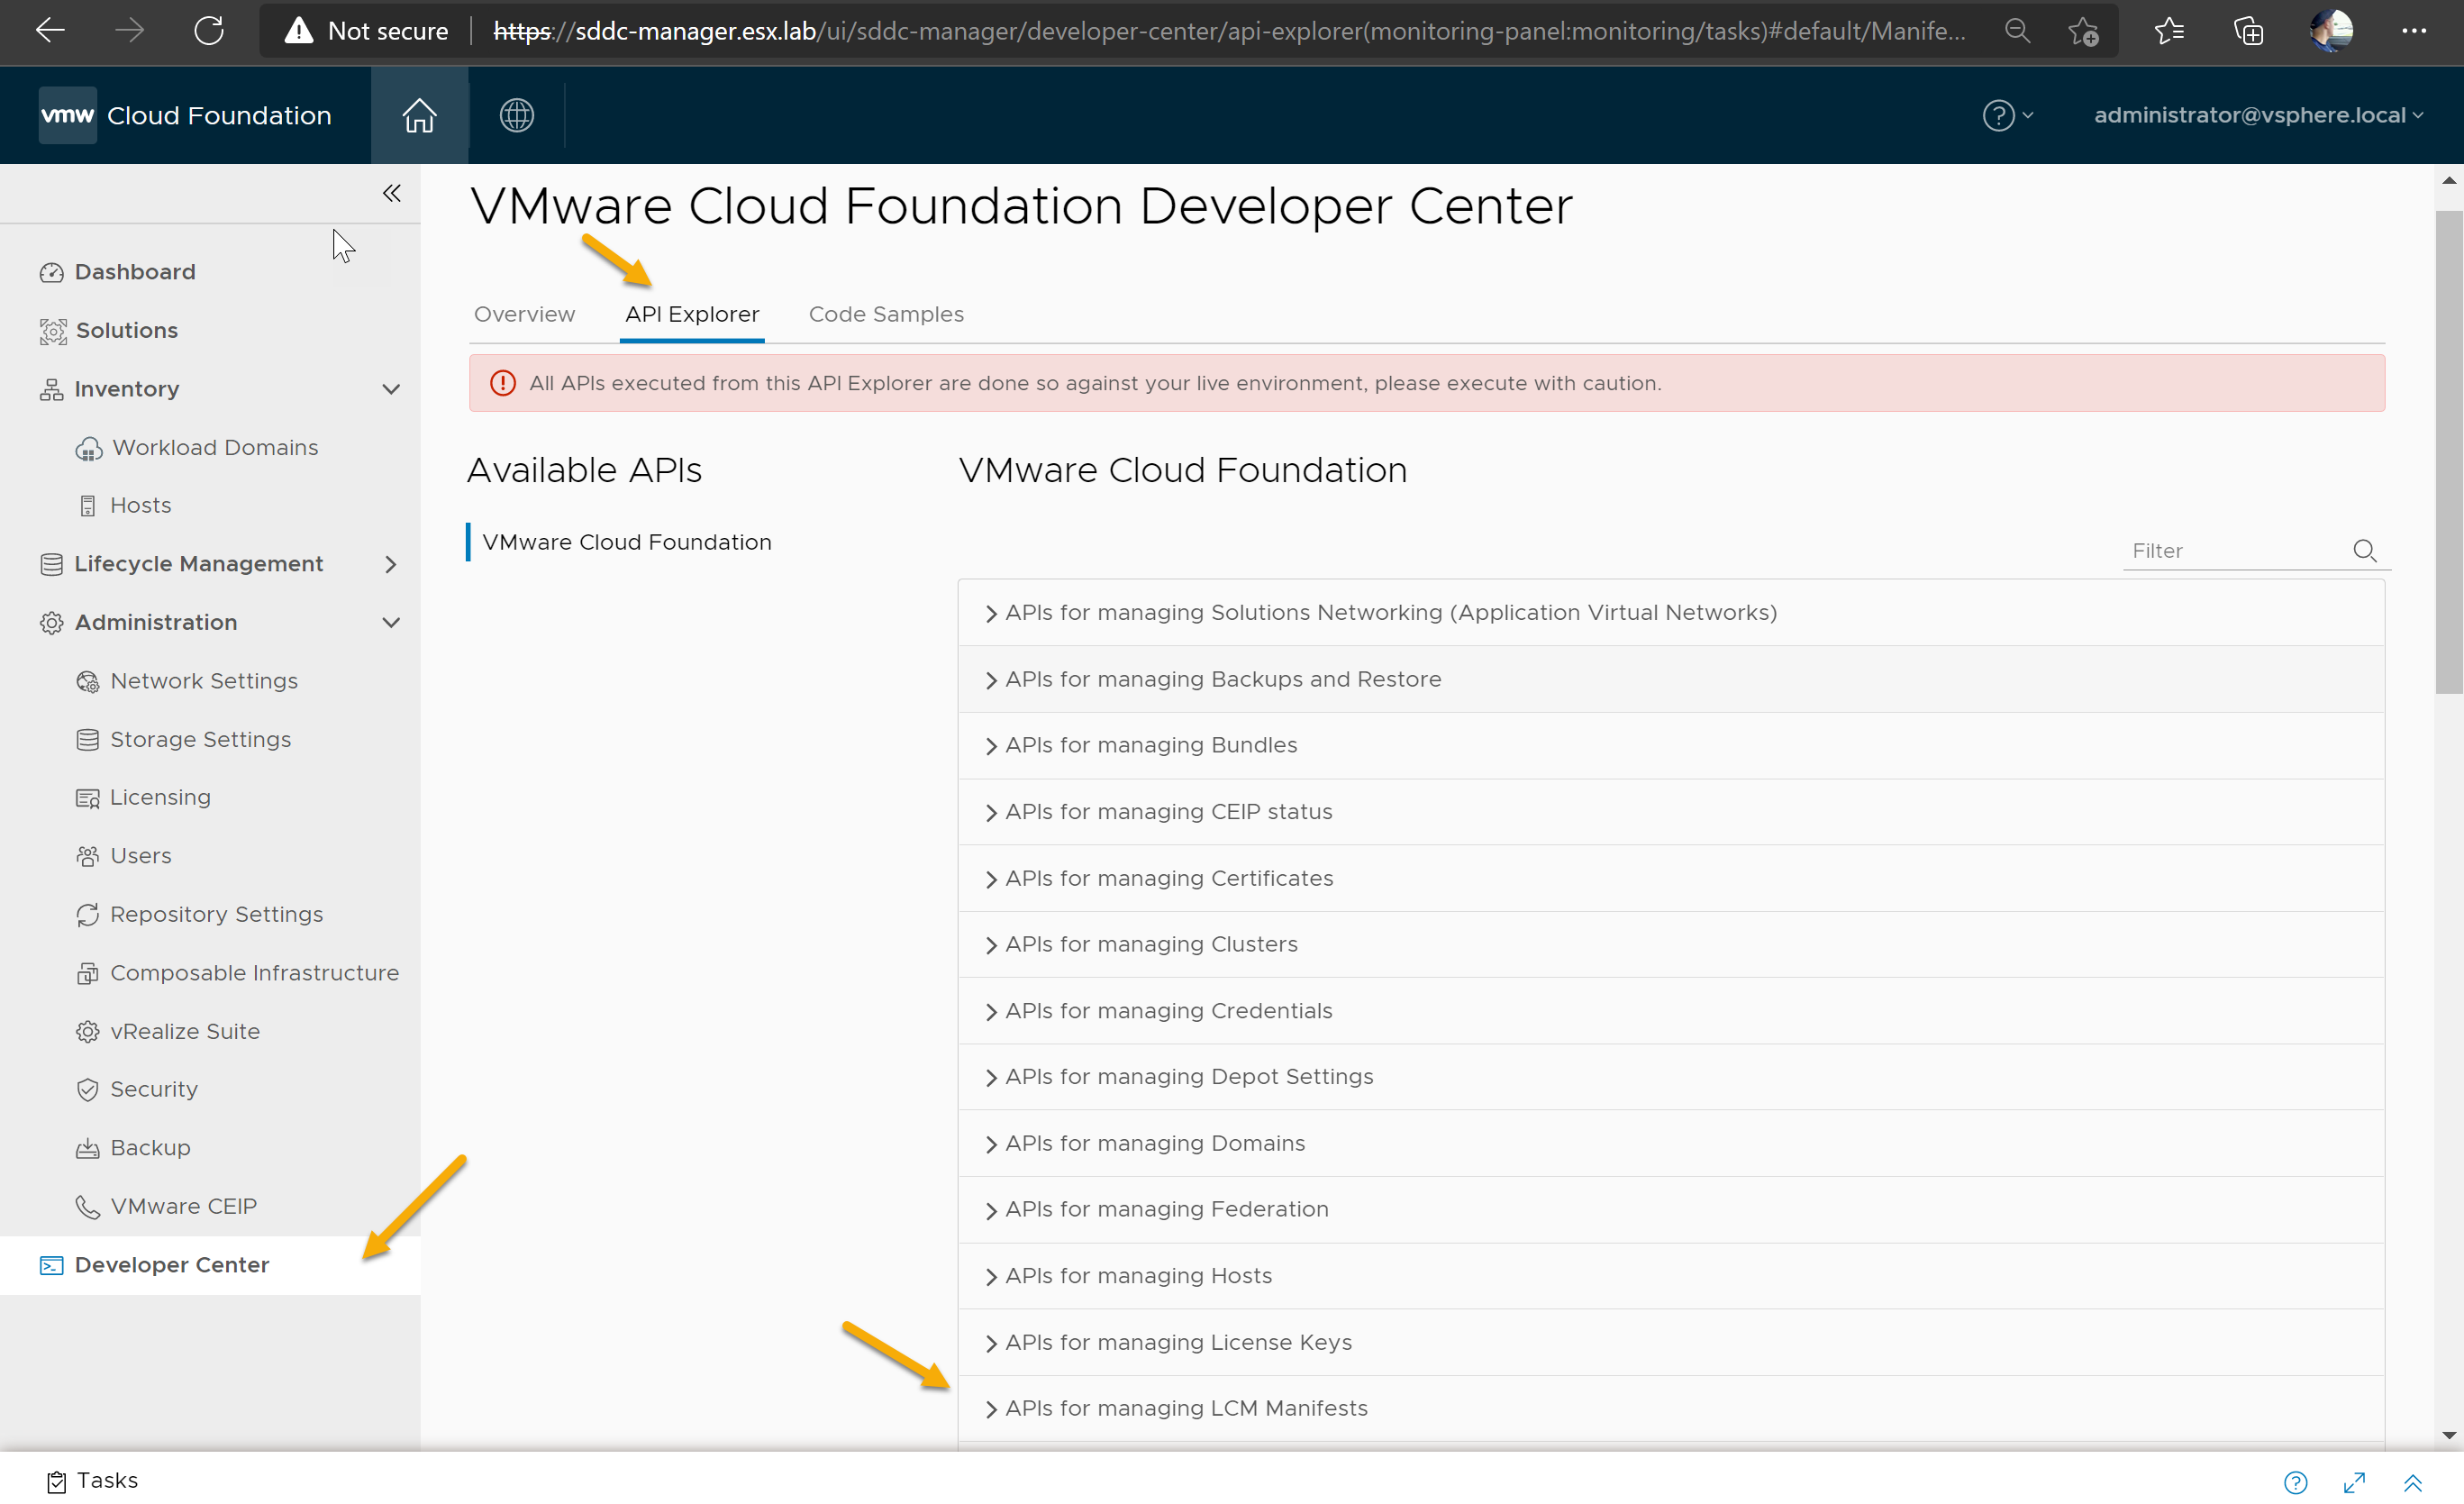
5. Verify import within the SDDC Manager client
- Log into SDDC Manager client using a web browser.
1https://sddc-manager.esx.lab
-
Go to “Devloper Center”
-
Select “API Explorer” and “APIs for managing LCM Manifest”
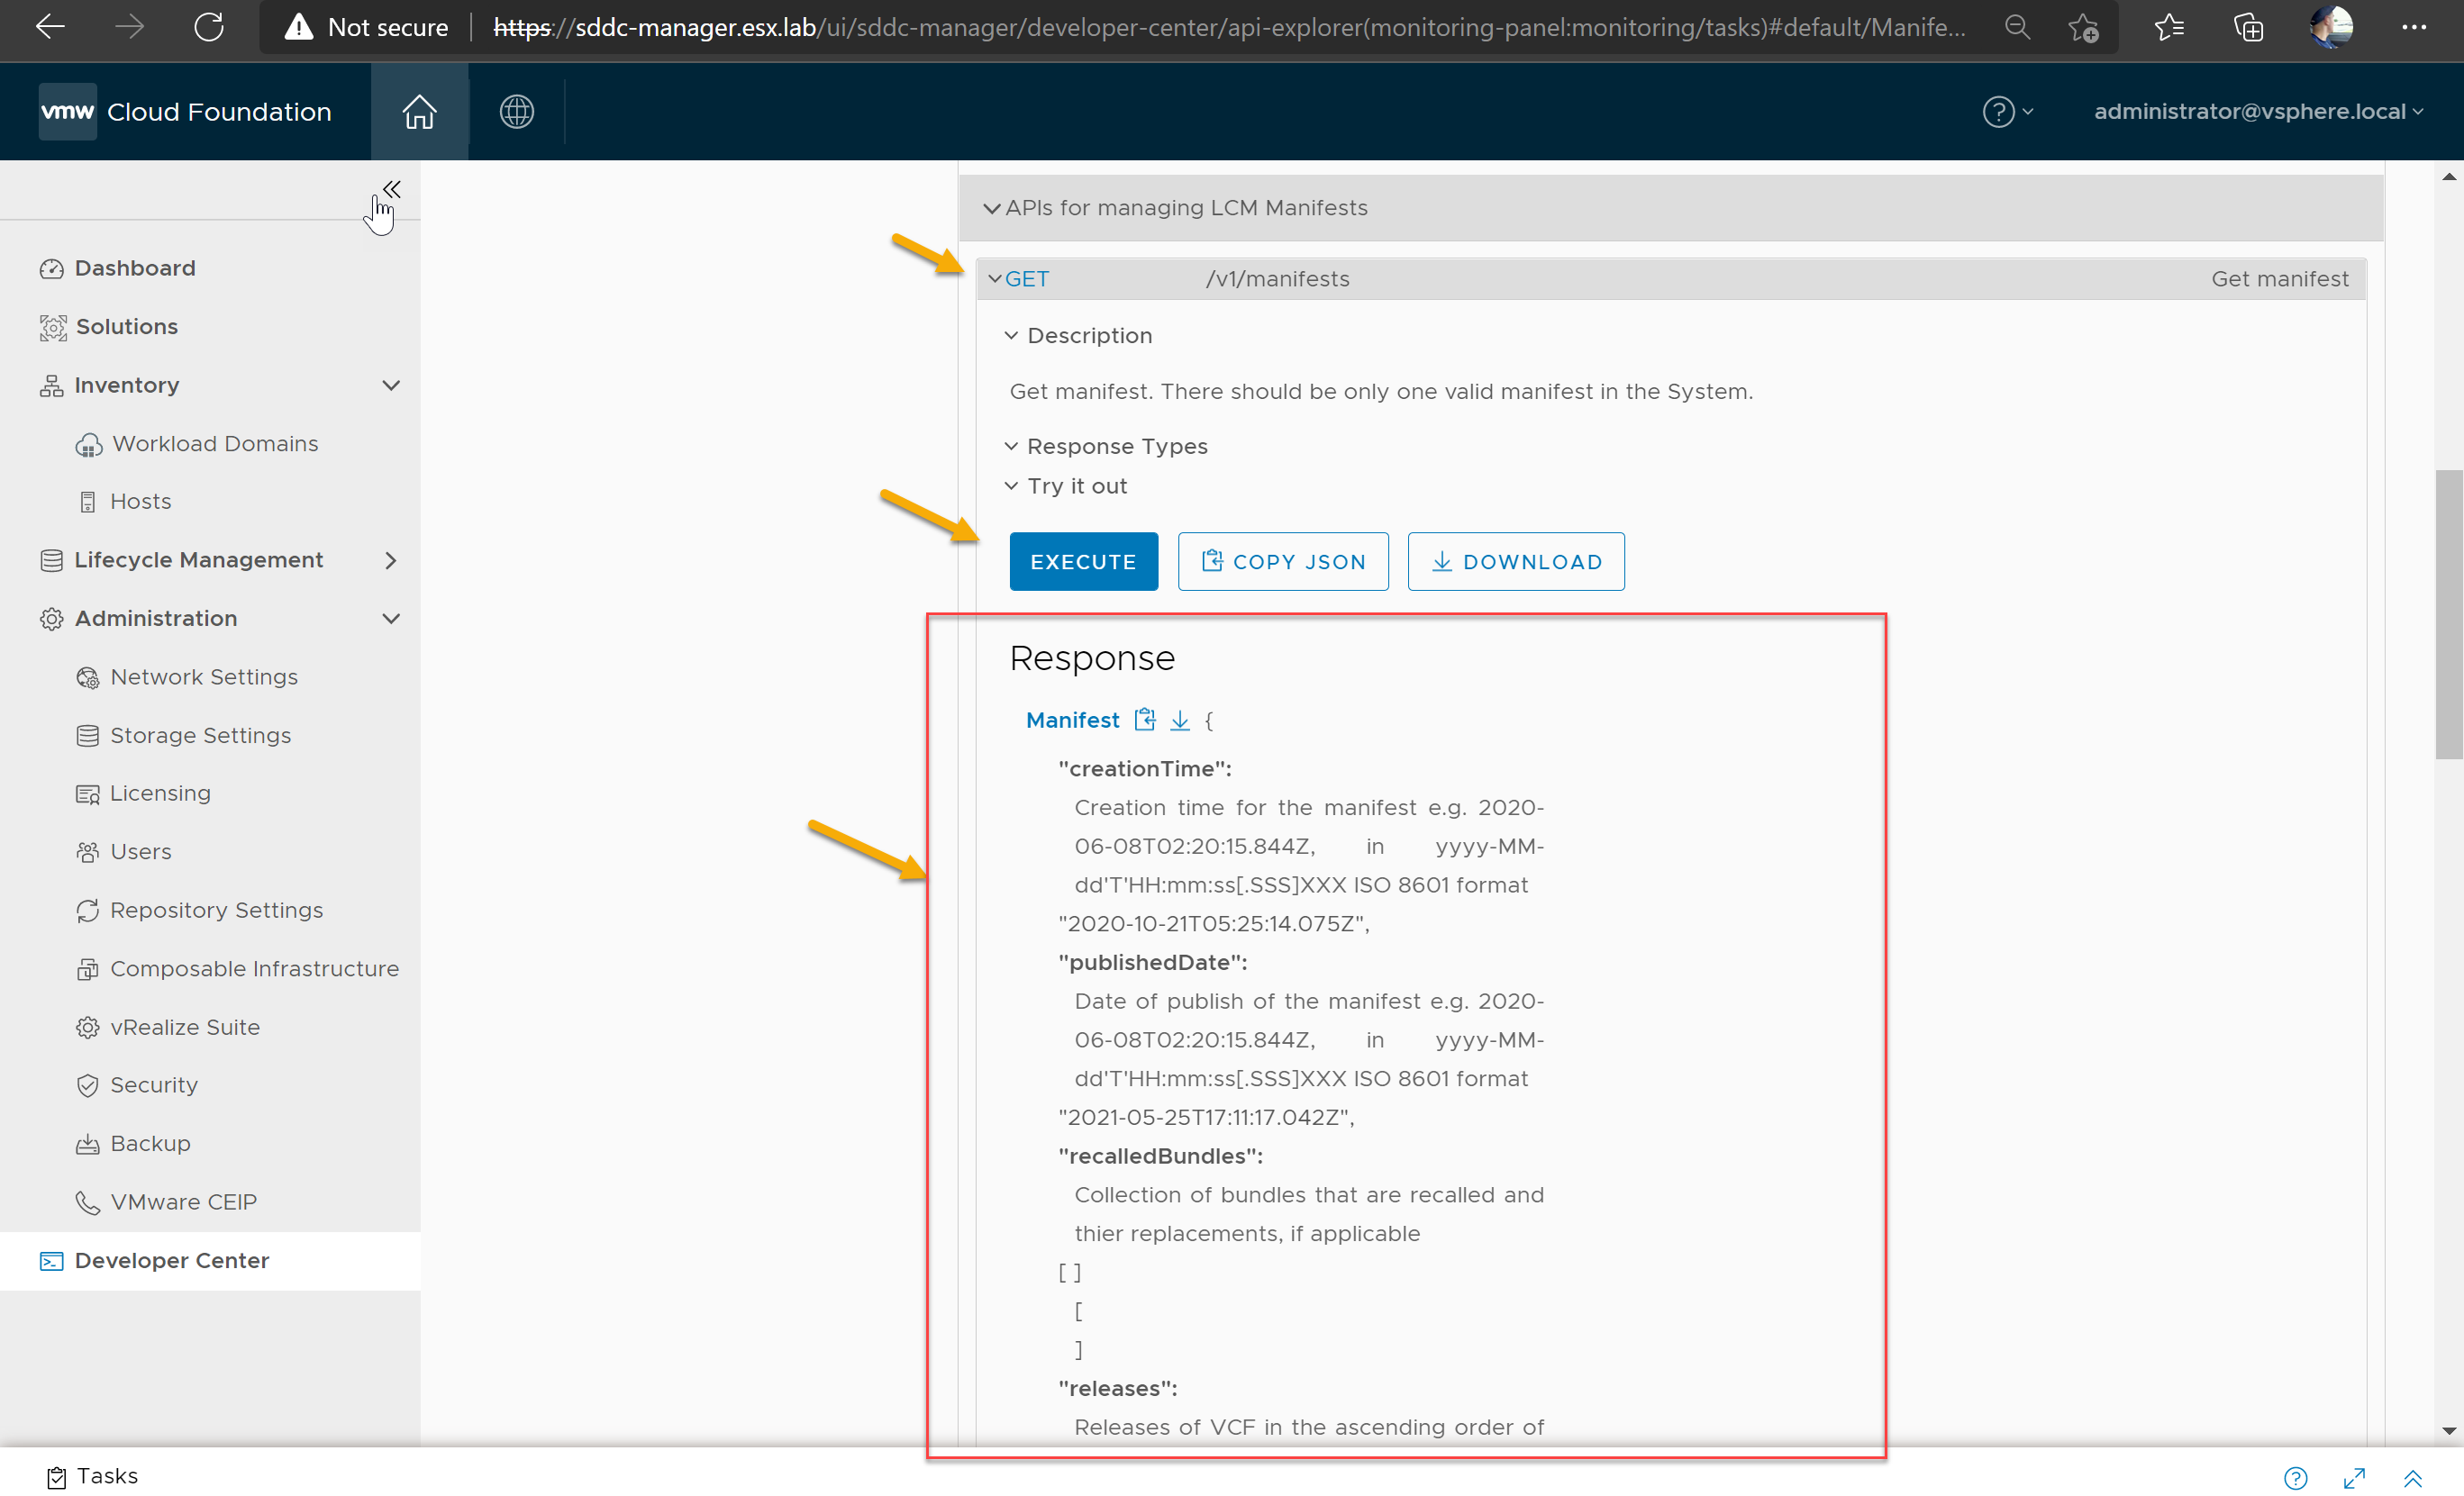
-
Expand “GET” and Select “Execute”
-
Under Response select “Manifest” and review the output to verify the manifest was uploaded.
- You should see the red banner no longer displays within SDDC Manager
Thats it! You have succesfully imported the manifest file into SDDC manager.