Install and configure Active Directory Certificate Services
Overview
Before we begin, I will go over which role services we will be selecting for our Active Directory Certificate Services implementation.
- Certificate Authority
- We will be selecting this role in order to establish our Certificate Authority. Certificate Authority Role installs either root or subordinate Certificate Authorities in your environment which institutes certificates. A Certificate Authority role is to issues certificates to computers, users, and services in your environment.
- Certificate Web Enrollment/Services
- Certificate Web Enrollment/Services Role establishes a web interface in order for users to request and retrieve certificates revocation lists (CRLs). Web Services provides a way for users to request CA to issue a certificate for users, computers, and services. For more info about CRLs please see here.
- Online Responder
- Online Repsonder is Online Certificate Status Protocol (OCSP). OCSP Responder allows a OCSP client to retrieve information about certificates in order to validate whether they are valid or have been revoked. OCSP improves on CRL process which allows OCSP client to retrieve information in timely manner. More information about Online Responder can be found here.
Our goal is to install and configure AD CS. I will be using Windows Server 2019 for this demo. The AD CS server will need to be joined to domain and the user account used will need to be member of “Enterprise Admins” and “Domain Admins” of domain your installing and configuring AD CS. Okay, lets get started!
How to Install AD CS
On Windows Server 2019 (Desktop Experience) go to your start menu and open Server Manager
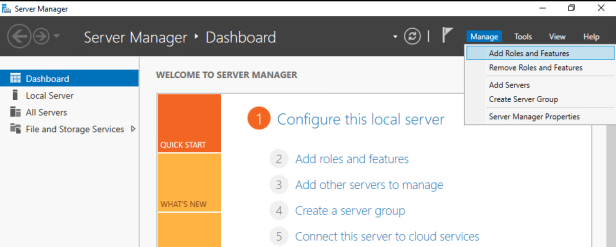
Click manage and select Add Roles and Feature
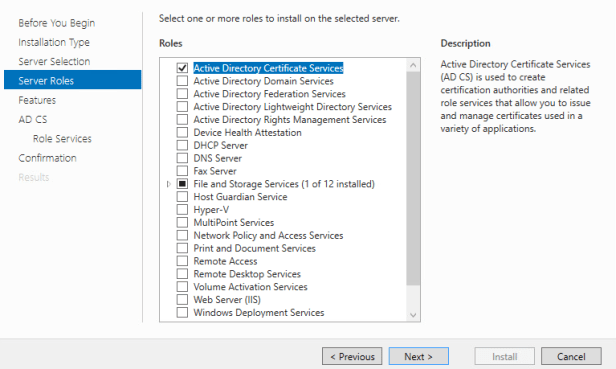
The Add Roles and Features Wizard should appear, Choose installation type Role-Based or Feature-Based Installation. At the Server Roles page select Active Directory Certificate Authority.
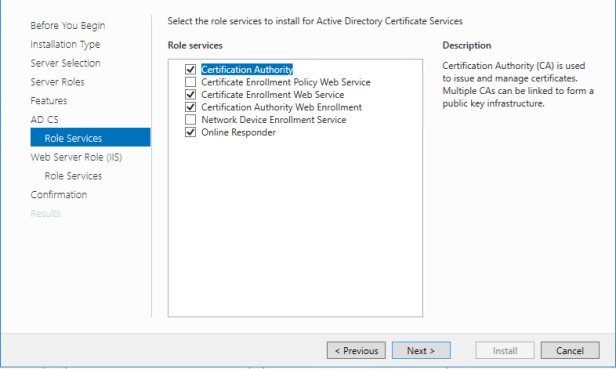
Go to Role Services under AD CS page and select the following Role services:
- Certification Authority
- Certificate Web Service (This will add IIS features needed.)
- Certification Authority Web Enrollment (This will add IIS features needed.)
- Online Responder
Continue to confirmation page. Add Roles and Features Wizard will have already selected everything needed for Web Server Role. At Confirmation page select Install.
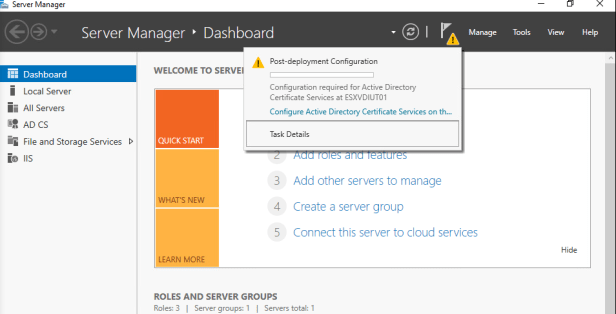
After installation, we will now run the Post-Deployment Configuration Wizard by selecting Configure Active Directory Certificate Services.
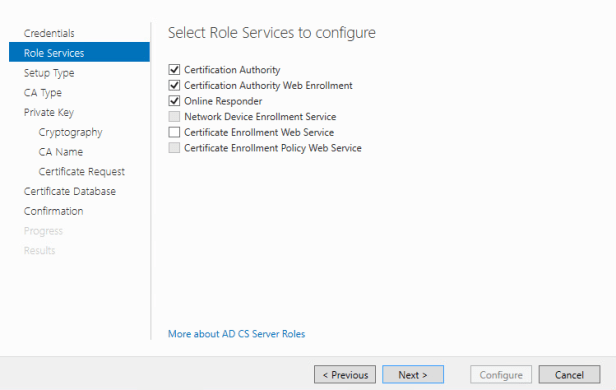
AD CS Configuration Wizard should appear. press next at credentials to continue to role services page. Select the following Role Services
- Certification Authority
- Certification Authority Web Enrollment
- Online Responder
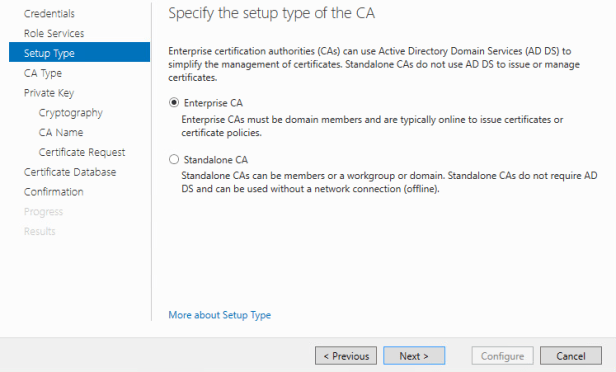
Setup type page select “Enterprise CA”
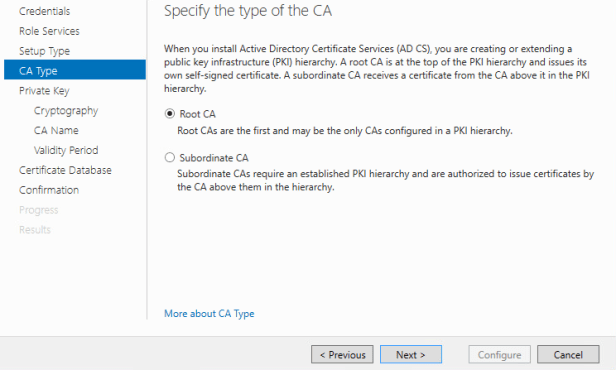
CA Type page select “Root CA”
Private Key page select Create a new Private Key. Cryptography page will be based on requirement for your environment. I will provide a sample configuration for our lab purposes for now.
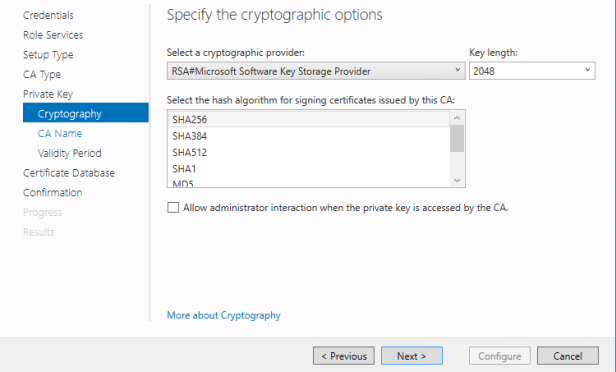
Configure the Validity page.
Note: Your Validity period may be based on requirement for your environment
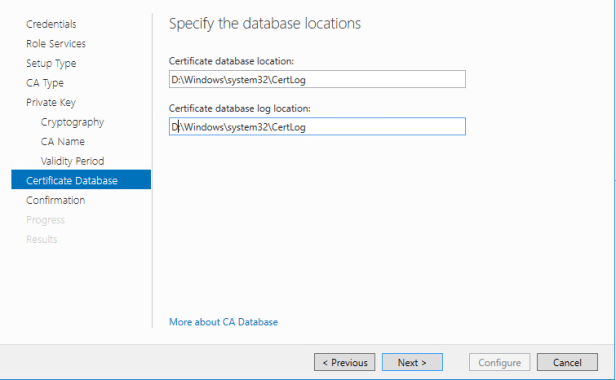
Once your at the Certificate Database specify the database locations (I recommend placing the certificate database separate drive from the windows operating system.)
Once the confirmation page has verified the configuration. Press configure to finish the AD CS Configuration
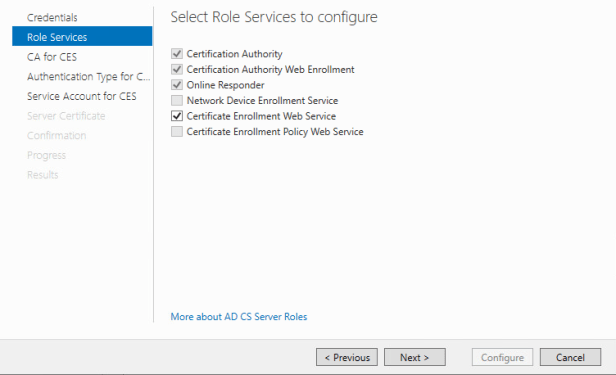
After AD CS Configuration has been completed. Lets go back into Server Manager and Run the AD CS Configuration wizard again to complete Certificate Enrollment Web Service
After verifying your credentials, lets go to the role services page and select “Certificate Enrollment Web Service”
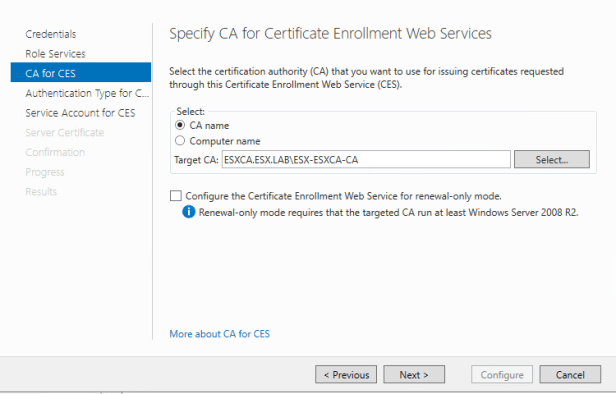
At the CA for CES page the AD CS Configuration wizard should fill in the Target CA for you. However, if it doesn’t click on the select button and choose your CA.
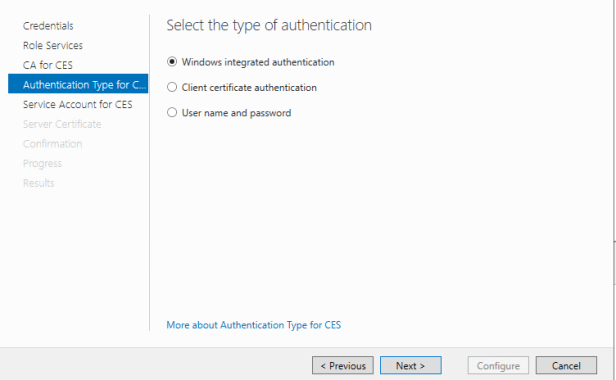
At the Authentication Type for CES page lets configure authentication type for “Windows Integrated Authentication”.
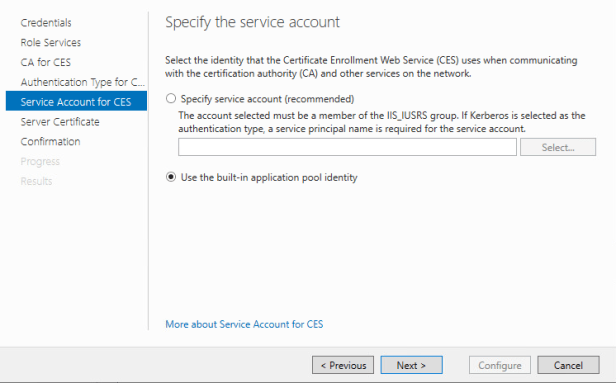
At the Service Account for CES lets select “Use the Built-in application pool identity”.
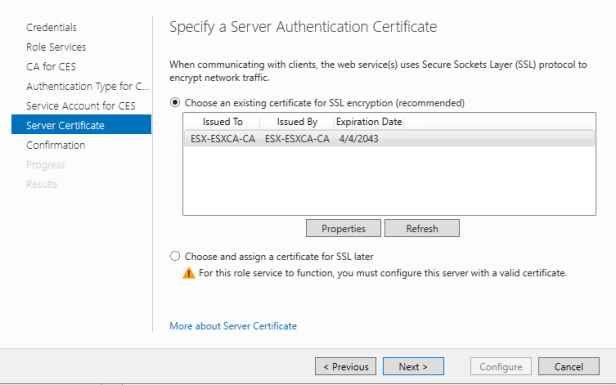
At the Service Certificate page lets select “Choose an existing certificate for SSL encryption”.
At the Confirmation page press configure in order to complete the configuration. You now have Certificate Authority in your environment!
Configuring Online Responder
Configure Online Responder Service
In order for us to start using our Online Responder, we will need to configure the Online Responder service first. This configuration for Windows Server 2016 and 2019.
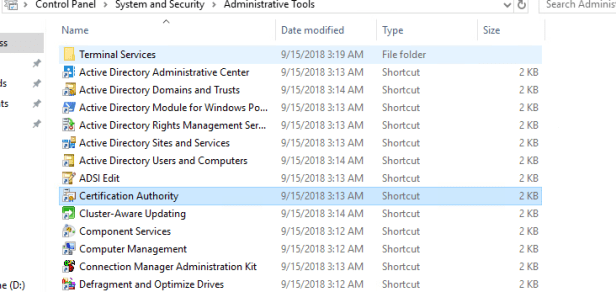
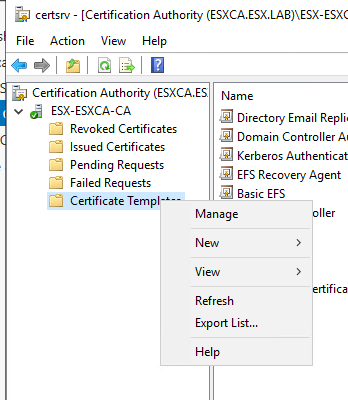
Open Certificate Authority management console
Right Click on Certificate Templates and select Manage
The Certificate Template Console should have opened. Under template display name column find OCSP Response Signing. right click on OCSP Response Signing and select properties.
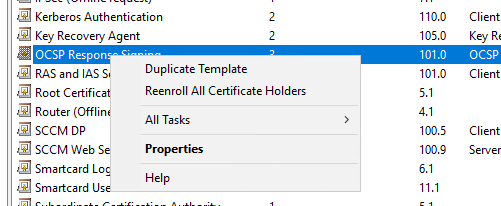
Once your in OCSP Repsonse Signing Properties go to “Security Tab” and add “OCSP Server” computer name in security tab with Read/Enroll permissions.
Note: I like to create a security group and nest the computer accounts inside the security group, then assign permissions to the security group template. Also, since our Online Responder is on the same server as the certificate authority, you should be able to issue the template to CA without having to do this. In production you would install Online Responder role on a separate server from your CA server. I felt it was important we go over this process since this is a best practice approach for configuring Online Responder in production environments.

Now open Certificate Authority management console again. Right click on Certificate Templates select new and then Certificate Templates to issue.
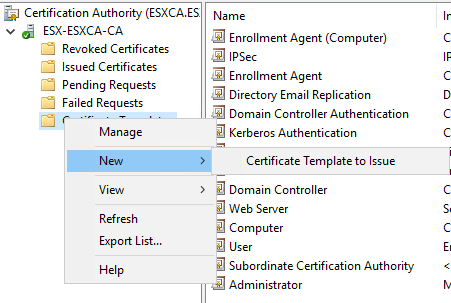
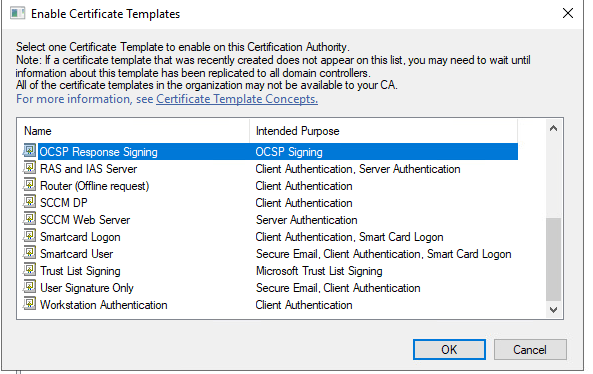
Select OCSP Response Signing template and press ok.
Configure AIA Extension to support OCSP
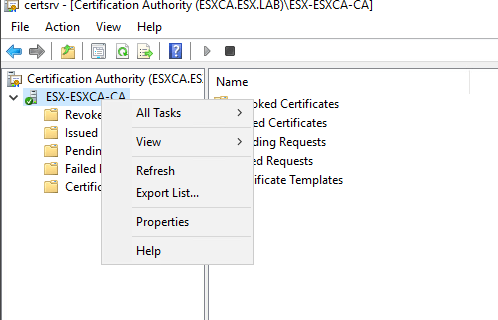
Open Certificate Authority Management Console

Right click on your Certificate Authority server and select properties
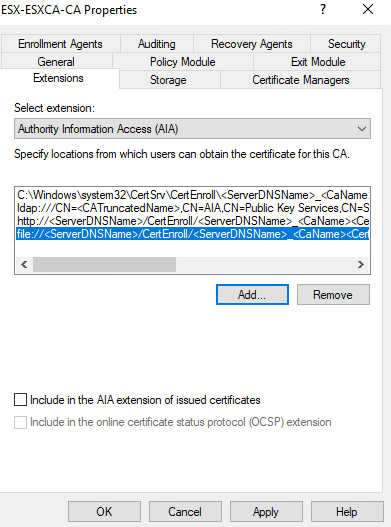
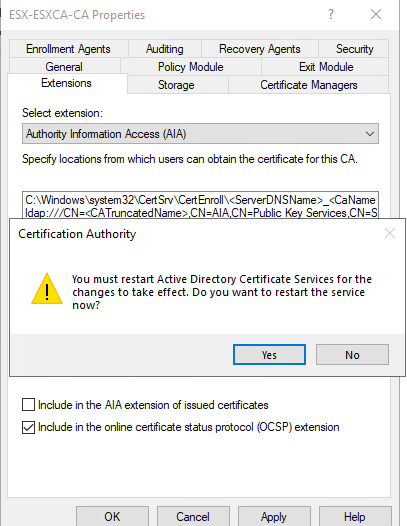
Go to Extensions tab. On “Select Extension” Drop down box select “Authority Information Access (AIA)” and click add.
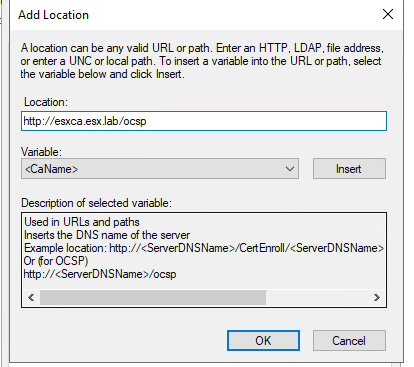
In location box add “http://FQDN/ocsp" and press ok
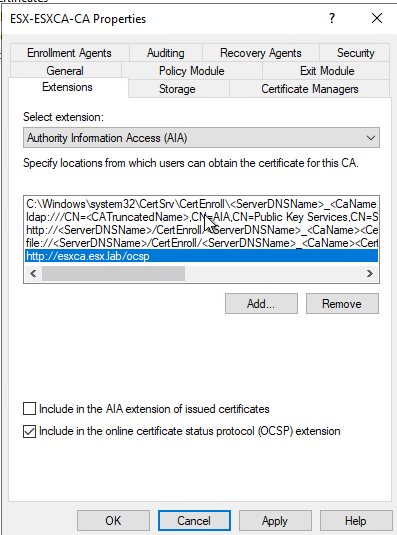
Select “Include In the online certificate status protocol (OCSP) Extension” and press ok
You will be prompted to restart Active Directory Certificate Services. Press Yes.
Configure Revocation Configuration
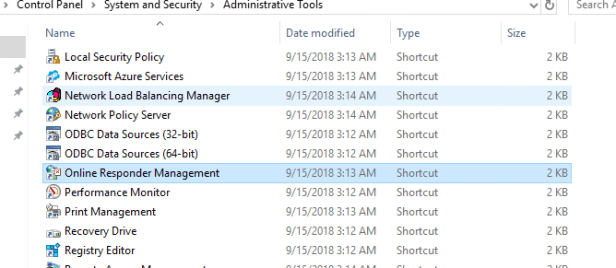
Open Online Responder Management
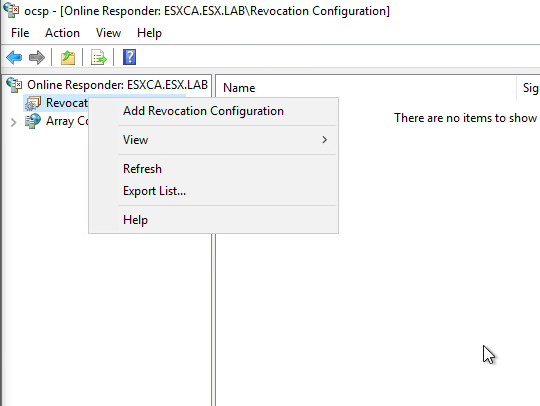
Right Click Revocation Configuration and Select Add Revocation Configuration
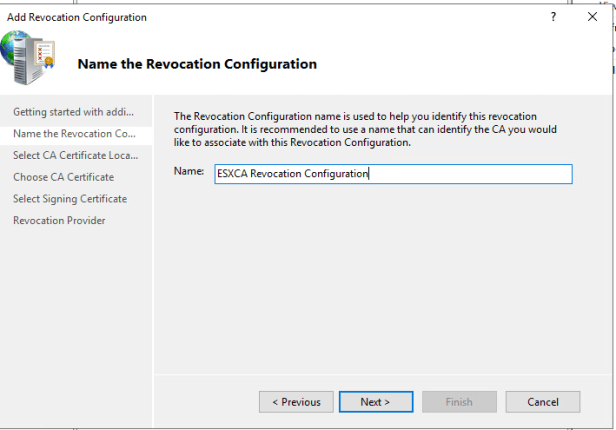
Configure Revocation Configuration Name. (Example “Hostname of OCSP Revocation Configuration”)
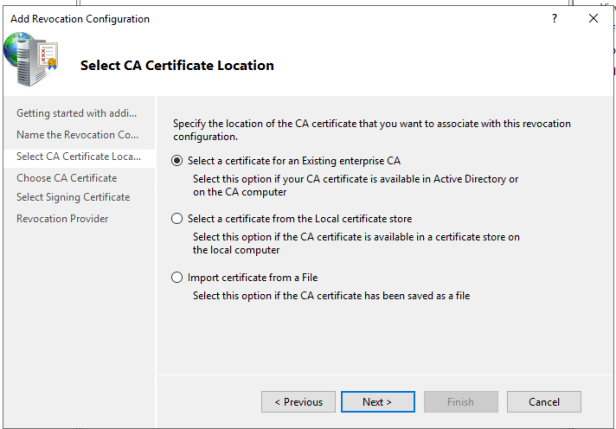
On Select CA Certificate Location Page and choose Select a certificate for existing enterprise CA
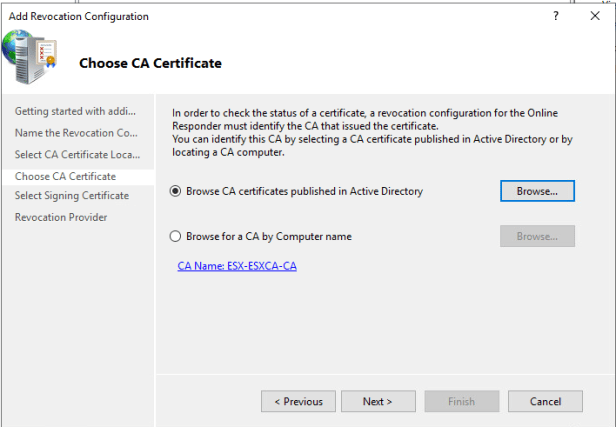
On Choose CA Certificate page choose Browse CA Certificate published in Active Directory and select your CA Server.
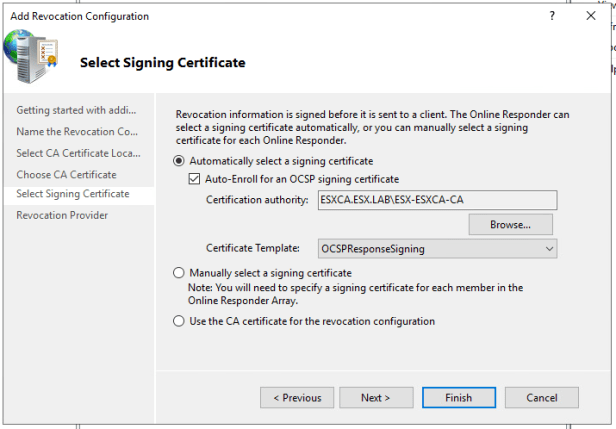
On Select Signing Certificate page choose Automatically select signing certificate and enable Auto-Enroll for OCSP Signing certificate.
After you have enabled Auto-Enroll for OCSP Signing certificate, select browse and choose your CA server. The certificate template field should now auto populate with the OCSP Response Signing template we issued earlier.
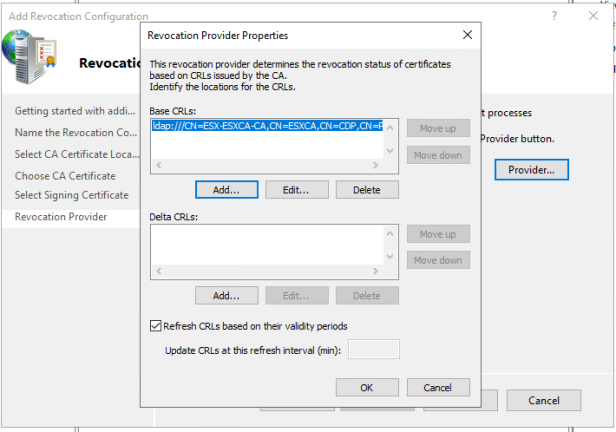
On Revocation Provider press provider and verify base CRLs have been selected. (This should be done automatically).
Press finish to complete Revocation Configuration
References